
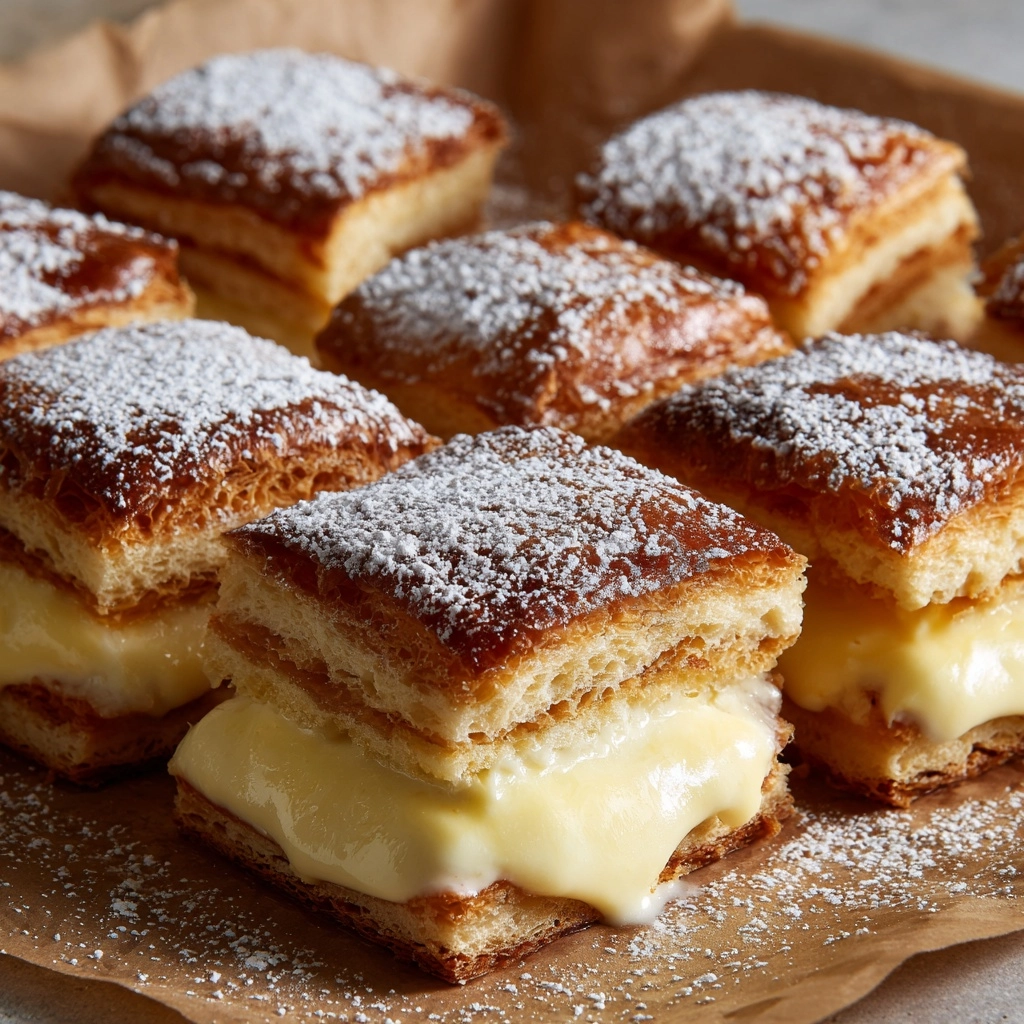
If you dream of an irresistibly fluffy pastry that combines creamy cheesecake and sweet, pillowy bread, you’ll absolutely adore this King’s Hawaiian Cheesecake Danish. With minimal prep and a heavenly combination of sweet rolls, rich cream cheese, and fruity topping, it delivers big-time bakery flavor at home—guaranteed to steal the show at breakfasts, brunches, or any time you need a comforting treat. This is the shortcut Danish you’ll want to make (and eat!) again and again.
Ingredients You’ll Need
Great news—every ingredient in this King’s Hawaiian Cheesecake Danish plays an important role, letting each flavor and texture shine. Grab these pantry-friendly staples to create something magical in hardly any time at all!
- King’s Hawaiian Original Sweet Rolls: The star of the show—these rolls add a tender, slightly sweet base that bakes up beautifully golden and soft.
- Cream Cheese (softened): Provides rich creaminess for that classic cheesecake layer—let it come to room temperature for easy mixing and the smoothest texture.
- Granulated Sugar: Sweetens up the cream cheese filling and balances the tang perfectly.
- Vanilla Extract: Just a splash adds a warm, comforting aroma that rounds out the flavors.
- Large Egg Yolk: Gives the cheesecake layer a silky thickness and extra richness.
- Cherry Pie Filling (or other fruit topping): Adds bright, juicy bursts of fruit in every bite—dress it up with your favorite fruit filling!
- Milk (for egg wash): Thins the egg for the perfect shiny, golden crust.
- Large Egg (for egg wash): Helps create that bakery-style, glossy finish on top.
- Powdered Sugar (optional, for dusting): A snowy sprinkle over the top adds a little extra sweetness and that perfect “Danish” look.
How to Make King’s Hawaiian Cheesecake Danish
Step 1: Prep Your Baking Sheet and Rolls
Preheat your oven to 350°F (175°C) and line a baking sheet with parchment paper—trust me, it makes cleanup painless! Carefully slice the entire slab of King’s Hawaiian rolls in half horizontally without separating the individual rolls apart. Place the bottom half, cut-side up, onto your prepared sheet. This creates the base for your luscious cheesecake filling.
Step 2: Whip Up the Cheesecake Filling
In a medium mixing bowl, combine the softened cream cheese, granulated sugar, vanilla extract, and egg yolk. Beat everything together until it’s smooth, fluffy, and lump-free. This mixture should be wonderfully creamy—a dream to spread over your sweet rolls!
Step 3: Assemble the Danish Layers
Spread the cream cheese mixture evenly across the bottom half of your rolls. Don’t worry about perfection; even swirls make each bite exciting. Next, dot the creamy layer with small spoonfuls of cherry pie filling (or whatever fruit topping you’re using). Scatter them generously for perfect fruit-to-cheesecake ratio in every slice.
Step 4: Top and Egg Wash
Gently set the top half of the rolls back over the filling, matching up the slices. In a small bowl, whisk together the egg and milk until blended. Brush this egg wash generously over the tops—the secret to achieving that glossy, golden look that makes the King’s Hawaiian Cheesecake Danish so tempting!
Step 5: Bake to Golden Perfection
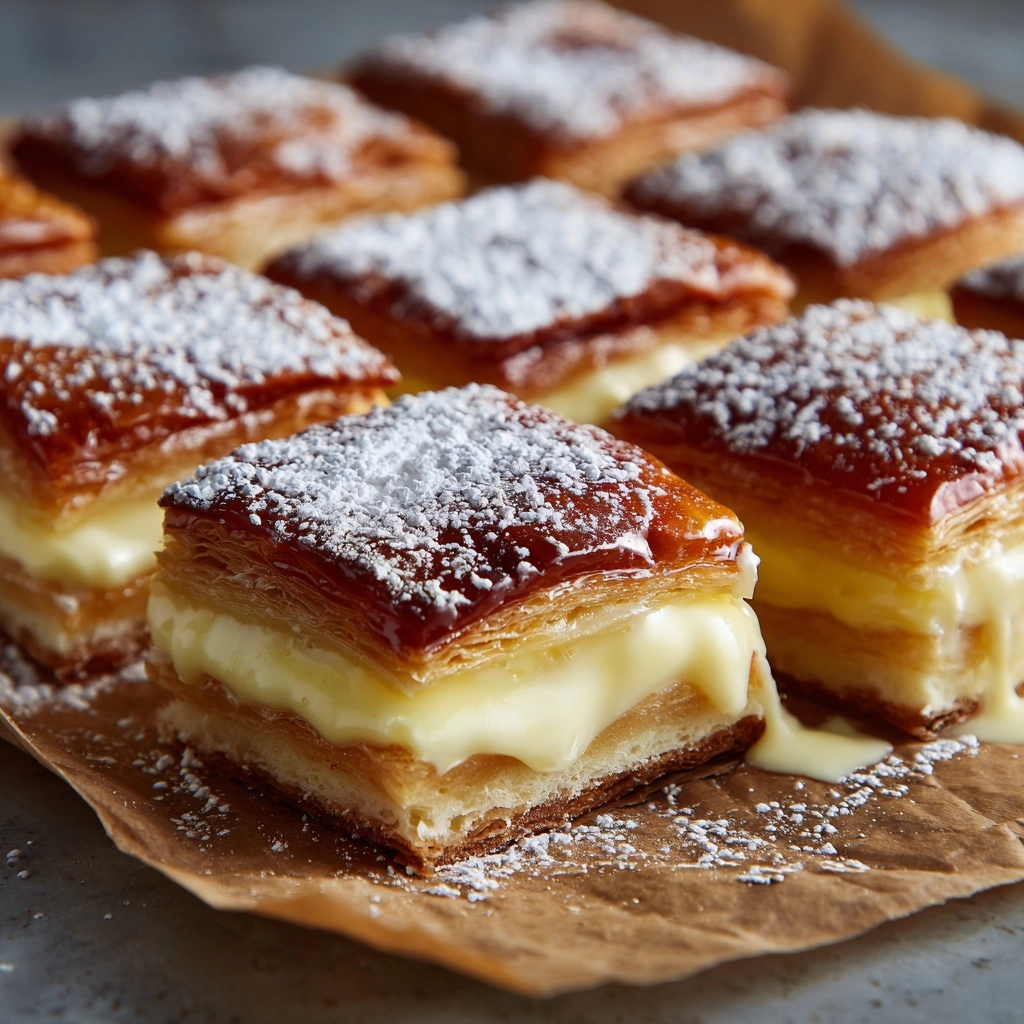
Slide the assembled Danish into the oven and bake for 18 to 22 minutes. When the tops are deeply golden and the filling has set with a slight jiggle, it’s ready. Cool the Danish for 10 to 15 minutes; this helps set the layers for clean, bakery-style slices. A dusting of powdered sugar is the crowning touch if you’re feeling fancy!
How to Serve King’s Hawaiian Cheesecake Danish
Garnishes
For that classic pastry shop finish, dust your warm King’s Hawaiian Cheesecake Danish with powdered sugar right before serving. A few fresh berries or a mint sprig on the side make it look extra special! If you want to get creative, drizzle a bit of warmed fruit jam or a simple icing over the top for extra flair and sweetness.
Side Dishes
This Danish absolutely shines with a cup of hot coffee or tea. If serving for brunch, try pairing it with crisp bacon, a savory egg bake, or a platter of fresh fruit for a perfectly balanced spread. Light, tangy sides help balance the richness of the cream cheese and the sweet rolls.
Creative Ways to Present
For parties, slice the King’s Hawaiian Cheesecake Danish into bite-size squares and pile them high on a pretty plate. For a cozy family breakfast, serve it whole at the table and let everyone pull apart their own soft, gooey square. It’s also fantastic for potlucks or picnics—everyone will want to know your secret!
Make Ahead and Storage
Storing Leftovers
If you’re lucky enough to have leftovers, wrap your Danish pieces tightly in plastic wrap or store them in an airtight container in the fridge. The flavors meld beautifully overnight, so don’t be surprised if it tastes even better the next day!
Freezing
King’s Hawaiian Cheesecake Danish freezes surprisingly well! Let the Danish cool completely, wrap individual pieces in foil or plastic, then transfer to a zip-top freezer bag. Freeze for up to one month. Thaw in the fridge before reheating for best texture.
Reheating
When it’s time to reheat, pop slices into a 325°F (160°C) oven for 8-10 minutes, or zap for 30 seconds in the microwave. The rolls will turn soft and pillowy again, and the cheesecake layer will become deliciously creamy—just like fresh!
FAQs
Can I use a different type Breakfast, Dessert
Absolutely! While cherry pie filling is classic, blueberry, raspberry, apple, or even lemon curd are fantastic options. Mix and match to keep your King’s Hawaiian Cheesecake Danish exciting every time you bake it.
Is there a way to make this recipe a little less sweet?
If you like things a bit more tart, sprinkle some lemon zest into the cream cheese filling or use a fruit filling with more acidity—like blackberries or raspberries—for a fresh, tangy twist on this Danish.
Can I prepare King’s Hawaiian Cheesecake Danish the night before?
Yes, you can assemble the Danish (minus the egg wash) and keep it in the fridge, covered, overnight. Add the egg wash right before baking for the freshest flavor and best texture.
Is it possible to make this gluten free?
While King’s Hawaiian rolls are not gluten-free, if you find a similar gluten-free soft bun, you can absolutely make this adaptation! Just make sure all your other ingredients are gluten-free as well.
Can I double the recipe for a larger group?
You bet! Simply double all the ingredients and use two packages of rolls. Bake on separate trays or side by side on a large baking sheet for a crowd-pleasing platter of King’s Hawaiian Cheesecake Danish.
Final Thoughts
This King’s Hawaiian Cheesecake Danish is pure comfort in every bite—creamy, fruity, and Oh-So-Soft! Whether for breakfast, dessert, or as a sweet brunch centerpiece, this recipe promises happiness for bakers of every level. Give it a try, and don’t be surprised if it becomes your family’s newest obsession!
Print
King’s Hawaiian Cheesecake Danish Recipe
- Prep Time: 10 minutes
- Cook Time: 20 minutes
- Total Time: 30 minutes
- Yield: 12 servings
- Category: Breakfast, Dessert
- Method: Baking
- Cuisine: American
- Diet: Vegetarian
Description
Indulge in the delightful combination of sweet King’s Hawaiian rolls filled with a creamy cheesecake layer and your favorite fruit topping. This King’s Hawaiian Cheesecake Danish is a perfect treat for breakfast or dessert.
Ingredients
King’s Hawaiian Cheesecake Danish:
- 1 package (12 rolls) King’s Hawaiian original sweet rolls
- 8 oz cream cheese (softened)
- 1/3 cup granulated sugar
- 1 teaspoon vanilla extract
- 1 large egg yolk
- 1/2 cup cherry pie filling or your preferred fruit topping
- 1 tablespoon milk (for egg wash)
- 1 large egg (for egg wash)
- powdered sugar for dusting (optional)
Instructions
- Preheat the oven: Preheat the oven to 350°F (175°C) and line a baking sheet with parchment paper.
- Slice the rolls: Carefully slice the entire block of King’s Hawaiian rolls in half horizontally, keeping the rolls intact.
- Prepare the cream cheese mixture: In a medium bowl, mix the softened cream cheese, granulated sugar, vanilla extract, and egg yolk until smooth and creamy.
- Fill the rolls: Spread the cream cheese mixture evenly over the bottom half of the rolls. Spoon small amounts of fruit filling across the cream cheese layer. Place the top half of the rolls back on.
- Brush with egg wash: In a small bowl, whisk together the egg and milk to create an egg wash, then brush it over the tops of the rolls.
- Bake: Bake for 18–22 minutes or until the tops are golden brown and the filling is set.
- Cool and serve: Let cool for 10–15 minutes before slicing. Dust with powdered sugar before serving if desired.
Notes
- You can use other fruit toppings like blueberry, raspberry, or apple.
- For a richer flavor, add a splash of lemon juice or zest to the cream cheese mixture.
- Best served warm or at room temperature.
Nutrition
- Serving Size: 1 roll
- Calories: 210
- Sugar: 14g
- Sodium: 150mg
- Fat: 9g
- Saturated Fat: 5g
- Unsaturated Fat: 3g
- Trans Fat: 0g
- Carbohydrates: 28g
- Fiber: 0g
- Protein: 3g
- Cholesterol: 40mg


