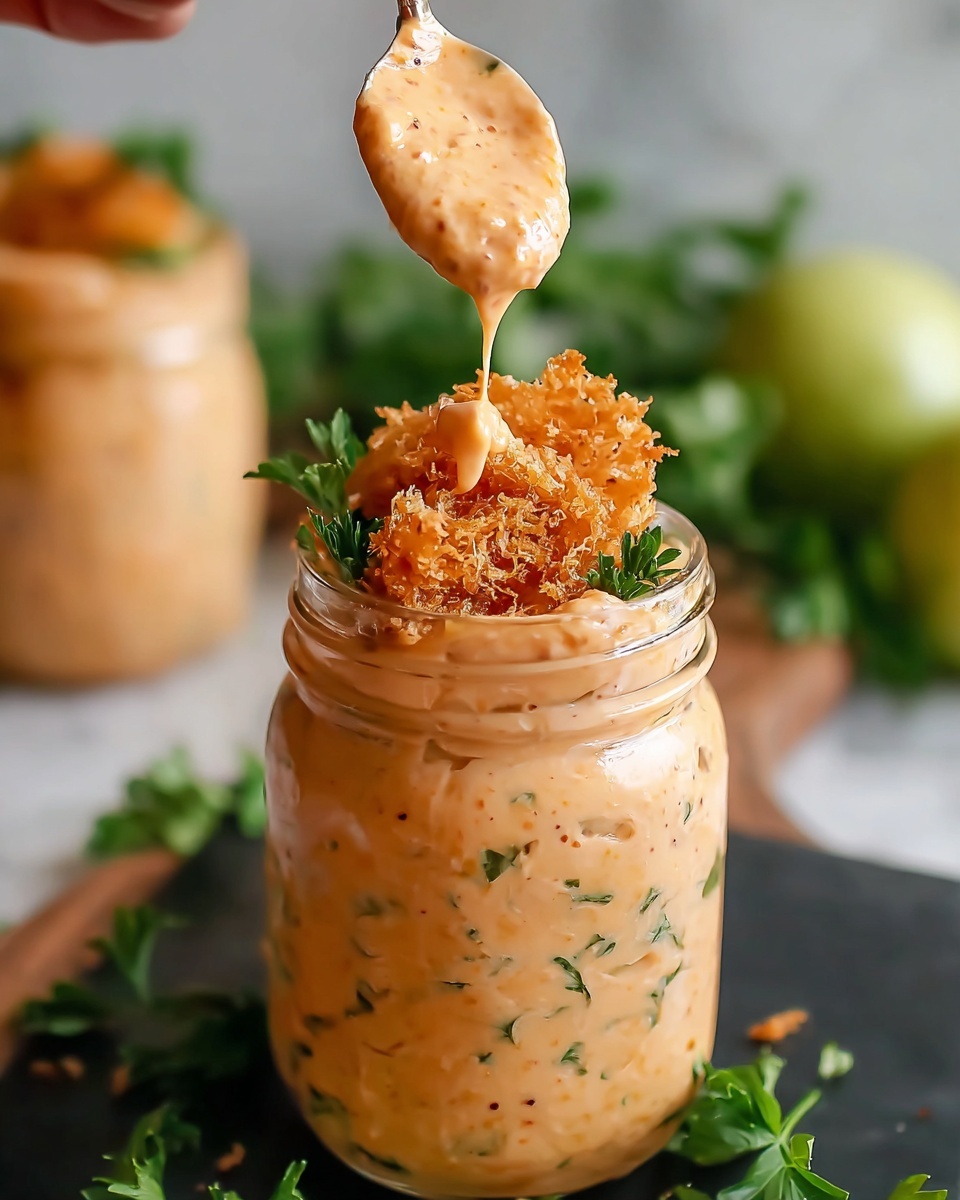
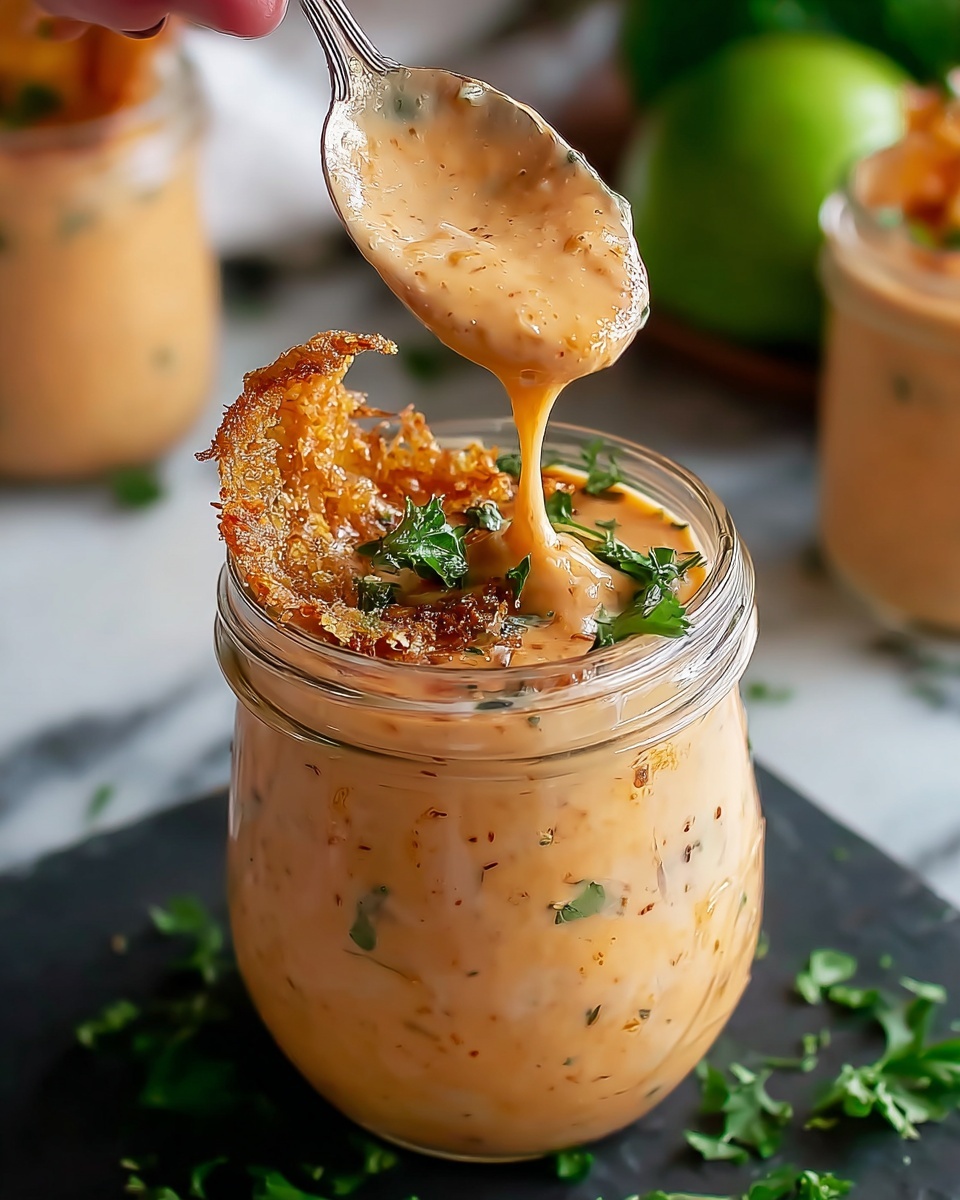
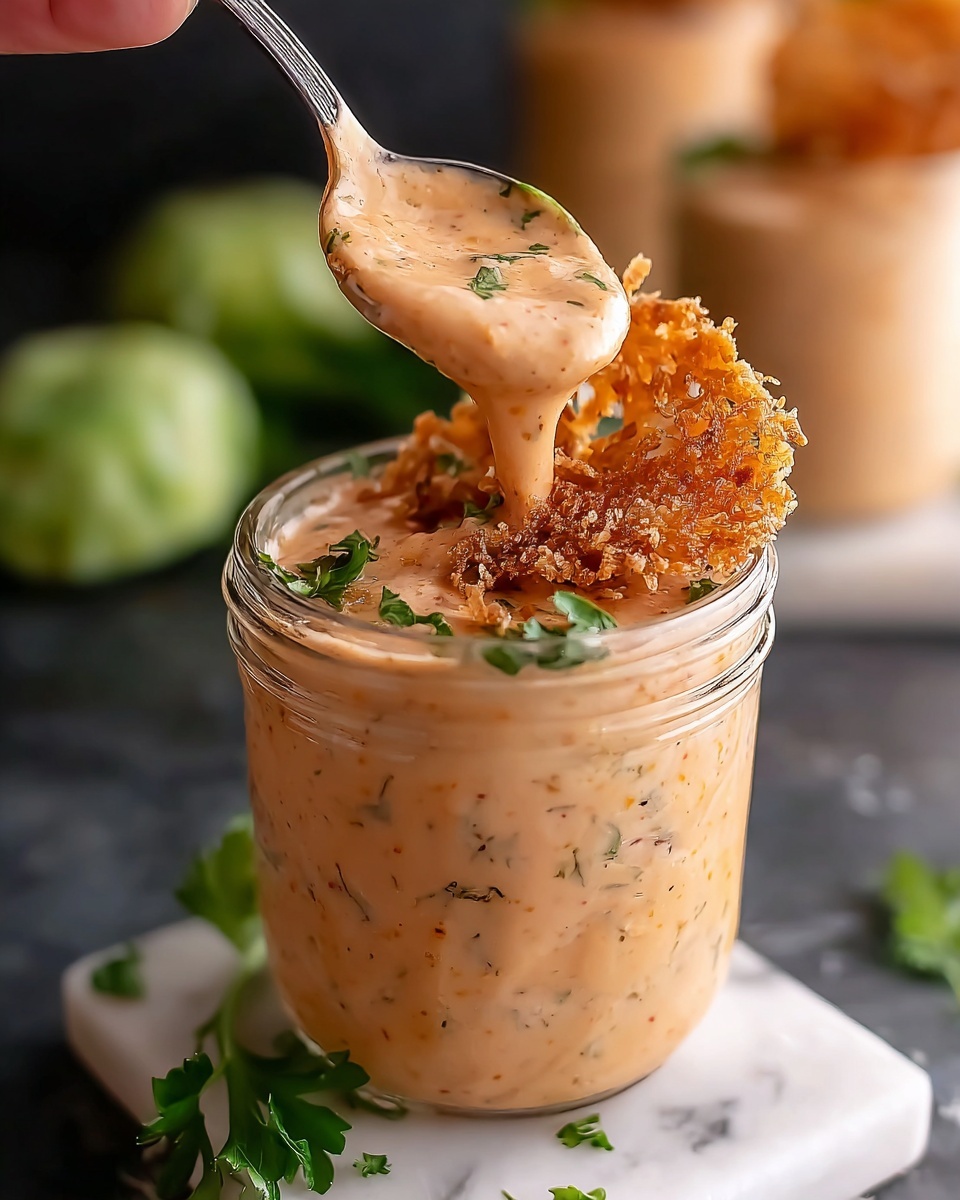
If you’re a fan of bold, tangy, and creamy dips that pack a punch of flavor, then this Blooming Onion Dip Recipe is going to become your new favorite companion to crispy onion rings, fries, or even burger toppings. It’s a perfect balance of zesty horseradish, smoky paprika, and savory herbs folded into a luscious blend of mayonnaise and sour cream that will have you reaching for more every time. Trust me, this dip brings the magic of that famous blooming onion appetizer straight to your table in a simple, no-cook sauce that elevates any snack or meal.
Ingredients You’ll Need
Getting this Blooming Onion Dip Recipe just right depends on a handful of straightforward, everyday ingredients that work together beautifully. Each element adds its own personality, from creamy tang to spicy warmth, resulting in a dip that’s anything but ordinary.
- Mayonnaise: The creamy base that gives the dip its smooth texture and rich flavor.
- Sour Cream: Adds a subtle tanginess that brightens the overall taste.
- Ketchup: Brings a touch of sweetness and vibrant color to the mix.
- Prepared Horseradish: The star of the show, delivering that iconic zing reminiscent of a classic blooming onion.
- Cayenne Pepper: Adds a gentle heat that lingers without overpowering.
- Paprika: Provides smoky depth and a lovely reddish hue.
- Dried Oregano: Offers a hint of earthy, herbal complexity.
- Garlic Powder: Gives a savory punch that rounds out the flavor profile.
- Salt and Pepper: Essential seasonings to enhance every other ingredient.
How to Make Blooming Onion Dip Recipe
Step 1: Combine the Creamy Ingredients
Start by grabbing a medium bowl and whisking together the mayonnaise and sour cream. This creates a luscious base for your dip, setting the stage for all the bold flavors that will come next. Don’t worry, this part is super quick and easy but incredibly important for that smooth texture.
Step 2: Add the Flavor Boosters
Next up, stir in the ketchup and prepared horseradish. The ketchup balances the spicy horseradish with a subtle sweetness, ensuring your dip won’t be one-dimensional but rather delightfully complex and tangy.
Step 3: Spice It Up
Now sprinkle in the cayenne pepper, paprika, oregano, and garlic powder. These spices add layers of flavor that evoke the sensation of biting into a perfectly fried blooming onion. Mix everything thoroughly until the dip is silky and all the spices are evenly distributed.
Step 4: Season to Taste and Chill
Finally, season with salt and pepper according to your preference. Give the dip one last good stir, then cover the bowl and pop it into the refrigerator for at least 30 minutes. This resting time allows the flavors to marry and intensify, making every bite unforgettable.
How to Serve Blooming Onion Dip Recipe
Garnishes
To give your Blooming Onion Dip Recipe an extra pop visually and flavor-wise, sprinkle some fresh chopped parsley or finely sliced green onions over the top just before serving. These garnishes add a fresh, vibrant contrast to the creamy, spicy dip.
Side Dishes
This dip is incredibly versatile and pairs wonderfully not just with onion rings but also with crispy fries, crunchy vegetable sticks like carrots and celery, or even warm soft pretzels. It also makes a fantastic spread for burgers, sandwiches, or wraps, turning an ordinary meal into something special.
Creative Ways to Present
Upgrade your snack game by serving the dip in a hollowed-out bread bowl or a rustic ceramic bowl surrounded by an assortment of dippers. You could even layer it into a dip platter featuring various cheeses, cured meats, and fresh veggies for a crowd-pleasing appetizer spread that’s as beautiful as it is delicious.
Make Ahead and Storage
Storing Leftovers
If you happen to have some leftover Blooming Onion Dip Recipe, no worries! Store it in an airtight container in the refrigerator. It will stay fresh and flavorful for up to 3 days, giving you plenty of time to enjoy it again without sacrificing any of its signature zing.
Freezing
While this dip is fantastic fresh, freezing is not ideal as the texture of the mayonnaise and sour cream base can become grainy once thawed. It’s best to make it fresh or store it in the fridge for a few days instead of freezing.
Reheating
This dip is meant to be served chilled or at room temperature, so reheating isn’t necessary. If you prefer it slightly warmer, simply let it sit out for a bit to come to room temperature or enjoy straight from the fridge for optimal creaminess.
FAQs
Can I make the Blooming Onion Dip Recipe dairy-free?
Yes! You can substitute the mayonnaise and sour cream with dairy-free or vegan alternatives, such as plant-based mayo and coconut or cashew-based sour cream. The dip will still be creamy and delicious with a slightly different flavor profile.
How spicy is this dip?
The dip has a gentle kick thanks to the horseradish and cayenne pepper, but it’s balanced by the creamy base and sweetness from the ketchup. If you love heat, feel free to add a bit more cayenne to suit your taste.
Can I use fresh spices instead of dried?
While dried herbs work best in this dip for consistent flavor and ease, fresh oregano finely chopped can be used if you prefer. Fresh garlic can also be substituted for garlic powder, but keep the quantity smaller since fresh garlic is more potent.
Is this dip only good with onion rings?
Definitely not! While it’s inspired by the famous blooming onion, this dip is a fantastic all-around condiment for vegetables, chips, fries, burgers, and more. It’s so flavorful that you’ll find yourself craving it beyond onion rings.
How long should I chill the dip before serving?
For the best flavor, chill the dip for at least 30 minutes to an hour. This resting period allows the spices to fully meld with the creamy base, creating a harmonious and irresistible flavor that can’t be rushed.
Final Thoughts
This Blooming Onion Dip Recipe is a true crowd-pleaser that combines simplicity, bold flavor, and that special something that makes you want to dip again and again. Whether you’re hosting friends or just jazzing up your snack time, this easy-to-make dip will deliver on taste and satisfaction every single time. Give it a try and discover your new go-to dip for any occasion!
Print
Blooming Onion Dip Recipe
- Prep Time: 10 minutes
- Cook Time: 0 minutes
- Total Time: 40 minutes (including chilling time)
- Yield: 1 cup (about 4 servings)
- Category: Sauce/Dip
- Method: No-Cook
- Cuisine: American
Description
A creamy, tangy, and spicy Blooming Onion Sauce perfect for dipping onion rings, fries, or adding a flavorful topping to burgers. This easy no-cook sauce combines mayonnaise, sour cream, and a blend of spices for a zesty and delicious accompaniment.
Ingredients
Blooming Onion Sauce Ingredients
- ½ cup mayonnaise
- ¼ cup sour cream
- 1 tbsp ketchup
- 1 tbsp prepared horseradish
- ½ tsp cayenne pepper
- ½ tsp paprika
- 1 tsp dried oregano
- ½ tsp garlic powder
- Salt and pepper to taste
Instructions
- Combine Ingredients: In a medium bowl, whisk together mayonnaise, sour cream, ketchup, prepared horseradish, cayenne pepper, paprika, dried oregano, garlic powder, salt, and pepper until smooth.
- Mix Thoroughly: Stir the mixture until all ingredients are well combined and the sauce has a uniform texture and color.
- Chill the Sauce: Refrigerate the sauce for at least 30 minutes. This resting time allows the flavors to meld and intensify, enhancing the overall taste.
- Serve: Use the sauce as a dip for onion rings, fries, or as a flavorful topping for burgers to add a zesty kick.
Notes
- Adjust the amount of cayenne pepper to control the heat level according to your preference.
- Prepare the sauce ahead of time to maximize flavor by letting it chill longer.
- This sauce keeps well in the refrigerator for up to 3 days in an airtight container.
- For a lighter version, substitute the mayonnaise with a low-fat or Greek yogurt alternative.


