
If you’ve ever dreamed of baking fresh, warm bread without the hassle of messy bowls and sticky hands, then you’re in for a treat with this incredible Bread in a Bag Recipe. It’s delightfully simple, surprisingly fun, and yields a soft, golden loaf with a perfectly tender crumb that feels like a warm hug from your oven. Using a resealable plastic bag to mix and knead the dough makes this recipe wonderfully accessible—even for kitchen newbies—and the results are just as delicious as any bakery bread. Trust me, once you try this Bread in a Bag Recipe, you’ll want to bake it again and again.
Ingredients You’ll Need
Before we dive in, let’s appreciate how straightforward this recipe is with its handful of kitchen staples. Each ingredient plays a vital role, from the yeast waking up to give your bread that satisfying rise, to the sugar and oil that add just the right touch of sweetness and moisture for perfect texture and flavor.
- Active dry yeast (1 packet / 2 1/4 tsp): The magic agent that makes your dough rise beautifully and gives bread its airy texture.
- Warm water (1/4 cup and additional 1/4 cup): Warmth activates the yeast; make sure it’s around 110°F for best results.
- All-purpose flour (3 cups): The foundation of your loaf, providing structure and body.
- Vegetable oil or melted butter (1/4 cup): Adds moisture and richness to your bread’s crumb.
- Sugar (1/4 cup): Feeds the yeast and brings a subtle sweetness that balances the flavor.
- Salt (1 tsp): Essential for flavor enhancement and controlling yeast growth.
- Warm milk (1/2 cup): Gives the dough tenderness and contributes to a softer crust.
How to Make Bread in a Bag Recipe
Step 1: Activate the Yeast
Start by dissolving your yeast and sugar in 1/4 cup of warm water. Let this bubbly mixture sit for about 5 minutes—it’s your first indication that the yeast is alive and ready to work its magic in fluffy, airy bread.
Step 2: Combine the Dry Ingredients in a Bag
Dump the flour, oil, salt, and warm milk right into a large resealable plastic bag. This unconventional mixing method makes cleanup a snap and keeps the kitchen tidy, while still mixing your ingredients thoroughly.
Step 3: Mix in the Yeast Mixture
Pour your activated yeast mixture into the bag, seal it up well, and gently knead by squeezing and folding the bag for 3 to 5 minutes until the dough comes together in a smooth ball. It feels a little strange at first but is actually a lot of fun!
Step 4: Let the Dough Rise
Keep the sealed bag in a warm spot and give the dough about an hour to double in size. This step is where patience pays off, as the yeast ferments and creates all those delightful bubbles that make your bread light and airy.
Step 5: Shape the Loaf
After rising, gently remove the dough from the bag and shape it into a loaf. Handling it with care preserves the airy structure inside you just worked for.
Step 6: Prepare for Baking
Preheat your oven to 350°F (175°C) and grease a loaf pan. Placing your dough here allows it to keep its shape while giving the crust a lovely golden color.
Step 7: Final Rise
Pop your shaped dough back into the pan and let it rise for another 20 to 30 minutes until doubled again. This final proof ensures your loaf will be soft and full of life.
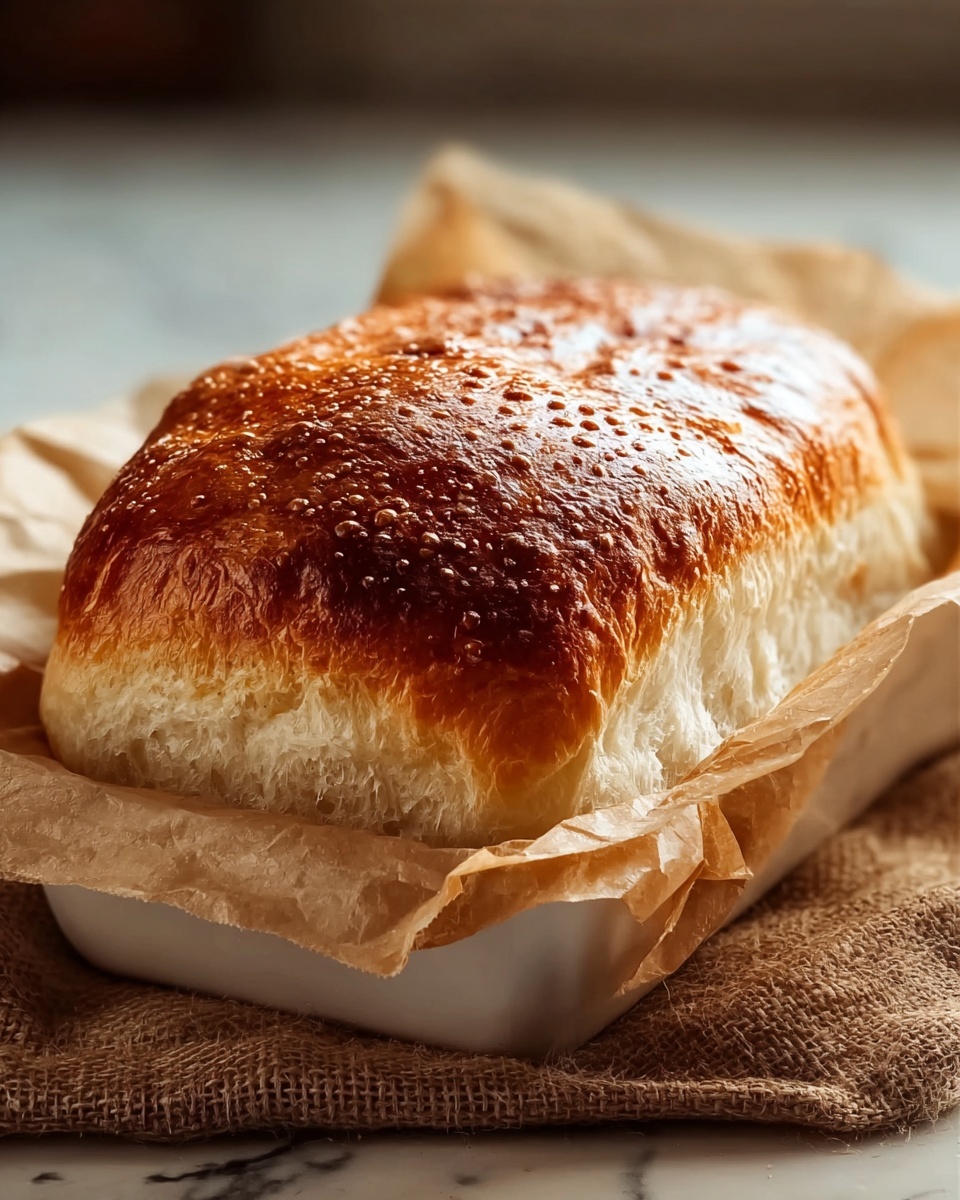
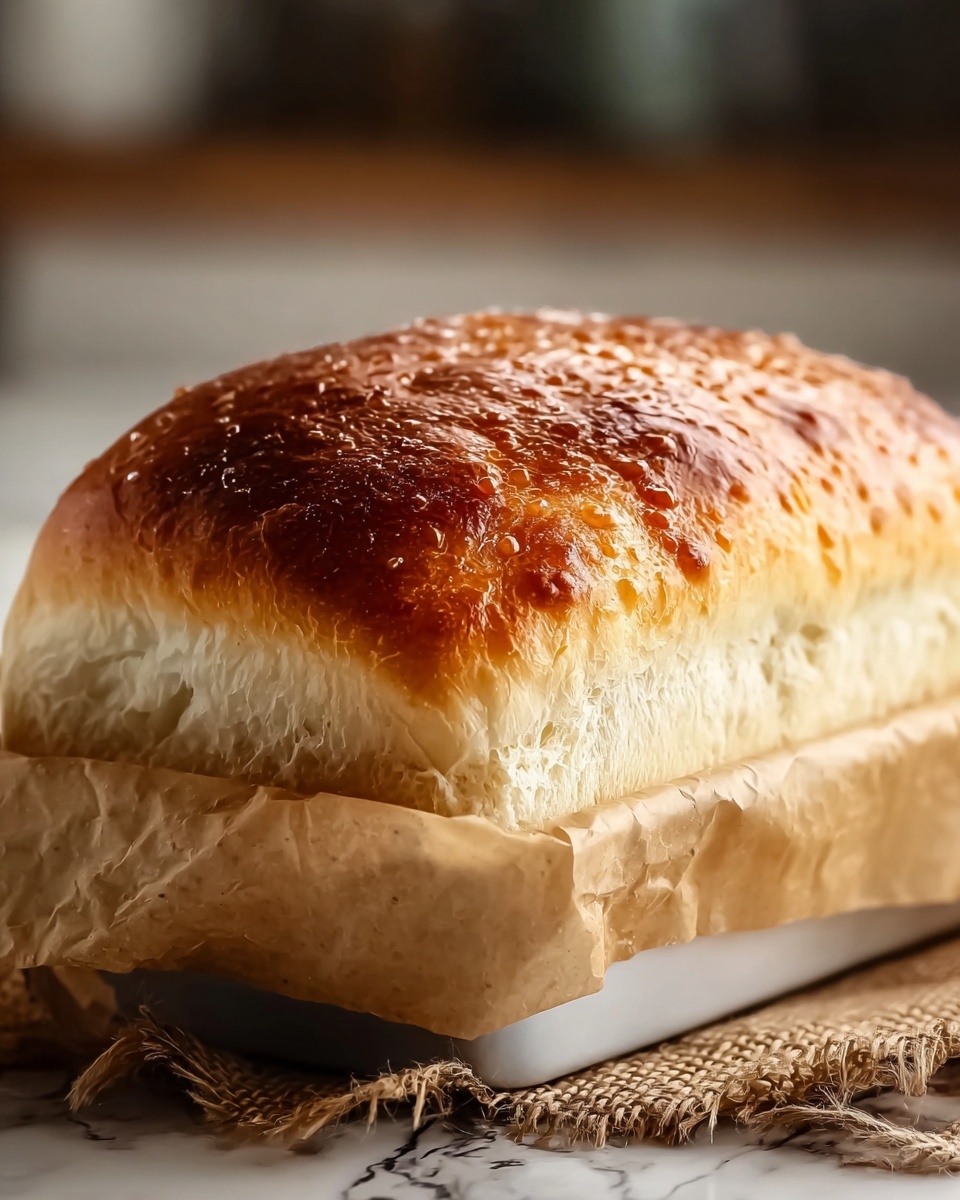
Step 8: Bake Until Golden
Bake the loaf for 25 to 30 minutes. The golden brown crust and hollow sound when you tap it are your signs that perfection has been reached.
Step 9: Cool and Enjoy
Remove the bread from the oven and let it cool on a wire rack before slicing. Cooling lets the crumb set so each slice is just as perfect as the first.
How to Serve Bread in a Bag Recipe
Garnishes
This bread shines simply with a pat of butter or a drizzle of honey. Sprinkle some sea salt or fresh herbs like rosemary on top of warm slices to elevate its rustic charm and add a special finishing touch effortlessly.
Side Dishes
Because this Bread in a Bag Recipe is soft and slightly sweet, it pairs beautifully with soups, stews, or hearty salads. Try it alongside garlic butter shrimp or a robust tomato stew for a comforting, well-rounded meal.
Creative Ways to Present
Slice thick for homemade sandwiches, toast for breakfast with jam, or even make mini bread bowls by hollowing out small loaves and filling them with creamy dips or cheesy chili. Your Bread in a Bag Recipe is a blank canvas for culinary creativity.
Make Ahead and Storage
Storing Leftovers
Wrap your leftover bread tightly in plastic wrap or place it in an airtight container at room temperature. It will stay fresh and soft for about 2 to 3 days—perfect for afternoon toast or midday snacks.
Freezing
If you want to keep your bread longer, freeze it wrapped tightly in foil and then in a freezer bag. This Bread in a Bag Recipe freezes well for up to 3 months without losing its delightful texture.
Reheating
To bring your frozen loaf back to life, thaw it at room temperature and warm it in a preheated oven at 350°F for 10 to 15 minutes. This refreshes the crust and softens the interior as if freshly baked.
FAQs
Can I use whole wheat flour instead of all-purpose?
Absolutely. Just keep in mind whole wheat flour absorbs more moisture, so you might need to adjust the liquid slightly. The bread will have a nuttier flavor and heartier texture.
Is it necessary to use a plastic bag to knead the dough?
The plastic bag method is designed to simplify the process and reduce mess, but you can certainly knead the dough by hand or with a mixer if you prefer.
Why did my bread not rise properly?
Check the temperature of your liquids—too hot can kill the yeast, and too cold won’t activate it. Also, make sure your yeast is fresh and not expired for the best rise.
Can I add herbs or other flavors to this recipe?
Yes! Adding dried herbs, garlic powder, or even a handful of seeds to the dough before kneading can give your bread a unique twist while keeping the texture wonderful.
How do I store the bread to keep it soft longer?
Store the loaf in a bread box or loosely wrapped in a cloth bag at room temperature to maintain its moisture without getting soggy crusts.
Final Thoughts
This Bread in a Bag Recipe is pure joy wrapped in simplicity. It transforms everyday ingredients into a truly comforting homemade loaf, perfect for any occasion and any skill level. Give it a try—you’ll soon see why it’s a favorite for so many home bakers looking for a fun and effortless way to enjoy fresh bread!
Print
Bread in a Bag Recipe
- Prep Time: 15 minutes
- Cook Time: 30 minutes
- Total Time: 1 hour 45 minutes
- Yield: 1 loaf (about 12 slices)
- Category: Baking
- Method: Baking
- Cuisine: American
Description
This easy and mess-free Bread in a Bag recipe uses a resealable plastic bag for mixing and kneading dough, minimizing cleanup. Featuring a soft and fluffy homemade loaf made with simple pantry ingredients, this method lets you bake fresh bread at home with minimal effort and no need for a stand mixer.
Ingredients
Yeast Mixture
- 1 packet (2 1/4 tsp) active dry yeast
- 1/4 cup warm water (110°F)
- 1/4 cup sugar
Dough
- 3 cups all-purpose flour
- 1/4 cup vegetable oil (or melted butter)
- 1 tsp salt
- 1/2 cup warm milk (110°F)
Instructions
- Dissolve yeast: In a small bowl, dissolve the yeast and sugar in 1/4 cup warm water. Let it sit for about 5 minutes until it becomes bubbly, indicating the yeast is active.
- Combine dry and wet ingredients in bag: Add 3 cups of flour, vegetable oil, salt, and 1/2 cup warm milk to a large resealable plastic bag.
- Add yeast mixture and knead: Pour the bubbly yeast mixture into the bag, seal it tightly, and gently knead for 3-5 minutes until a cohesive dough forms.
- Let dough rise in bag: Rest the sealed bag in a warm place for about 1 hour, allowing the dough to rise and double in size.
- Shape the dough: Carefully remove the risen dough from the bag, shape it into a loaf shape.
- Preheat oven: Preheat your oven to 350°F (175°C).
- Prepare loaf pan and second rise: Grease a loaf pan and place the shaped dough inside. Let it rise another 20-30 minutes until doubled in size.
- Bake the bread: Bake the loaf for 25-30 minutes until golden brown on top and hollow sounding when tapped.
- Cool before slicing: Remove from oven and cool on a wire rack to prevent sogginess before slicing.
Notes
- Ensure your water and milk are warm (around 110°F) for optimal yeast activation.
- You can substitute vegetable oil with melted butter for a richer flavor.
- Allow the bread to cool completely before slicing to maintain its structure.
- If you prefer a crustier loaf, bake on a preheated baking stone or place a pan of water in the oven for steam.
- Store bread in an airtight container to keep it fresh for up to 3 days.


