If you’re looking to impress your guests with something fresh, festive, and utterly delightful, this Easter Charcuterie Board Recipe is your new best friend. Imagine a vibrant spread that bursts with colors and flavors, bringing together an artful mix of savory, sweet, and tangy bites that perfectly complement each other. Whether you’re hosting a family brunch or a casual get-together, this Easter Charcuterie Board Recipe offers a simple yet elegant way to celebrate the season with an irresistible array of textures and tastes.
Ingredients You’ll Need
Putting together an Easter Charcuterie Board Recipe is surprisingly simple, and the magic lies in choosing ingredients that balance taste, texture, and color. Each component plays a crucial role, from creamy cheeses to crisp crackers and bright fruits that bring the board to life.
- Cured meats: Prosciutto, salami, or soppressata add savory, rich flavors that are essential for layering taste.
- Cheeses: A variety of soft, semi-soft, and hard cheeses like brie, gouda, and aged cheddar create textural contrast and indulgence.
- Fresh fruits: Grapes, strawberries, and orange slices bring sweetness and freshness, balancing the saltiness of the meats.
- Crunchy nuts: Almonds and walnuts offer a satisfying crunch that complements softer cheeses and meats.
- Artisan crackers and bread: Thin crackers and baguette slices serve as the perfect vehicles for toppings, adding a crisp bite.
- Accents and spreads: Honey, fig jam, and whole grain mustard round out the board with sweet and tangy highlights.
- Olives and pickles: These provide a briny, sharp contrast, lifting the palate between bites.
How to Make Easter Charcuterie Board Recipe
Step 1: Choose Your Base
Start with a large wooden board or slate to assemble your Easter Charcuterie Board Recipe. The base is your blank canvas, so make sure it’s spacious enough to arrange all your ingredients beautifully without overcrowding.
Step 2: Arrange the Cheeses
Place your cheeses first, spacing them evenly across the board. Cut some cheeses into slices or cubes, while leaving others whole with small cheese knives nearby — this makes it inviting and accessible for guests to serve themselves.
Step 3: Add the Meats
Fold or roll your cured meats into elegant shapes and nestle them around the cheeses. This layering adds volume and visual interest, while also making the meats easy to pick up without falling apart.
Step 4: Include Fruits and Nuts
Scatter clusters of fresh fruits and handfuls of nuts close to meats and cheeses. The pops of color and crunch create a lively contrast that excites your guests’ senses.
Step 5: Fill in with Crackers, Spreads, and Accents
Fill gaps with crackers and small bowls or spoons of honey, jams, and mustard. Add olives and pickles in little piles to bring brightness and complexity to the experience.
How to Serve Easter Charcuterie Board Recipe
Garnishes
Fresh herbs like rosemary sprigs or edible flowers can elevate your Easter Charcuterie Board Recipe with a fragrant, inviting look. They add a delicate aroma that makes the presentation feel extra special and festive.
Side Dishes
Complement your charcuterie board with light side dishes such as a crisp green salad with lemon vinaigrette or a chilled cucumber soup. These options refresh the palate and balance the richness of the board’s components.
Creative Ways to Present
Consider using a tiered stand for a multi-layered effect or incorporating mini bowls of seasonal dips like whipped feta or herbed cream cheese. These inventive touches make your Easter Charcuterie Board Recipe feel interactive and dynamic for your guests.
Make Ahead and Storage
Storing Leftovers
If you find yourself with leftovers from your Easter Charcuterie Board Recipe, store them separately in airtight containers. Wrap cheeses tightly to maintain freshness, keep cured meats refrigerated, and store crackers in a dry place to keep them crisp.
Freezing
While freezing is not ideal for most charcuterie components, you can freeze certain hard cheeses if necessary. Avoid freezing meats and fresh fruits as it will compromise their texture and flavor.
Reheating
Since this dish is meant to be enjoyed cold or at room temperature, reheating is generally not recommended. If you include warm components like roasted nuts or baked bread, reheat them briefly in the oven to restore their crunch and softness.
FAQs
Can I customize the Easter Charcuterie Board Recipe to suit dietary restrictions?
Absolutely! This board is highly versatile. You can swap traditional cured meats for plant-based alternatives, use dairy-free cheeses, and add more fruits and nuts to accommodate vegan or gluten-free diets.
What cheeses work best for an Easter Charcuterie Board Recipe?
A mix of textures and flavors makes for an interesting board. Soft cheeses like brie, tangy goat cheese, and firmer types such as aged cheddar or gouda create a perfect balance that everyone will enjoy.
How far in advance can I prepare the board?
It’s best to assemble the board no more than a couple of hours before serving to maintain freshness. You can prep ingredients the day before, just keep them stored properly and assemble right before your guests arrive.
Can I include sweets on my Easter Charcuterie Board Recipe?
Definitely! Small bites like chocolate-covered almonds, honeycomb pieces, or dried fruits can add a delightful sweet note that pairs beautifully with savory items.
What drinks pair well with this Easter Charcuterie Board Recipe?
Light and crisp beverages like rosé, sparkling water with a squeeze of lemon, or even a fruity white wine complement the flavors harmoniously without overwhelming the palate.
Final Thoughts
Creating an Easter Charcuterie Board Recipe is such a joyful way to bring people together over food. It’s a celebration of flavors, colors, and convivial moments that warm your heart as much as your taste buds. I encourage you to dive in, experiment with your favorite ingredients, and enjoy the effortless charm this board brings to your Easter gathering.
Print
Easter Charcuterie Board Recipe
- Prep Time: 10 minutes
- Cook Time: 30-35 minutes
- Total Time: 45 minutes
- Yield: 4 servings
- Category: Dessert
- Method: Baking
- Cuisine: American
Description
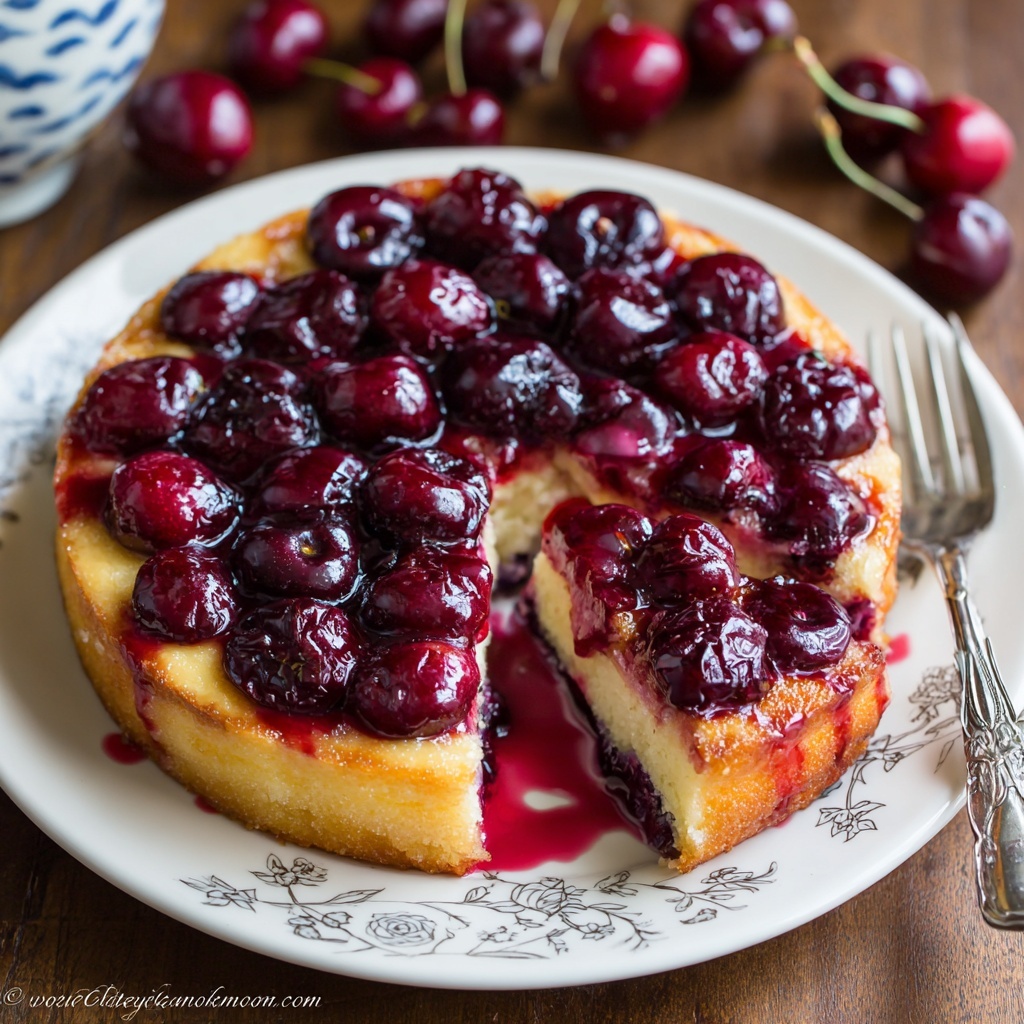
This Summer Cake is a simple and delightful cherry cake perfect for warm weather gatherings. Made with fresh cherries folded into a tender buttery batter, it offers a moist texture with a delicate fruity burst in each bite. Ideal for an easy homemade dessert or afternoon snack.
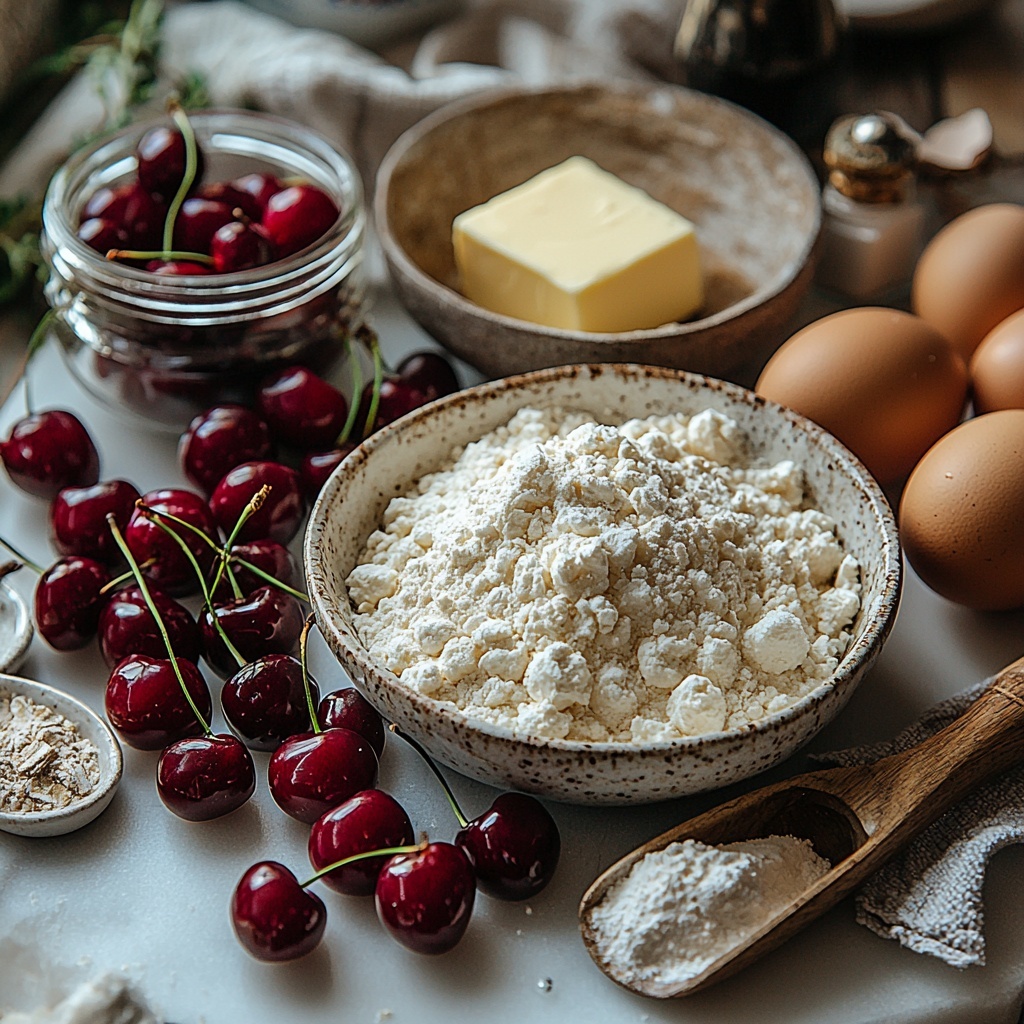
Ingredients
Cake Batter
- 1 cup all-purpose flour
- 1 cup granulated sugar
- 1/2 cup unsalted butter (softened)
- 2 large eggs
- 1 teaspoon vanilla extract
- 1 teaspoon baking powder
- 1/4 teaspoon salt
Fruit
- 1 cup fresh cherries (pitted and halved)
Instructions
- Preheat the oven: Set your oven to 350°F (175°C) and prepare a 9-inch round cake pan by greasing and lightly flouring it to prevent sticking.
- Cream butter and sugar: In a mixing bowl, beat together the softened unsalted butter and granulated sugar until the mixture is light and fluffy, which creates a smooth base for the cake batter.
- Add eggs and vanilla: Incorporate the eggs one at a time into the butter-sugar mixture, beating well after each addition to ensure thorough blending. Then stir in the vanilla extract for added flavor.
- Combine dry ingredients: In a separate bowl, whisk together the all-purpose flour, baking powder, and salt to distribute the leavening agent and seasoning evenly.
- Mix dry and wet ingredients: Gradually add the dry flour mixture to the wet ingredients, mixing gently until just combined to avoid overworking the batter and ensuring a tender crumb.
- Fold in cherries: Gently fold the fresh pitted and halved cherries into the batter, distributing them evenly without crushing.
- Pour and smooth batter: Transfer the batter into the prepared cake pan, spreading it evenly and smoothing the surface for uniform baking.
- Bake the cake: Place the pan in the preheated oven and bake for 30-35 minutes. Check doneness by inserting a toothpick into the center; it should come out clean or with a few crumbs.
- Cool the cake: Let the cake cool in the pan for about 10 minutes to firm up, then transfer it onto a wire rack to cool completely before serving.
Notes
- Ensure cherries are pitted to avoid any hard bites. Fresh cherries provide the best flavor, but frozen cherries can be used if thawed and drained well.
- Do not overmix the batter to keep the cake tender and fluffy.
- Cooling the cake completely before slicing prevents it from falling apart.
- You can dust the cake with powdered sugar or glaze with a simple icing for extra sweetness, if desired.


