
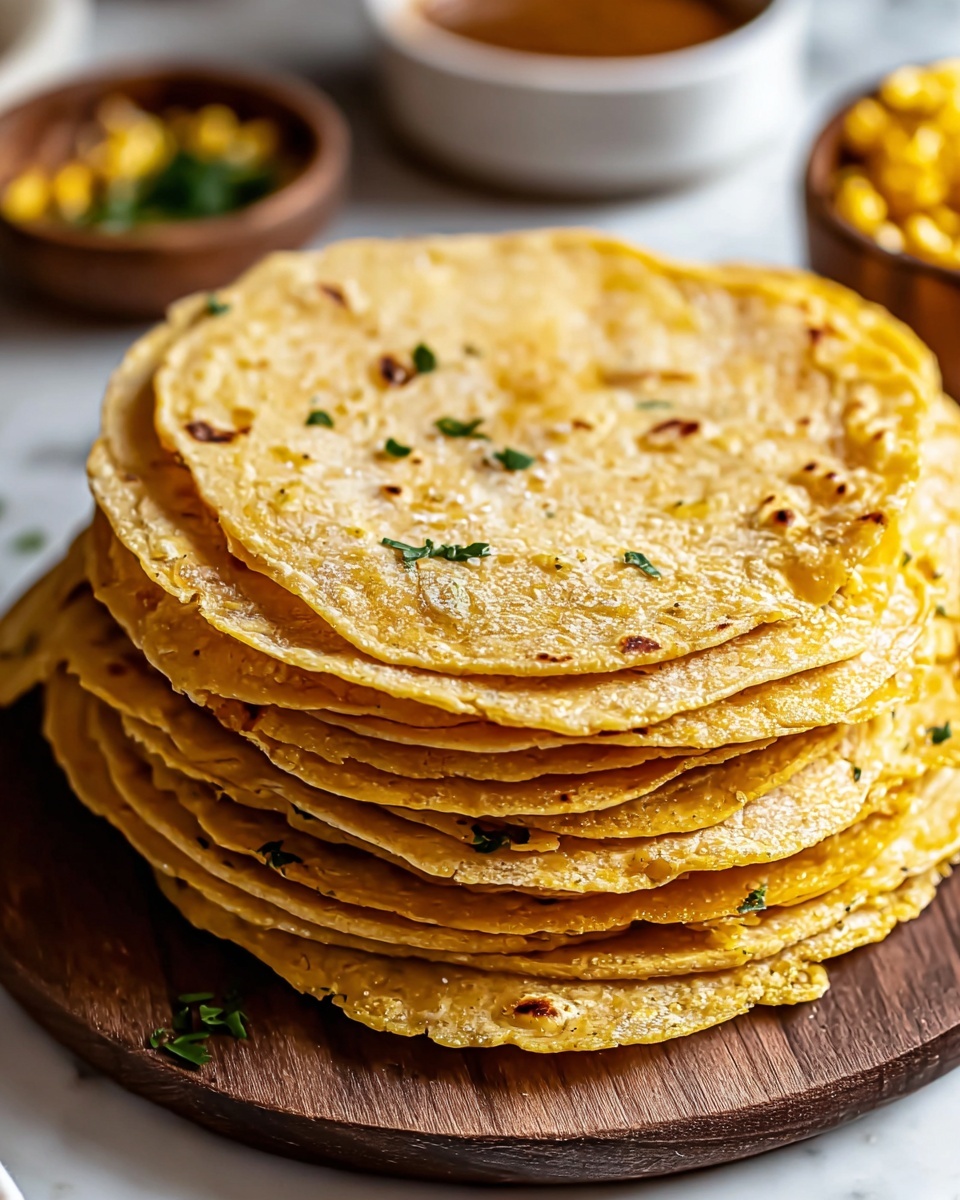
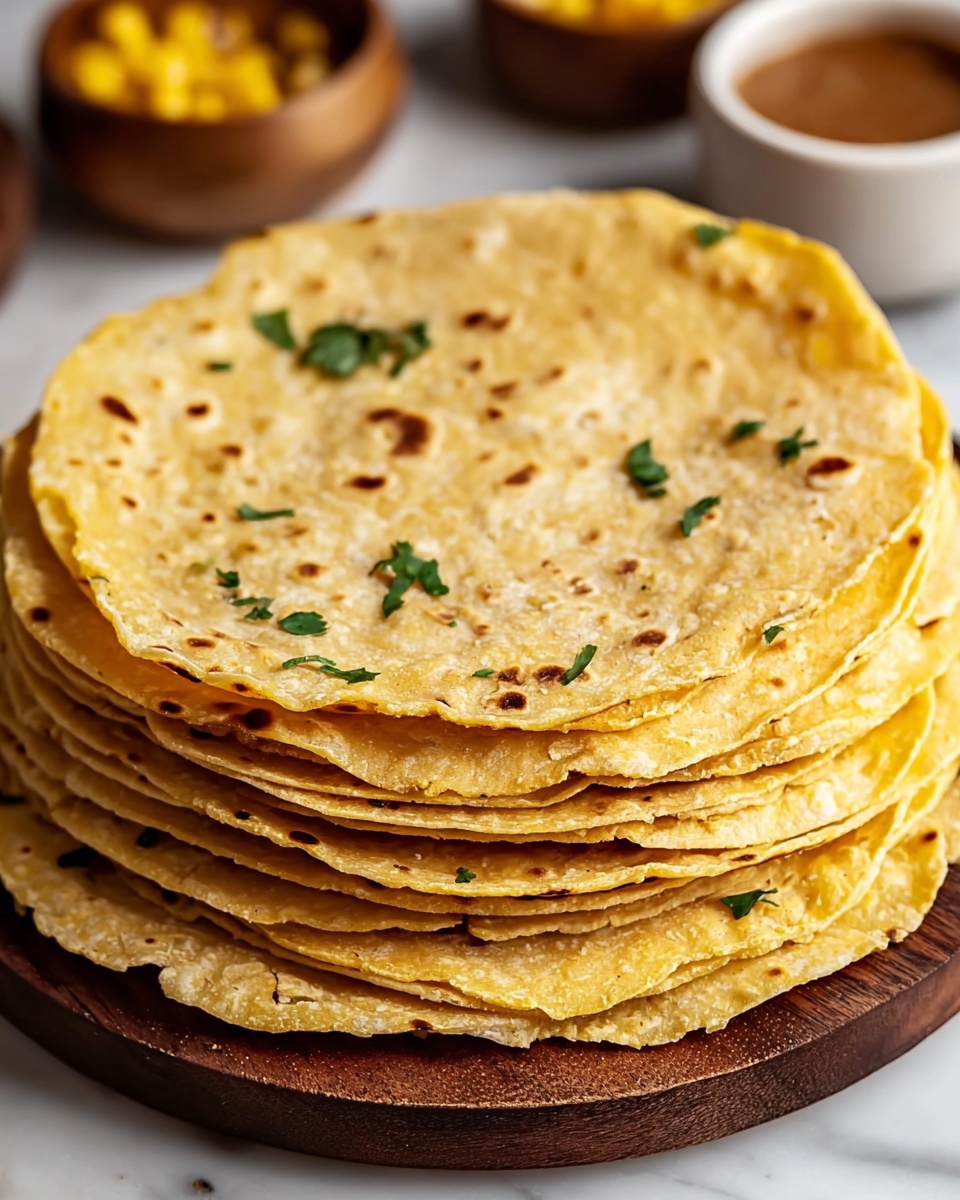
If you’ve been searching for a gluten-free, tasty alternative to traditional tortillas that can elevate your taco nights or wraps, you are going to love this Easy Homemade Cassava Flour Tortillas for Tacos and Wraps Recipe. These tortillas are wonderfully pliable, mildly sweet, and come together with just a handful of simple ingredients. Whether you are gluten sensitive or just eager to try something new, these cassava flour tortillas are a brilliant way to bring fresh, wholesome flavor and a lovely chewy texture to your meals.
Ingredients You’ll Need
This recipe is all about simplicity and quality. Each ingredient plays a key role in creating the perfect tortilla — from the tender crumb to that subtle flavor that complements any filling.
- 2 cups Cassava Flour: The star ingredient that’s naturally gluten-free and gives the tortillas their soft texture and slightly sweet taste.
- 3/4 cup Warm Water: Essential for hydrating the cassava flour so the dough becomes workable and elastic without cracking.
- 1/2 teaspoon Salt: Just enough to enhance the tortilla’s flavor without overpowering it.
- 1 tablespoon Olive Oil (optional): Adds a touch of richness and helps prevent the tortillas from sticking to the pan for that perfect cook every time.
How to Make Easy Homemade Cassava Flour Tortillas for Tacos and Wraps Recipe
Step 1: Mix the Dry Ingredients
Start by whisking together the cassava flour and salt in a large mixing bowl. This ensures an even distribution of salt throughout the flour, so every bite carries that subtle seasoning you’re looking for in a good tortilla.
Step 2: Form the Dough
Gradually pour in the warm water while stirring. This gentle hydration brings the cassava flour to life, forming a dough that will hold together perfectly. If the dough feels too dry, add a little more water, a tablespoon at a time, until it feels soft but not sticky.
Step 3: Knead Lightly
Turn the dough out onto a clean surface and knead it for about 1 to 2 minutes. You’re aiming for a smooth, slightly tacky dough that’s pliable enough to shape but not so wet that it sticks excessively. This light kneading helps develop the dough’s structure gently.
Step 4: Divide and Rest
Divide your dough into 8 to 10 equal balls. Cover them with a damp cloth to keep the moisture in and let them rest for a few minutes to relax the gluten-free flour and make rolling easier.
Step 5: Heat Your Skillet
Place a skillet or cast-iron pan over medium heat and let it get really hot before you start cooking. This step ensures your tortillas develop those beautiful pockets of golden brown as they cook evenly on each side.
Step 6: Flatten the Tortillas
Using either parchment paper or a tortilla press, flatten each dough ball into a thin circle about 1/8 inch thick. Parchment paper prevents sticking and helps you get an even thickness without tearing the dough. Thin tortillas cook faster and stay soft and bendy.
Step 7: Cook the Tortillas
Place each flattened tortilla onto the hot skillet and cook for 1 to 2 minutes per side. Watch for golden brown spots to appear—that’s your sign the tortilla is perfectly cooked without drying out. Flipping gently ensures they stay soft and don’t crack.
Step 8: Keep Warm
Once cooked, move your tortillas onto a plate and cover them with a clean kitchen towel to keep them warm and soft. This step makes all the difference in preserving their texture until it’s time to serve.
Step 9: Serve and Enjoy
Now the best part: filling your Easy Homemade Cassava Flour Tortillas for Tacos and Wraps Recipe with all your favorite ingredients and enjoying that fresh homemade flavor and texture right at your table.
How to Serve Easy Homemade Cassava Flour Tortillas for Tacos and Wraps Recipe
Garnishes
Fresh garnishes can turn your tacos or wraps from good to unforgettable. Think thinly sliced radishes, chopped cilantro, a squeeze of lime, or a dollop of creamy avocado or sour cream. These add brightness and a fresh contrast to the warm, chewy tortilla.
Side Dishes
This recipe pairs brilliantly with a vibrant salsa, smoky beans, or a crunchy slaw. Roasted vegetables or grilled meats also make hearty accompaniments that let your homemade tortillas shine as the foundation of any delicious meal.
Creative Ways to Present
Don’t be shy about showcasing your tortillas beyond tacos. Use them as wrap bases for fresh salads, as little pockets for dips, or even try cutting them into chips for snacking. The mild flavor of cassava pairs beautifully with a range of flavors and cuisines.
Make Ahead and Storage
Storing Leftovers
If you make more tortillas than you need, store them in an airtight container or wrap in foil at room temperature for up to two days. This keeps them soft and ready to reheat quickly.
Freezing
For longer storage, you can freeze these tortillas. Stack them with parchment paper in between each so they don’t stick together and place them in a sealed freezer bag. They’ll keep beautifully frozen for up to three months.
Reheating
To reheat, gently warm the tortillas in a hot skillet for just 30 seconds on each side or wrap them in a damp paper towel and microwave for about 20 seconds. This restores their softness and pliability nicely.
FAQs
Can I substitute cassava flour with another gluten-free flour?
Cassava flour has a unique texture and hydration level, so substituting it may affect the dough’s consistency. While you can try almond or coconut flour, the results will vary and might require different amounts of water.
Do these tortillas taste like traditional corn tortillas?
They offer a mild, slightly sweet flavor that differs from corn tortillas but provide a similarly flexible and soft texture, making them a wonderful alternative for those avoiding corn or gluten.
Is olive oil necessary in the recipe?
Olive oil is optional but recommended as it adds a bit of richness and helps prevent the tortillas from sticking during cooking, making the process easier and the texture more tender.
How thin should I roll the tortillas?
Aim for about 1/8 inch thickness to ensure they cook quickly and stay pliable. Too thick, and they may be doughy; too thin, and they could become brittle.
Can I make these tortillas vegan and allergy-friendly?
Absolutely! This recipe is naturally vegan, dairy-free, and gluten-free, making it safe and delicious for a variety of dietary needs.
Final Thoughts
Making your own tortillas at home is incredibly rewarding, and these Easy Homemade Cassava Flour Tortillas for Tacos and Wraps Recipe are no exception. With just a few wholesome ingredients and a little bit of love, you’ll have fresh, flexible, and flavorful tortillas that can transform any meal into a special occasion. I can’t wait for you to try them and add this newfound favorite to your cooking repertoire!
Print
Easy Homemade Cassava Flour Tortillas for Tacos and Wraps Recipe
- Prep Time: 15 minutes
- Cook Time: 20 minutes
- Total Time: 35 minutes
- Yield: 8-10 tortillas
- Category: Tortillas
- Method: Stovetop
- Cuisine: Latin American
- Diet: Gluten Free
Description
These Easy Homemade Cassava Flour Tortillas are a perfect gluten-free alternative to traditional tortillas, ideal for tacos and wraps. Made with simple ingredients like cassava flour, warm water, salt, and olive oil, they come together quickly and cook on the stovetop to golden perfection. Soft yet sturdy, they provide a delicious base for your favorite fillings with a subtle, slightly nutty flavor.
Ingredients
Dry Ingredients
- 2 cups Cassava Flour
- 1/2 teaspoon Salt
Wet Ingredients
- 3/4 cup Warm Water
- 1 tablespoon Olive Oil (optional)
Instructions
- Mix Dry Ingredients: In a large mixing bowl, combine 2 cups of cassava flour and 1/2 teaspoon of salt. Whisk thoroughly to evenly distribute the salt throughout the flour.
- Add Water and Form Dough: Gradually pour 3/4 cup of warm water into the flour mixture, stirring continuously until a dough begins to form. If the dough feels too dry, add a little more water, a tablespoon at a time, until it comes together.
- Knead Dough: Transfer the dough onto a clean surface and knead lightly for 1-2 minutes until it becomes smooth and slightly tacky but not sticky.
- Divide Dough: Cut the dough into 8 to 10 equal portions and roll each into a ball. Cover the dough balls with a damp cloth to prevent drying out while you prepare to cook.
- Preheat Skillet: Place a skillet over medium heat and allow it to heat thoroughly until hot but not smoking.
- Flatten Tortillas: Using a tortilla press or rolling pin with parchment paper to prevent sticking, flatten each dough ball into a thin circle approximately 1/8 inch thick.
- Cook Tortillas: Place each flattened tortilla onto the hot skillet and cook for about 1-2 minutes on each side. Look for golden brown spots to appear, indicating that the tortilla is cooked through.
- Keep Tortillas Warm: Remove the cooked tortillas from the skillet and keep them wrapped in a kitchen towel to stay warm and pliable while you cook the rest.
- Serve: Once all tortillas are cooked, serve them warm with your favorite taco fillings or as wraps.
Notes
- If the dough is too sticky, sprinkle a small amount of cassava flour on your hands or work surface.
- For softer tortillas, add the optional 1 tablespoon of olive oil into the dough when mixing.
- If you don’t have a tortilla press, use a rolling pin and parchment paper to flatten the dough evenly.
- Cook on medium heat to avoid burning before the tortilla is cooked through.
- Store any leftovers wrapped in a towel inside an airtight container at room temperature for up to 2 days.
