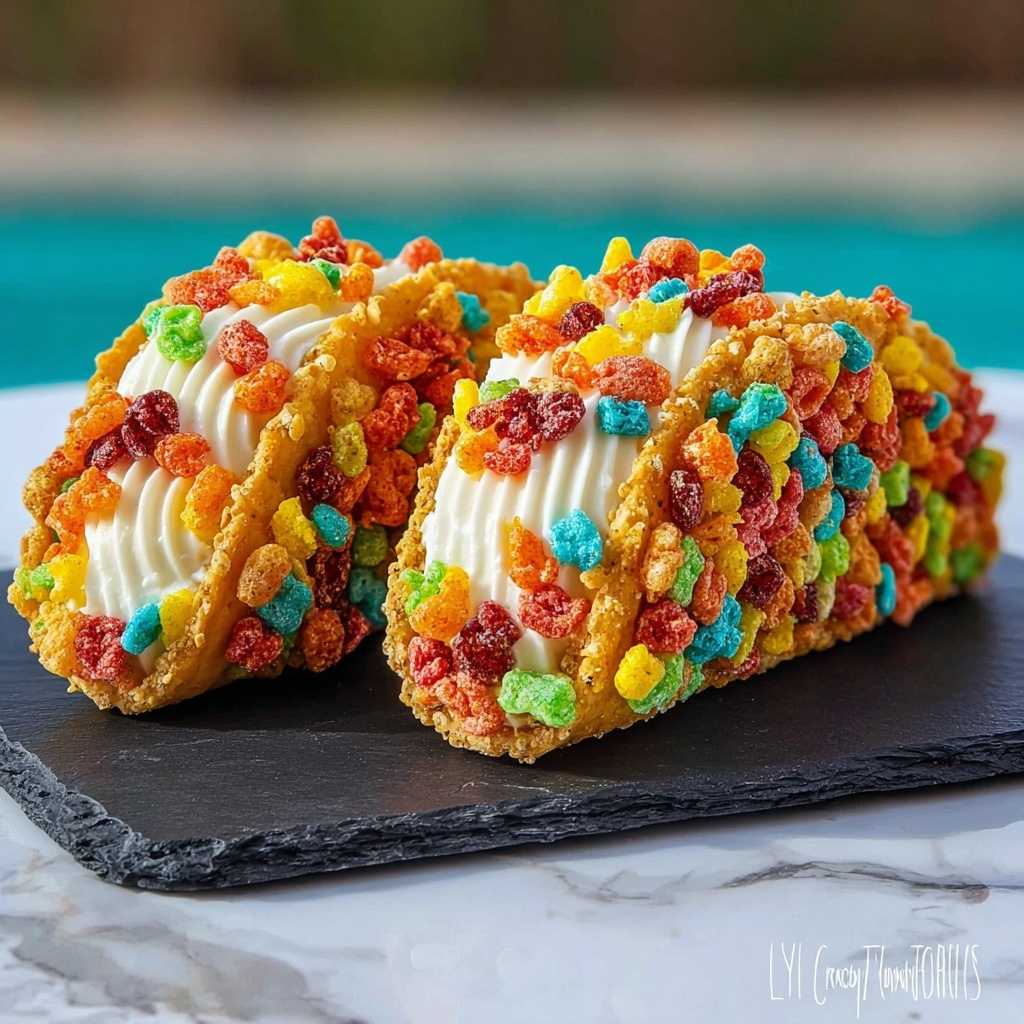
If you’ve ever dreamed of a dessert that feels like biting into a crunchy, colorful party, then the Fruity Pebbles Cheesecake Tacos Recipe is about to become your new obsession. This playful treat combines the nostalgic crunch of Fruity Pebbles cereal with a luscious, creamy cheesecake filling, all wrapped up in a fun taco shell made entirely from marshmallow and cereal. It is a perfect blend of textures and flavors that both kids and adults will adore. Honestly, every bite bursts with happiness, making this recipe a must-try for anyone looking to wow their family or guests with something truly unique and delicious.
Ingredients You’ll Need
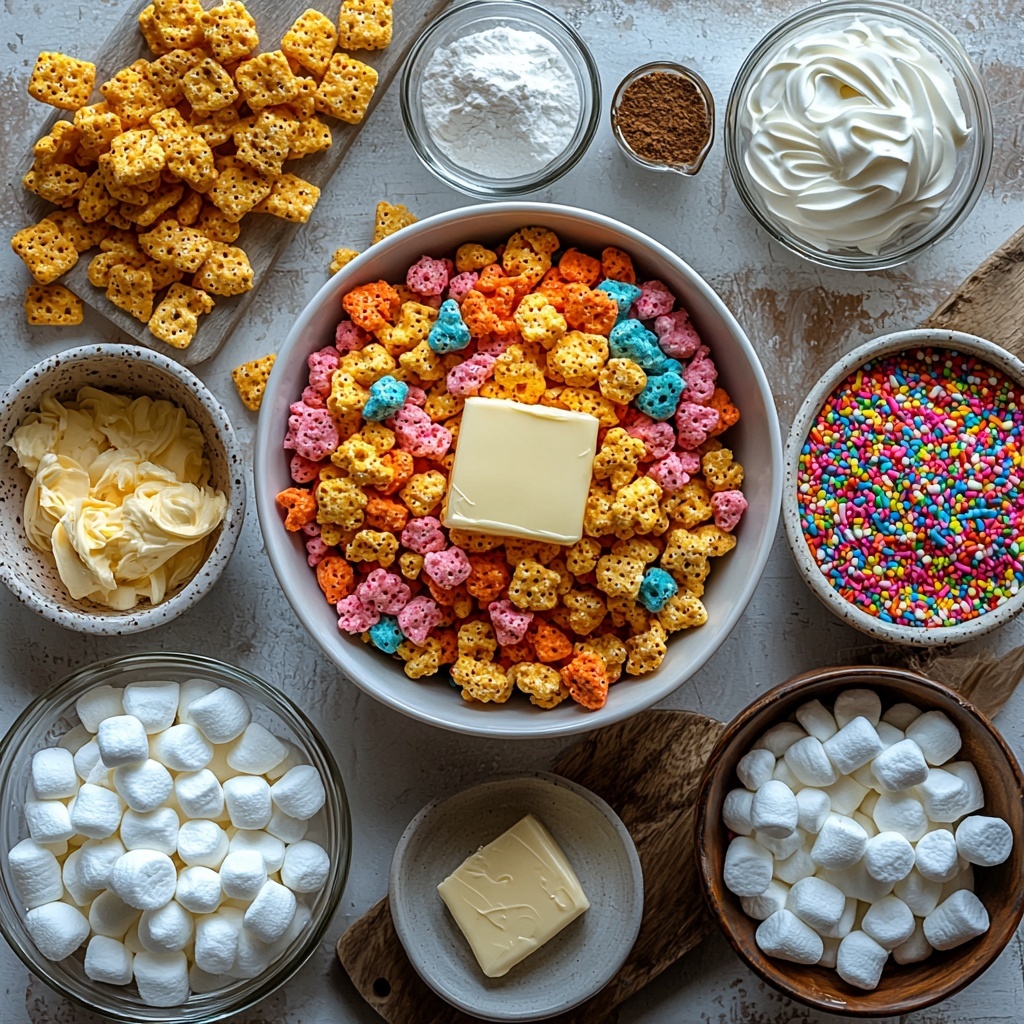
Getting started with the Fruity Pebbles Cheesecake Tacos Recipe is a breeze because it uses simple, pantry-friendly ingredients that come together beautifully. Each one plays a crucial role in building this dessert’s irresistible texture, flavor, and vibrant appearance.
- 3 cups Fruity Pebbles cereal: The star of the show, adding a colorful, crispy base packed with fruity flavor.
- 3 cups mini marshmallows: These melt down to glue the taco shell together while adding sweetness.
- 3 tablespoons butter: Helps melt and bind the marshmallows and cereal smoothly for shaping.
- 8 ounces cream cheese, softened: Creates a rich, tangy filling that balances the sweetness.
- 1/2 cup powdered sugar: Adds just the right touch of sweetness to the cheesecake filling.
- 1 teaspoon vanilla extract: Infuses the filling with warm, comforting flavor.
- 1/2 cup heavy cream: Whipped to fluffy perfection, it lightens the cheesecake filling for a dreamy texture.
- 1/4 cup rainbow sprinkles: Sprinkles add a playful, colorful finish that makes these tacos pop visually.
How to Make Fruity Pebbles Cheesecake Tacos Recipe
Step 1: Create the Taco Shells
Start by melting the butter and mini marshmallows together over low heat. This gentle warming gives you a sticky, sweet glue-like mixture. Once melted and smooth, stir in the Fruity Pebbles cereal until every colorful flake is coated. This is where the magic begins – the warm marshmallow mixture helps the cereal stick together perfectly, setting the stage for those vibrant, crunchy taco shells.
Step 2: Shape the Taco Shells
While the mixture is still warm and pliable, quickly shape it into taco shells by molding the cereal over a rolling pin or any rounded form that mimics a taco shell curve. This step needs speed and care before the shells cool and harden. Once shaped, let them cool completely – this chilling solidifies their shape and crunch, giving you that iconic taco shell texture, but in sweet form!
Step 3: Prepare the Cheesecake Filling
Next, whip the softened cream cheese with powdered sugar and vanilla extract until smooth and creamy. This luscious base is the creamy delight that will contrast wonderfully with the crunch of your taco shells. The vanilla adds just enough fragrance to keep it cozy and inviting.
Step 4: Whip the Heavy Cream
In a separate bowl, whip the heavy cream until stiff peaks form. This lightens the cheesecake filling and gives it that airy, fluffy quality you want in every bite. Carefully fold the whipped cream into the cream cheese mixture, keeping the texture light but rich — a true cheesecake cloud ready to be stuffed inside your taco shells!
Step 5: Fill the Taco Shells
Now comes the fun part: filling! Use a spoon or a piping bag to generously fill your cooled Fruity Pebbles taco shells with the cheesecake filling. Fill them beautifully so each taco is loaded with creamy goodness, promising a perfect balance when you take a bite.
Step 6: Add the Final Touches
Sprinkle rainbow sprinkles on top of the filled tacos for an extra dash of color and festive crunch. Then refrigerate the tacos for at least 30 minutes. This helps set the filling so every slice stays neat and every bite stays luscious. Trust me, the chill factor turns this dessert into pure perfection.
How to Serve Fruity Pebbles Cheesecake Tacos Recipe
Garnishes
For serving, keep it vibrant! Fresh fruit like sliced strawberries or kiwi pairs beautifully, offering a fresh counterpoint to the sugary sweetness. Drizzling a little chocolate or caramel sauce can also add a delightful finishing touch. A few extra colorful sprinkles on the plate never hurt anyone either!
Side Dishes
These cheesecake tacos make a fantastic standalone dessert but consider serving them alongside a scoop of vanilla ice cream or a cold glass of milk. The simplicity of these sides can balance the richness of the cheesecake filling and complement the fun crunch of the taco shell.
Creative Ways to Present
Think outside the taco shell! Serve your Fruity Pebbles Cheesecake Tacos Recipe in mini dessert baskets or on vibrant plates that highlight their colors. You could also slice them in half for a bite-sized treat at parties. Whatever you choose, letting their bright colors and playful form shine is a guaranteed crowd-pleaser.
Make Ahead and Storage
Storing Leftovers
If you have leftovers, place your cheesecake tacos in an airtight container in the refrigerator. Because the shells are made with marshmallows, they can soften a little over time. Eat them within two days for the best crunch and flavor experience.
Freezing
Freezing isn’t recommended for these tacos. The delicate marshmallow shells can become soggy or lose their crunch when thawed, and the creamy filling may separate slightly. For best results, enjoy them fresh or refrigerated.
Reheating
Since these tacos are best enjoyed cold or at room temperature, reheating is not advised. If you want to slightly warm the taco shells before filling, do so gently in a low oven for a minute or two, but avoid heating the filled tacos.
FAQs
Can I substitute the Fruity Pebbles cereal with another cereal?
Absolutely! While Fruity Pebbles bring vibrant color and fruity flavor, you can use other cereals like Rice Krispies or Cocoa Pebbles if you prefer, but keep in mind it will change the taste and look of your tacos.
Can I make the cheesecake filling dairy-free?
Yes, you can substitute cream cheese and heavy cream with dairy-free alternatives such as vegan cream cheese and coconut cream. The texture might be slightly different, but it will still be deliciously creamy.
How long do the taco shells stay crispy?
For the best crisp texture, serve the taco shells fresh or within a day of making. If stored in airtight containers, they can maintain crunch for about 24 hours but may soften as moisture settles in later.
Can I make these ahead of time for a party?
You can prepare the taco shells and cheesecake filling a day ahead. Fill and decorate the tacos on the day of your event for the freshest taste and texture. This way, your dessert stays vibrant and crisp when served.
What is the best way to shape the taco shells?
Using a rolling pin or a curved mold works well. Just be sure to work quickly with the warm cereal mixture, as it hardens fast. Cooling on the mold helps maintain that perfect taco curve.
Final Thoughts
Trust me when I say that the Fruity Pebbles Cheesecake Tacos Recipe is a delightful surprise — bright, fun, and totally irresistible. Whether you’re making these for a birthday, a casual get-together, or just because, they bring smiles with every bite. I can’t wait for you to try this recipe and experience that perfect crunch paired with creamy cheesecake bliss. It’s a joyful twist on dessert that’s sure to become a favorite in your kitchen!
Print
Fruity Pebbles Cheesecake Tacos Recipe
- Prep Time: 20 minutes
- Cook Time: 10 minutes
- Total Time: 50 minutes
- Yield: 6 servings
- Category: Dessert
- Method: Stovetop
- Cuisine: American
- Diet: Vegetarian
Description
These Fruity Pebbles Cheesecake Tacos are a colorful and fun dessert, featuring crispy Fruity Pebbles cereal shells filled with a creamy and sweet cheesecake filling. Perfect for a creative treat that combines the nostalgic flavor of Fruity Pebbles with a smooth, luscious filling, topped with rainbow sprinkles for an extra festive touch.
Ingredients
For the Taco Shells
- 3 cups Fruity Pebbles cereal
- 3 cups mini marshmallows
- 3 tablespoons butter
For the Cheesecake Filling
- 8 ounces cream cheese, softened
- 1/2 cup powdered sugar
- 1 teaspoon vanilla extract
- 1/2 cup heavy cream
For Garnish
- 1/4 cup rainbow sprinkles
Instructions
- Prepare the Taco Shells: In a saucepan over low heat, melt the butter and mini marshmallows together, stirring until smooth and fully combined. Quickly stir in the Fruity Pebbles cereal until every piece is well coated with the marshmallow mixture.
- Shape the Shells: While the mixture is still warm and pliable, mold it carefully over a rolling pin or taco shell mold to form taco-shaped shells. Set them aside and allow to cool completely so they harden into shape.
- Make the Cheesecake Filling: In a mixing bowl, beat together the softened cream cheese, powdered sugar, and vanilla extract until creamy and smooth without lumps.
- Whip the Cream: In a separate bowl, whip the heavy cream until stiff peaks form. Gently fold the whipped cream into the cream cheese mixture to create a light and fluffy cheesecake filling.
- Fill the Shells: Using a piping bag or spoon, carefully fill the cooled Fruity Pebbles taco shells with the cheesecake filling, ensuring an even and generous amount inside each shell.
- Garnish and Chill: Sprinkle the tops with rainbow sprinkles for a colorful finish. Refrigerate the filled tacos for at least 30 minutes before serving to allow the filling to set.
Notes
- Work quickly when shaping the shells as the marshmallow mixture hardens fast once cooled.
- You can substitute Fruity Pebbles with any colorful rice cereal to customize flavors.
- Ensure the cream cheese is softened to avoid lumps in the filling.
- For easier shaping, lightly grease the rolling pin or mold before pressing the cereal mixture onto it.
- Keep the tacos refrigerated until serving to maintain firmness and freshness.

