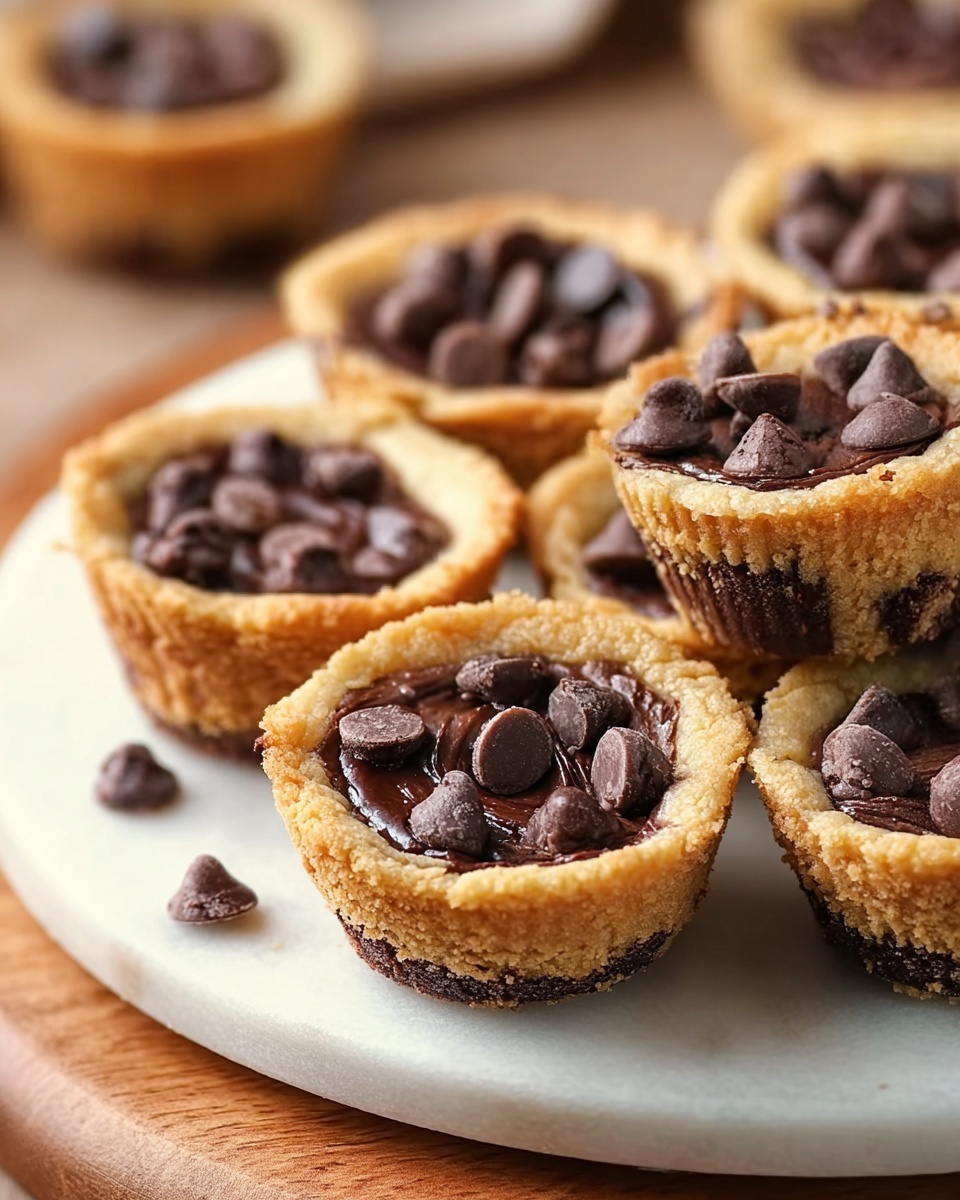
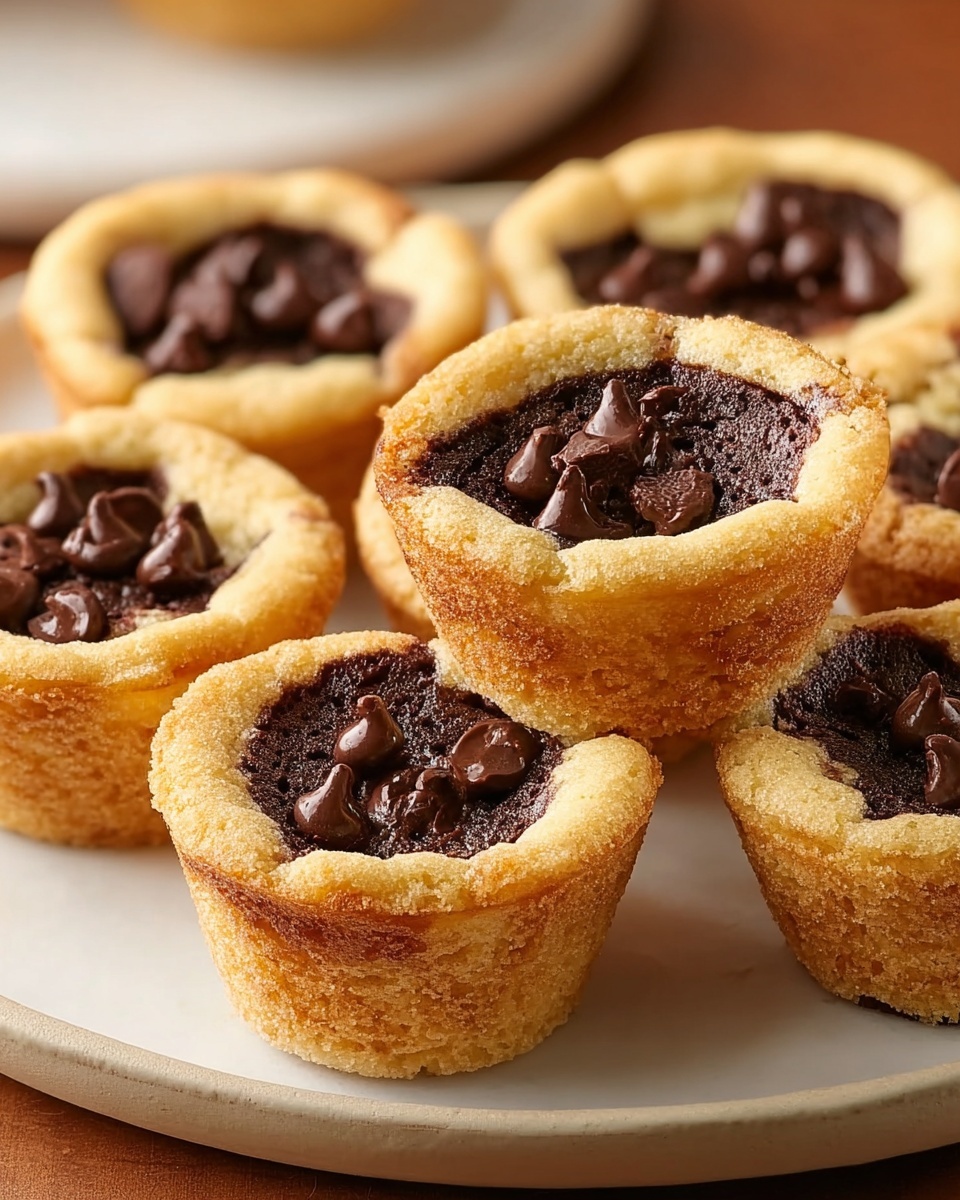
If you have a sweet tooth and love a delightful twist on classic cookies, you’re going to adore this Fudge Filled Chocolate Chip Cookie Cups Recipe. Imagine perfectly baked, golden cookie cups with a rich, creamy fudge center that melts in your mouth with every bite. This recipe turns simple ingredients into a show-stopping dessert that’s both fun to make and impossible to resist. Whether for a party, a family treat, or a cozy night in, these cookie cups deliver the perfect balance of chewy cookie and luscious fudge filling. Get ready to fall in love at first bite with this unforgettable indulgence.
Ingredients You’ll Need
These ingredients are straightforward but each plays a crucial role in creating the ideal texture, flavor, and look of the cookie cups. From the buttery dough that forms a tender yet sturdy cup to the silky chocolate fudge filling, each element contributes something special to make these treats unforgettable.
- All-purpose flour: Provides the structure and base for the cookie dough, ensuring a soft yet stable cup shape.
- Salt: Enhances flavor by balancing the sweetness and intensifying the chocolate notes.
- Baking soda: Helps the cookie dough rise slightly, giving a light and chewy texture.
- Unsalted butter: Adds richness and moisture, making the cookies tender and flavorful.
- Brown sugar: Contributes a deep caramel flavor and chewy texture to the cookies.
- Egg: Binds the ingredients and adds moisture for a soft dough.
- Vanilla extract: Brings warmth and aromatic sweetness to the cookie dough and fudge filling.
- Semisweet chocolate chips (for dough): Delivers bursts of melty chocolate throughout the cookie cups.
- Semisweet chocolate chips (for fudge): Creates a luscious, smooth fudge center that pairs perfectly with the cookie.
- Sweetened condensed milk: Gives the fudge filling its creamy, rich texture and sweetness.
How to Make Fudge Filled Chocolate Chip Cookie Cups Recipe
Step 1: Preheat and Prepare
Start by setting your oven to 350°F (175°C) so it’s perfectly hot when your dough is ready. Grease or lightly spray two mini muffin pans to prevent sticking and help the cookie cups come out effortlessly after baking.
Step 2: Mix Dry Ingredients
In a medium bowl, whisk together the all-purpose flour, salt, and baking soda. This step ensures the leavening ingredients are evenly distributed, so your cookie cups bake up uniform and tender every time.
Step 3: Cream Butter and Sugar
Using a large bowl, cream the softened unsalted butter and packed brown sugar until the mixture turns light and fluffy. This adds air into the dough, resulting in a softer texture and nicely golden cookie cups.
Step 4: Combine Wet Ingredients
Beat in the egg and vanilla extract until well combined. These add moisture and subtle flavor depth that complements the chocolate beautifully.
Step 5: Add Dry Ingredients
Gradually mix the flour mixture into the wet ingredients until just combined. Be careful not to overmix to keep the cookie cups tender, not tough.
Step 6: Fold in Chocolate Chips and Shape
Fold the semisweet chocolate chips into the dough, making sure they’re evenly distributed. Then roll the dough into 1-inch balls and place each into the prepared mini muffin cups. This step shapes the cookie cups and ensures plenty of chocolate in every bite.
Step 7: Bake and Form Cups
Bake for 10-12 minutes until the edges are golden brown. While still warm, press the center of each cookie gently with the back of a teaspoon to create the signature cups. Let them cool completely before carefully removing them from the pan so they keep their shape.
Step 8: Make and Fill With Fudge
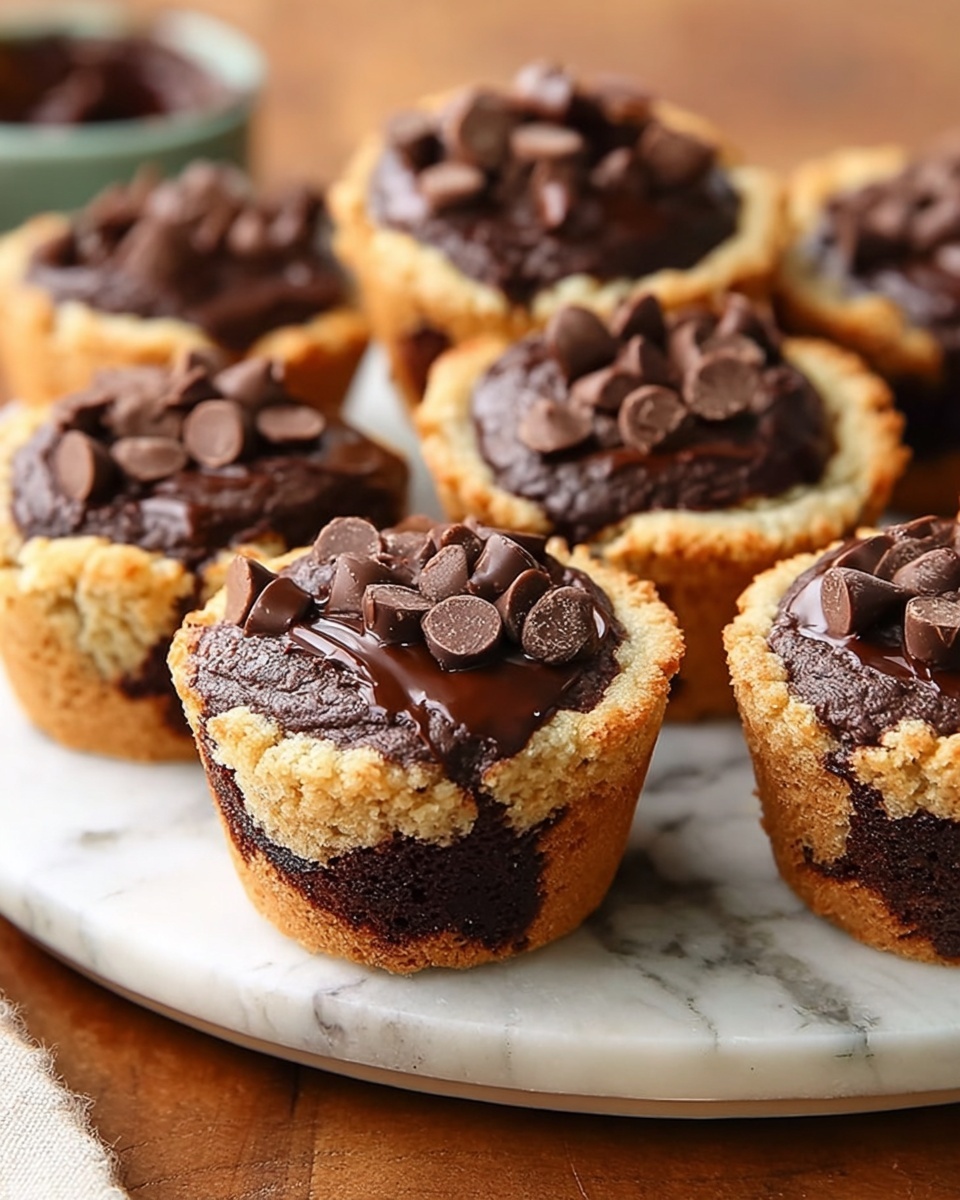
For the fudge filling, melt semisweet chocolate chips with sweetened condensed milk over simmering water, stirring until the mixture is perfectly smooth. Remove from the heat and stir in vanilla extract for added depth. Using a piping bag or spoon, fill each cooled cookie cup generously with the rich fudge. Allow the fudge to set so the filling holds beautifully.
How to Serve Fudge Filled Chocolate Chip Cookie Cups Recipe
Garnishes
Sprinkle a pinch of flaky sea salt or finely chopped nuts on top for a hint of crunch and contrast. You can also dust with a light coating of powdered sugar or drizzle some melted white chocolate to make each cup look extra special and irresistible.
Side Dishes
Serve these cookie cups alongside a scoop of your favorite vanilla or coffee ice cream for a decadent dessert pairing. For a refreshing touch, fresh berries or a dollop of whipped cream make a lovely complement, balancing the rich chocolate and fudgy sweetness.
Creative Ways to Present
Arrange the cookie cups in a pretty dessert tray lined with parchment paper for parties or gatherings. You can also insert a small decorative flag or toothpick for a playful party presentation. For a fun twist, serve them warm with a glass of cold milk or a cup of hot coffee—comfort in every bite!
Make Ahead and Storage
Storing Leftovers
You can store leftover cookie cups in an airtight container at room temperature for up to 3 days. Keep them away from direct sunlight or heat to maintain their shape and freshness.
Freezing
Freeze baked and filled cookie cups by placing them on a baking sheet first to freeze individually, then transferring them to a sealed freezer-safe container. They’ll keep for up to 2 months, letting you enjoy this dessert anytime.
Reheating
Thaw frozen cookie cups at room temperature for about 30 minutes, then warm briefly in a low oven (around 300°F) if you prefer the fudge melty and gooey again. Avoid microwaving for too long to preserve the cookie’s crisp edges.
FAQs
Can I use dark chocolate instead of semisweet chocolate?
Absolutely! Dark chocolate will give your cookie cups a richer, slightly more intense chocolate flavor, which many chocolate lovers adore. Just opt for a good-quality chocolate for the best result.
Is it necessary to press the cookie centers while warm?
Yes, pressing the centers while the cookies are warm helps form the perfect cup shape without cracking. Once cooled, the cookie cups will hold their shape better for filling and serving.
Can I make these gluten-free?
Yes, you can substitute the all-purpose flour with a gluten-free blend that measures cup-for-cup. Just ensure your baking soda and other ingredients are gluten-free as well for safety.
How long does the fudge filling take to set?
The fudge usually sets at room temperature within 1 to 2 hours. For quicker setting, refrigerate the filled cookie cups for about 30 minutes before serving.
Can I switch up the fudge filling flavor?
Definitely! Try mixing in a tablespoon of peanut butter or a splash of espresso to the fudge for an exciting new spin. You can also add chopped nuts or sea salt for extra texture and flavor layers.
Final Thoughts
There’s something truly special about the way the cookie exterior perfectly cradles that rich, dreamy fudge center in this Fudge Filled Chocolate Chip Cookie Cups Recipe. Each bite is an invitation to indulge in pure dessert happiness. I encourage you to try this recipe soon—whether for yourself or to impress your friends and family, these cookie cups are bound to become a cherished favorite in your baking repertoire.
Print
Fudge Filled Chocolate Chip Cookie Cups Recipe
- Prep Time: 30 minutes
- Cook Time: 12 minutes
- Total Time: 42 minutes
- Yield: 30-32 cookie cups
- Category: Dessert
- Method: Baking
- Cuisine: American
Description
These delicious Fudge Filled Chocolate Chip Cookie Cups combine soft, chewy chocolate chip cookies with a rich and creamy fudge filling. Perfect for parties or a decadent treat, these bite-sized cookie cups are baked in mini muffin tins and then filled with a luscious homemade fudge made from melted chocolate chips and sweetened condensed milk.
Ingredients
Cookie Cups
- 1 1/2 cups all-purpose flour
- 1/2 teaspoon salt
- 1/2 teaspoon baking soda
- 1/2 cup (4 ounces) unsalted butter, softened
- 3/4 cup packed brown sugar
- 1 egg, room temperature
- 1 teaspoon vanilla extract
- 1 cup semisweet chocolate chips
Fudge Filling
- 1 cup semisweet chocolate chips
- 3/4 cup sweetened condensed milk
- 1/2 teaspoon vanilla extract
Instructions
- Preheat Oven: Preheat your oven to 350°F (175°C) and prepare two mini muffin pans by greasing or lining with paper liners to ensure the cookie cups release easily after baking.
- Mix Dry Ingredients: In a medium bowl, whisk together the all-purpose flour, salt, and baking soda until evenly combined to prepare the dry base of the cookie dough.
- Cream Butter and Sugar: In a large bowl, using a mixer, cream the softened butter and packed brown sugar together for 2-3 minutes until the mixture is light and fluffy, which helps create a tender cookie texture.
- Add Egg and Vanilla: Beat in the room temperature egg and vanilla extract until fully incorporated, ensuring the dough is smooth and homogenous.
- Combine Dough: Gradually add the dry ingredients to the wet ingredients, mixing just until combined to avoid overworking the dough, which can result in tough cookies.
- Incorporate Chocolate Chips and Shape: Fold in 1 cup of semisweet chocolate chips evenly throughout the dough. Then, roll the dough into 1-inch balls and place each ball into a cup of the muffin pans to form the base for your cookie cups.
- Bake and Shape Cups: Bake the cookie balls in the preheated oven for 10-12 minutes until golden brown. Immediately after baking, use the back of a teaspoon to gently press the center of each cookie to create a cup shape. Allow the cookie cups to cool completely in the pan before removing.
- Prepare Fudge Filling: To make the fudge, melt 1 cup of semisweet chocolate chips with 3/4 cup sweetened condensed milk over simmering water (double boiler), stirring continuously until smooth. Remove from heat and stir in 1/2 teaspoon vanilla extract for added flavor.
- Fill Cookie Cups: Using a piping bag or a spoon, fill each cooled cookie cup with the prepared fudge. Let the filled cookie cups set at room temperature or in the refrigerator until the fudge is firm before serving.
Notes
- Ensure the butter and egg are at room temperature for easier mixing and better texture.
- Do not overmix the dough once the dry ingredients are added to keep the cookies tender.
- Press the cookie centers gently right after baking to create a perfect cup shape without cracking.
- The fudge filling can be stored separately and added just before serving for freshness.
- Store the finished cookie cups in an airtight container at room temperature for up to 3 days or refrigerate to extend freshness.


