
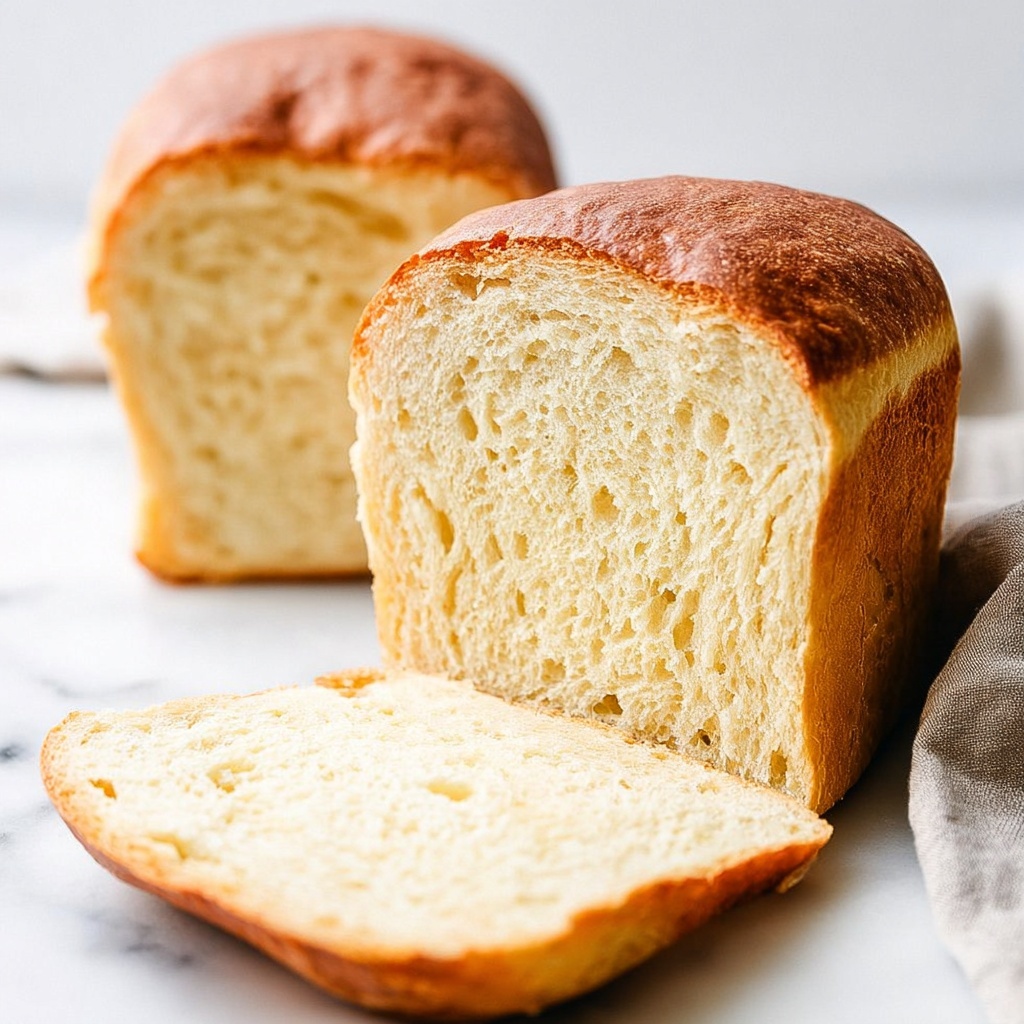
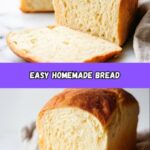
There is something truly magical about making bread from scratch, and with Grandma’s Perfect Homemade Bread Recipe, you get to experience that warm, comforting feeling right in your own kitchen. This recipe captures the essence of a timeless classic, delivering a loaf that’s soft inside with a golden crust, bursting with flavor that reminds you of cozy family breakfasts and fresh-baked memories. Whether you are a baking newbie or a seasoned pro, this recipe is a wonderful way to create bread that feels like a heartfelt gift—simple ingredients coming together to make something truly special.
Ingredients You’ll Need
Ingredients You’ll Need
Don’t let the simplicity fool you—each ingredient in this bread recipe plays an essential role in creating the perfect balance of flavor, texture, and color. From the warm water that activates the yeast to the oil that ensures softness, every component matters.
- 2 ½ cups warm water: Perfect temperature water helps proof the yeast for that beautiful rise.
- ¼ cup sugar: Adds just the right amount of sweetness to feed the yeast and enhance flavor.
- 1 ¼ teaspoon salt: Balances the sweetness and strengthens the dough’s gluten network.
- 1 Tablespoon dry active yeast: The magic ingredient that makes your bread fluff up and come alive.
- 5 cups all-purpose flour: Provides the structure and chewiness every good bread needs.
- 2 Tablespoons olive oil: Keeps the crumb tender and adds a subtle richness.
How to Make Grandma’s Perfect Homemade Bread Recipe
Step 1: Proof the Yeast and Combine Ingredients
Start by mixing warm water, sugar, salt, and active dry yeast in your stand mixer’s bowl. Be patient and allow the yeast to proof for about 5 minutes until you see bubbles forming—that’s your sign that the yeast is alive and kicking. Using a dough hook, slowly add your flour one cup at a time, mixing until a soft dough starts to form. This gradual addition ensures the dough is just the right texture, not too sticky or too dry.
Step 2: Knead the Dough
Transfer the dough to a floured surface and knead it by hand until it feels smooth and elastic—this usually takes about 8 to 10 minutes. Kneading is where all the magic happens to develop the gluten, giving your bread that perfect chew and structure. Once kneaded, form it into a ball, coat your bowl with oil, place the dough inside, and cover it tightly. Let it rise in a warm spot until it doubles in size, which should take about 1 to 1 ½ hours. Watching it rise is like watching a little miracle unfold.
Step 3: Shape and Second Rise
After the first rise, gently punch down the dough to release all the trapped air. On a floured surface, divide the dough into two equal parts and roll each into a loaf shape. Prepare two 9×5 inch pans by greasing and flouring them, then place your loaves inside. Cover the pans again and let the dough rise once more until doubled, about another 1 to 1 ½ hours. This second rise is crucial for that perfect fluffy texture when baked.
Step 4: Bake to Golden Perfection
Preheat your oven to 350 degrees Fahrenheit and bake the loaves for 30 to 35 minutes. You’ll know they are done when the tops turn a beautiful golden brown and the bread sounds hollow when tapped. Let your loaves cool for about 10 minutes before slicing to help set the crumb and avoid squishing the soft interior. The aroma alone makes waiting totally worth it.
How to Serve Grandma’s Perfect Homemade Bread Recipe
Garnishes
While the bread is perfect on its own, sprinkling a little coarse sea salt or brushing the top with melted butter right after baking adds a lovely touch. Fresh herbs like rosemary or thyme can be pressed gently into the top before baking to infuse an extra aromatic layer.
Side Dishes
This bread pairs excellently with almost anything! Serve it alongside a bowl of hearty soup, vibrant salads, or as the base for towering sandwiches stuffed with fresh veggies and your favorite meats or cheeses. It also shines when dipped into olive oil and balsamic vinegar as an elegant appetizer.
Creative Ways to Present Grandma’s Perfect Homemade Bread Recipe
Try cutting your loaf into thick slices and toasting them with garlic butter for a scrumptious garlic bread twist. You can also transform it into homemade croutons by cubing and baking with herbs and olive oil—perfect for adding crunch to salads or soups.
Make Ahead and Storage
Storing Leftovers
To keep your homemade bread fresh, store it in a bread box or wrapped loosely in a clean kitchen towel at room temperature. This will preserve the crust’s crispness while keeping the inside soft for a couple of days.
Freezing
If you want to enjoy Grandma’s Perfect Homemade Bread Recipe over a longer period, slicing and freezing the extra loaves is a smart move. Wrap the slices tightly in plastic wrap and place them in a freezer bag. This way, you can pull out just what you need and avoid waste.
Reheating
To bring frozen bread back to life, simply toast the slices or warm them in an oven at 350 degrees Fahrenheit for about 5 to 10 minutes. If it’s a whole loaf, wrap it in foil before warming to retain moisture and avoid drying out the crust.
FAQs
Can I use a different type of flour for Grandma’s Perfect Homemade Bread Recipe?
Absolutely! While all-purpose flour works beautifully and yields a soft texture, you can swap in bread flour for a chewier crumb or whole wheat flour for a nuttier flavor. Keep in mind that whole wheat may require slightly more water.
What if my yeast doesn’t bubble during proofing?
It could mean your yeast is inactive—make sure your water is warm but not hot, around 100°F to 110°F. Hot water can kill the yeast. If no bubbles appear after 5 to 10 minutes, try fresh yeast to ensure your bread rises properly.
Can I make the dough by hand instead of using a stand mixer?
Definitely! Hand mixing and kneading is traditional and perfectly fine. It just takes a bit more elbow grease but also gives a great sense of connection to the dough and the process.
Why do I need two rises in Grandma’s Perfect Homemade Bread Recipe?
The first rise helps develop flavor and structure, while the second rise after shaping ensures the bread is light and airy. Skipping either can result in a denser loaf.
How do I know when the bread is fully baked?
Look for a golden top and a hollow sound when tapping on the loaf’s bottom. If needed, use an instant-read thermometer—the internal temperature should be around 190°F to 200°F for perfectly baked bread.
Final Thoughts
Once you try Grandma’s Perfect Homemade Bread Recipe, I promise you’ll feel inspired to bake again and again. It’s such a joy to create something from simple ingredients that deliver comfort, warmth, and the timeless taste of homemade love. So roll up your sleeves, gather your ingredients, and get ready to fill your kitchen with the wonderful aroma of fresh bread—your future self will thank you!
Print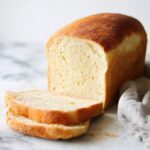
Grandma’s Perfect Homemade Bread Recipe
- Prep Time: 15 minutes
- Cook Time: 30 minutes
- Total Time: 2 hours 45 minutes
- Yield: 16 slices (2 loaves)
- Category: Bread
- Method: Baking
- Cuisine: American
Description
Grandma’s Perfect Homemade Bread is a classic, soft, and fluffy loaf made from simple ingredients. This recipe involves proofing yeast, kneading dough, allowing it to rise twice, and baking to golden perfection. The result is a delicious, tender bread perfect for sandwiches or toast, capturing nostalgic homemade flavors with a cozy texture.
Ingredients
Dough Ingredients
- 2 ½ cups warm water
- ¼ cup sugar
- 1 ¼ teaspoon salt
- 1 Tablespoon dry active yeast
- 5 cups all-purpose flour
- 2 Tablespoons olive oil
Instructions
- Proof the Yeast: In a stand mixer bowl, combine 2 ½ cups warm water, ¼ cup sugar, 1 ¼ teaspoon salt, and 1 Tablespoon dry active yeast. Allow the yeast mixture to proof until it bubbles, about 5 minutes, indicating the yeast is active and ready.
- Mix the Dough: Using the dough hook attachment, add 5 cups all-purpose flour one cup at a time into the yeast mixture until the dough forms a soft, cohesive mass. This ensures gradual incorporation and proper hydration.
- Knead the Dough: Transfer the dough onto a floured surface and knead it until smooth and elastic. Shape it into a ball. Lightly oil a large bowl with 2 Tablespoons olive oil, place the dough inside, and cover it. Let it rise in a warm place until it doubles in size, about 1 to 1 ½ hours.
- Shape and Second Rise: Grease and flour two 9×5 inch loaf pans. Punch down the risen dough to release air. Place the dough on a flat surface, cut it into two equal parts, shape each into a loaf by rolling, and put each loaf into the prepared pans. Cover and let rise again until doubled, approximately 1 to 1 ½ hours.
- Bake the Bread: Preheat the oven to 350°F (175°C). Bake the loaves for 30 to 35 minutes or until the tops are golden brown. Once baked, remove from oven and let cool in pans for 10 minutes before slicing to ensure clean cuts and a perfected crumb.
Notes
- Make sure the water is warm, not hot, to activate the yeast without killing it.
- Allow ample rising time for the dough to properly double in size; rising can be longer in cooler environments.
- Use all-purpose flour or bread flour for best texture.
- For a crustier loaf, place a pan of water in the oven while baking to create steam.
- Store bread in a sealed container or bread box to maintain freshness for up to 3 days.

