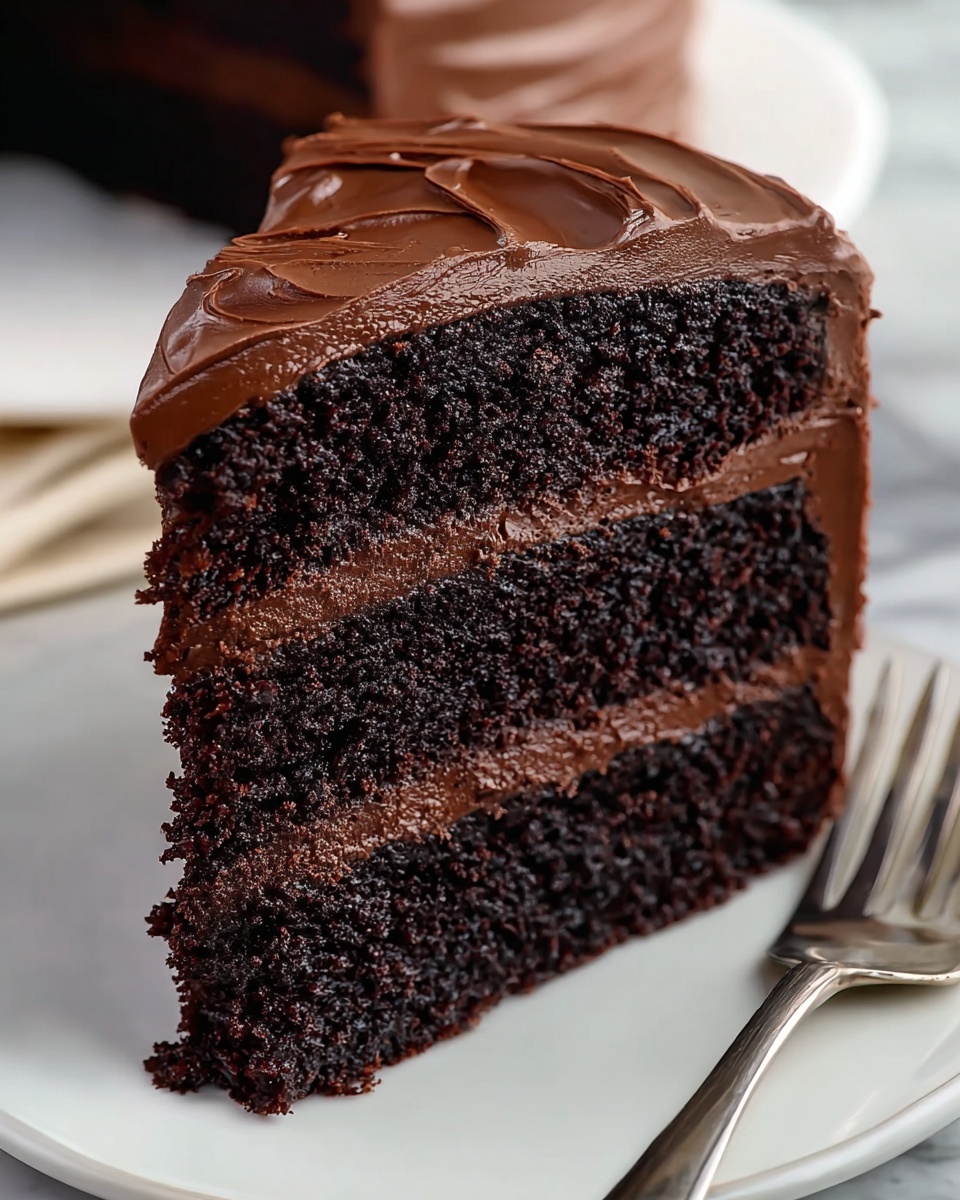
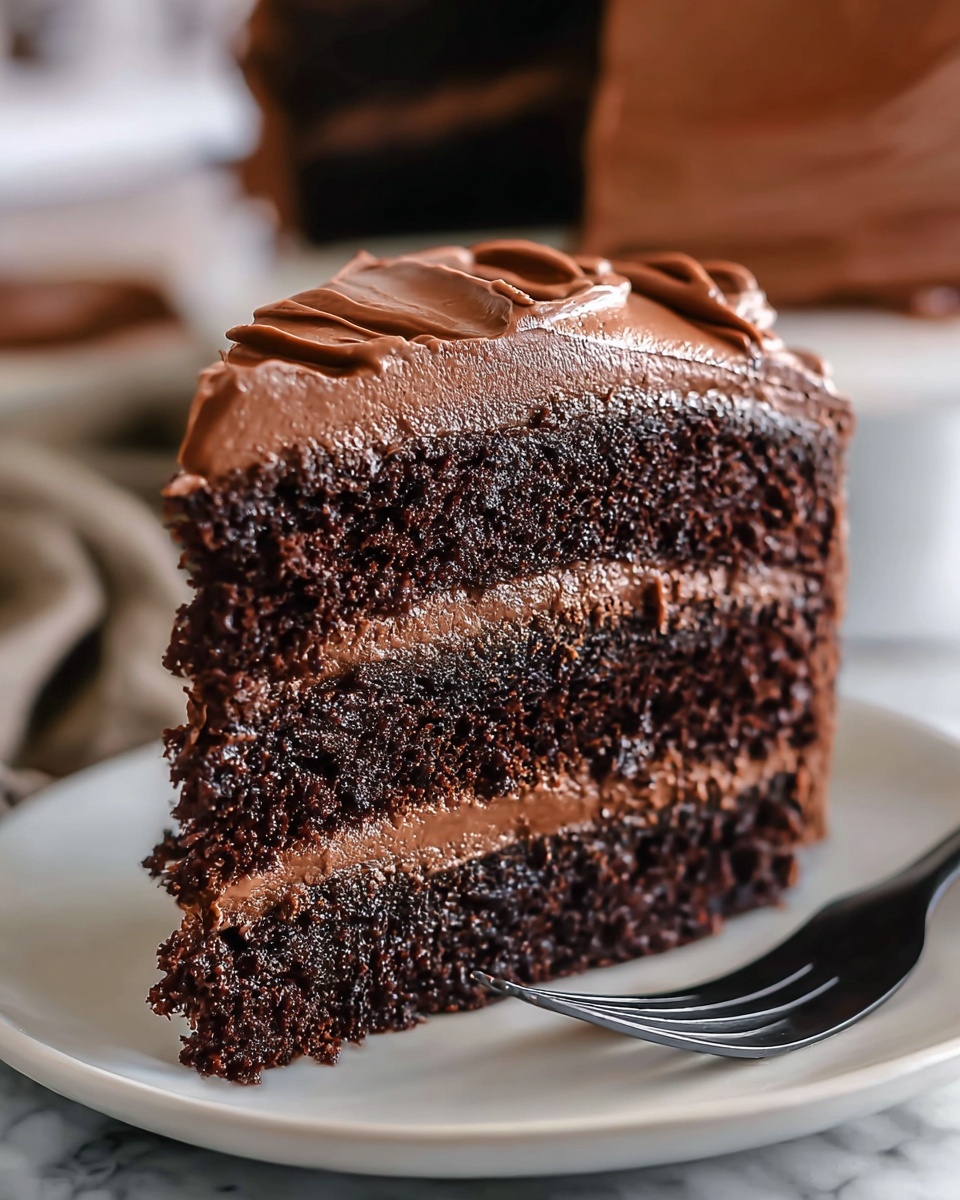
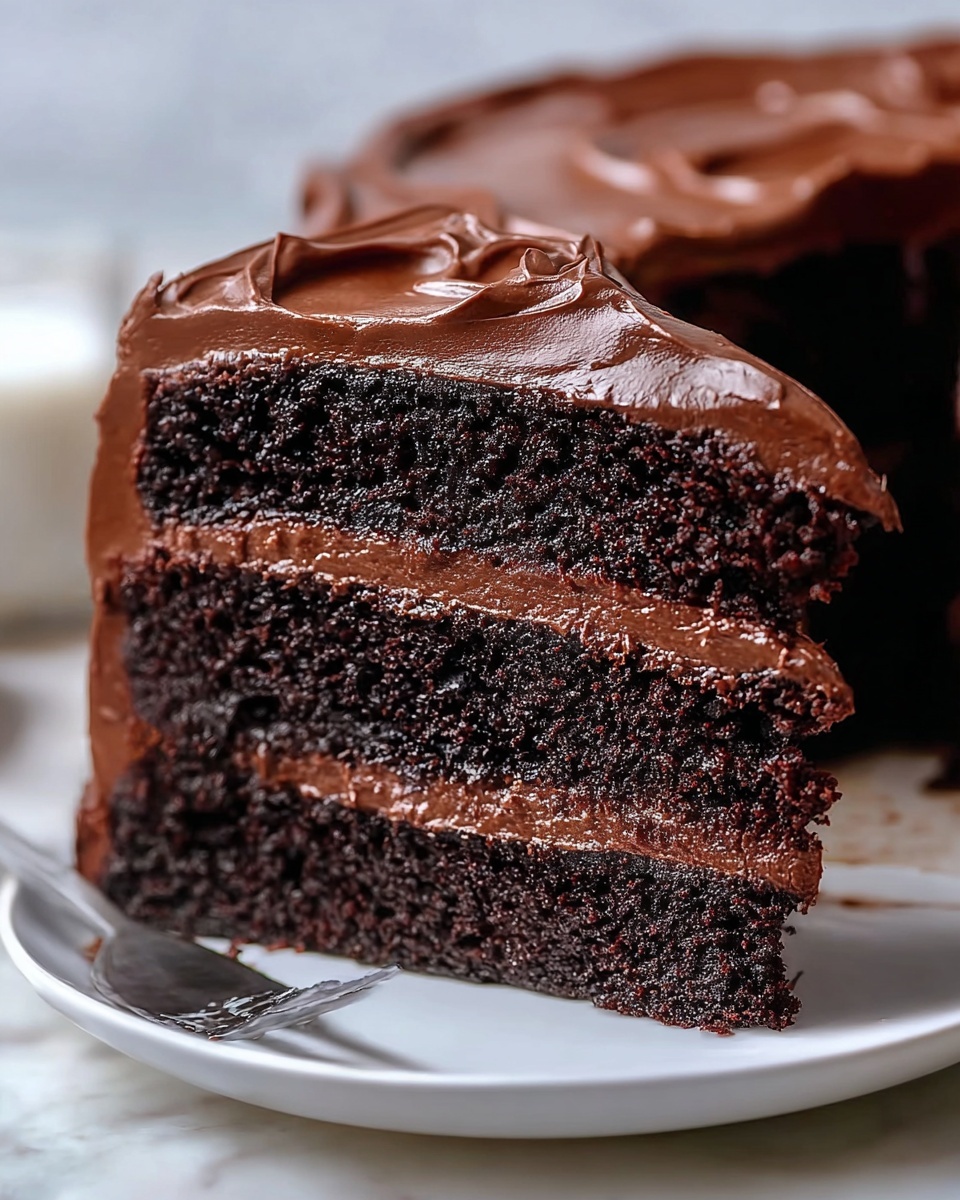
If you’re looking for a truly decadent treat that feels like a warm hug in dessert form, this Homemade Chocolate Cake with Rich Cocoa Frosting Recipe is your new best friend. It’s the perfect balance of fluffy, moist cake layers combined with a deeply chocolatey, velvety frosting that will make every bite melt in your mouth. Whether you’re baking for a special occasion or just because you deserve a little indulgence, this recipe brings all the classic chocolate cake magic with an extra boost of cocoa richness that’s bound to impress everyone at the table.
Ingredients You’ll Need
Sometimes the simplest ingredients create the most unforgettable desserts. Each item not only plays a key role in building flavor but also helps achieve the perfect texture and color that make this cake so irresistible.
- All-purpose flour: The foundation providing structure and a tender crumb to the cake.
- Granulated sugar: Sweetens the batter while keeping it light and airy.
- Baking powder and baking soda: These leavening agents make the cake rise beautifully and stay fluffy.
- Salt: Enhances all the flavors and balances the sweetness.
- Unsweetened cocoa powder: Delivers that rich, dark chocolate flavor and lovely color throughout.
- Milk (room temperature): Adds moisture and helps blend the ingredients evenly.
- Vegetable oil: Keeps the cake moist and tender without weighing it down.
- Eggs: Bind everything together and contribute to the cake’s soft texture.
- Vanilla extract: Adds a lovely warm aroma and depth to the chocolate.
- Boiling water: Intensifies the cocoa flavor and creates a smooth, thin batter perfect for baking.
- Unsalted butter (softened): Forms the creamy base of the luscious cocoa frosting.
- Powdered sugar (sifted): Sweetens and thickens the frosting for that silky finish.
- Milk for frosting: Adjusts the frosting’s consistency, making it easy to spread.
- Pinch of salt (for frosting): Balances the sweetness and highlights the chocolate depth.
How to Make Homemade Chocolate Cake with Rich Cocoa Frosting Recipe
Step 1: Preheat the Oven and Prep Pans
Start by setting your oven to 350°F (175°C). Grease two 9-inch cake pans and line them with parchment paper. This little prep work ensures your cakes will come out clean and perfect every time.
Step 2: Combine the Dry Ingredients
In a large bowl, whisk together your flour, sugar, baking powder, baking soda, salt, and unsweetened cocoa powder. This mix is the base that carries all the chocolate goodness and helps the cake rise evenly.
Step 3: Add Wet Ingredients to Dry
Mix the milk, vegetable oil, eggs, and vanilla extract into the dry ingredients. Stir just until combined; the batter should be smooth but avoid overmixing to keep the cake light and tender.
Step 4: Stir in Boiling Water
Slowly pour in the boiling water and mix until the batter is smooth. It will be thin, but that’s exactly what makes this cake irresistibly moist once baked.
Step 5: Bake to Perfection
Distribute the batter evenly between your prepared pans and bake for 30 to 35 minutes. You’ll know it’s ready when a toothpick inserted into the center comes out clean. This step locks in all the rich flavors and gives you those soft, airy layers.
Step 6: Cool Your Cakes
Let the cakes cool in their pans for about 10 minutes before transferring them onto wire racks. Allow them to cool completely to make frosting easier and prevent it from melting.
Step 7: Start the Cocoa Frosting Base
Melt the softened butter in a saucepan or microwave and whisk in cocoa powder until it forms a smooth, luscious paste. This combination gives the frosting its deep chocolate flavor and creamy texture.
Step 8: Whip Up the Frosting
In a large mixing bowl, gradually blend powdered sugar, milk, vanilla extract, and a pinch of salt into the butter-cocoa mixture. Beat it until the frosting is light, fluffy, and spreadable. You can tweak the milk quantity to get the perfect consistency.
Step 9: Frost the First Cake Layer
Place one cooled cake layer on a serving plate and slather an even layer of your rich chocolate frosting over the top. This first layer sets the stage for a beautifully stacked final cake.
Step 10: Stack and Cover
Put the second cake layer on top and generously coat the entire cake with the remaining frosting. Be sure to spread it smoothly over the sides for that classic decadent look.
Step 11: Let the Frosting Set
Allow your frosted cake to rest for a bit so the frosting firms up slightly. This step makes slicing neat and keeps every piece looking as stunning as it tastes.
How to Serve Homemade Chocolate Cake with Rich Cocoa Frosting Recipe
Garnishes
A simple dusting of cocoa powder or a handful of chocolate shavings on top elevates the cake’s presentation and boosts the chocolate experience. Fresh berries or edible flowers add a splash of color and a tangy contrast that pairs wonderfully with the rich frosting.
Side Dishes
This chocolate cake shines on its own but can be complemented by a scoop of creamy vanilla ice cream, a dollop of whipped cream, or even some fresh fruit salad for a balance of sweet and fresh flavors.
Creative Ways to Present
Try serving individual slices with a drizzle of warm chocolate ganache or a sprinkle of crushed nuts for added texture. For a party, cut the cake into mini squares and serve on decorative plates with a side of espresso or your favorite dessert wine.
Make Ahead and Storage
Storing Leftovers
Keep your leftover cake covered tightly in an airtight container at room temperature for up to two days to maintain its softness and freshness. If you need longer storage, refrigeration is a good option, though allow it to come to room temperature before serving.
Freezing
You can freeze unfrosted cake layers wrapped in plastic wrap and aluminum foil for up to three months. For a fully frosted cake, freezing is possible but the texture of the frosting might change slightly. Thaw in the fridge and bring to room temperature before serving.
Reheating
If you like your cake slightly warm, gently heat individual slices in the microwave for 10-15 seconds. This warms both the cake and frosting, enhancing the chocolate aroma and flavor while keeping it moist.
FAQs
Can I substitute the vegetable oil with butter in this recipe?
Absolutely, using melted butter instead of vegetable oil can add a richer, slightly denser texture and buttery flavor. Just make sure to cool the melted butter before mixing it into the batter to prevent cooking the eggs.
Why is the boiling water added to the batter?
The boiling water intensifies the cocoa flavor in the cake and helps dissolve the cocoa powder fully, resulting in a smoother, more vibrant chocolate taste and a thinner batter that bakes into moist layers.
How do I prevent the cake from drying out?
Follow the baking time closely and avoid overbaking. Also, the oil in this recipe keeps the cake moist, and storing the cake in airtight conditions will help retain that moisture.
Can I make this cake gluten-free?
Yes! Substitute the all-purpose flour with a gluten-free flour blend that’s suitable for baking. Just be mindful some blends might alter texture slightly, so look for one that contains xanthan gum or other binding agents.
What’s the best way to get smooth frosting?
Sift your powdered sugar before mixing and beat the frosting well until it’s fluffy and smooth. Adjust the milk and beat times for the consistency you want, and make sure the butter is softened, not melted.
Final Thoughts
This Homemade Chocolate Cake with Rich Cocoa Frosting Recipe isn’t just a dessert; it’s a celebration of chocolate that anyone can make at home with simple ingredients and heartfelt care. I can’t recommend it enough for your next baking adventure because it truly delivers on every chocolate lover’s dream. So grab your mixing bowl and get ready to enjoy every heavenly bite!
Print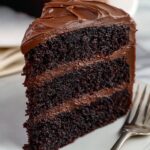
Homemade Chocolate Cake with Rich Cocoa Frosting Recipe
- Prep Time: 20 minutes
- Cook Time: 35 minutes
- Total Time: 55 minutes
- Yield: 12 servings
- Category: Dessert
- Method: Baking
- Cuisine: American
Description
This delicious homemade chocolate cake features moist, rich layers made with cocoa powder and topped with a smooth, creamy chocolate frosting. Perfect for celebrations or any chocolate craving, this classic dessert combines simple ingredients and easy steps for a crowd-pleasing treat.
Ingredients
Cake Ingredients
- 2 cups all-purpose flour
- 2 cups granulated sugar
- 1 1/2 tsp baking powder
- 1 1/2 tsp baking soda
- 1/2 tsp salt
- 3/4 cup unsweetened cocoa powder
- 1 cup milk (room temperature)
- 1/2 cup vegetable oil
- 2 large eggs
- 2 tsp vanilla extract
- 1 cup boiling water
Chocolate Frosting Ingredients
- 1 cup unsalted butter (softened)
- 3/4 cup unsweetened cocoa powder
- 4 cups powdered sugar (sifted)
- 1/2 cup milk
- 2 tsp vanilla extract
- Pinch of salt
Instructions
- Preheat the Oven: Set your oven to 350°F (175°C). Grease two 9-inch cake pans and line the bottoms with parchment paper to prevent sticking.
- Mix Dry Ingredients: In a large bowl, whisk together the flour, sugar, baking powder, baking soda, salt, and cocoa powder until well combined.
- Mix Wet Ingredients: Add the milk, vegetable oil, eggs, and vanilla extract to the dry mixture. Stir gently until just combined, being careful not to overmix.
- Add Boiling Water: Slowly pour in the boiling water while stirring. The batter will be thin, which is expected for a moist cake.
- Bake: Divide the batter evenly into the prepared pans. Bake for 30 to 35 minutes or until a toothpick inserted into the center comes out clean.
- Cool the Cakes: Allow the cakes to cool in their pans for 10 minutes before transferring them to a wire rack to cool completely.
- Melt the Butter: In a saucepan or microwave, melt the softened butter. Whisk in the cocoa powder until the mixture is smooth and well combined.
- Mix Ingredients: In a large bowl, combine the powdered sugar, milk, vanilla extract, and salt with the cocoa butter mixture. Beat until the frosting is smooth and fluffy. Adjust milk quantity if necessary to achieve the desired spreading consistency.
- Frost the Layers: Place one cooled cake layer on a serving plate and spread an even layer of chocolate frosting on top using a spatula.
- Stack and Frost: Place the second cake layer on top of the frosted layer. Apply the remaining frosting evenly over the top and sides of the cake.
- Set Before Serving: Let the frosted cake sit for a short while so the frosting can set before slicing and serving.
Notes
- Ensure all ingredients are at room temperature for the best texture in your cake.
- The batter will be thin after adding boiling water, which is normal and results in a moist cake.
- Use parchment paper in the pans for easy removal of the cake layers.
- Adjust milk quantity in the frosting to get your preferred consistency—thicker for spreading, thinner if you want it smoother.
- For a richer flavor, you can substitute milk with buttermilk or add a shot of espresso to enhance the chocolate taste.
- Make sure the cakes are completely cool before frosting to prevent the frosting from melting.
- Store leftover cake in an airtight container at room temperature for up to 3 days or in the fridge for up to 5 days.

