“`html
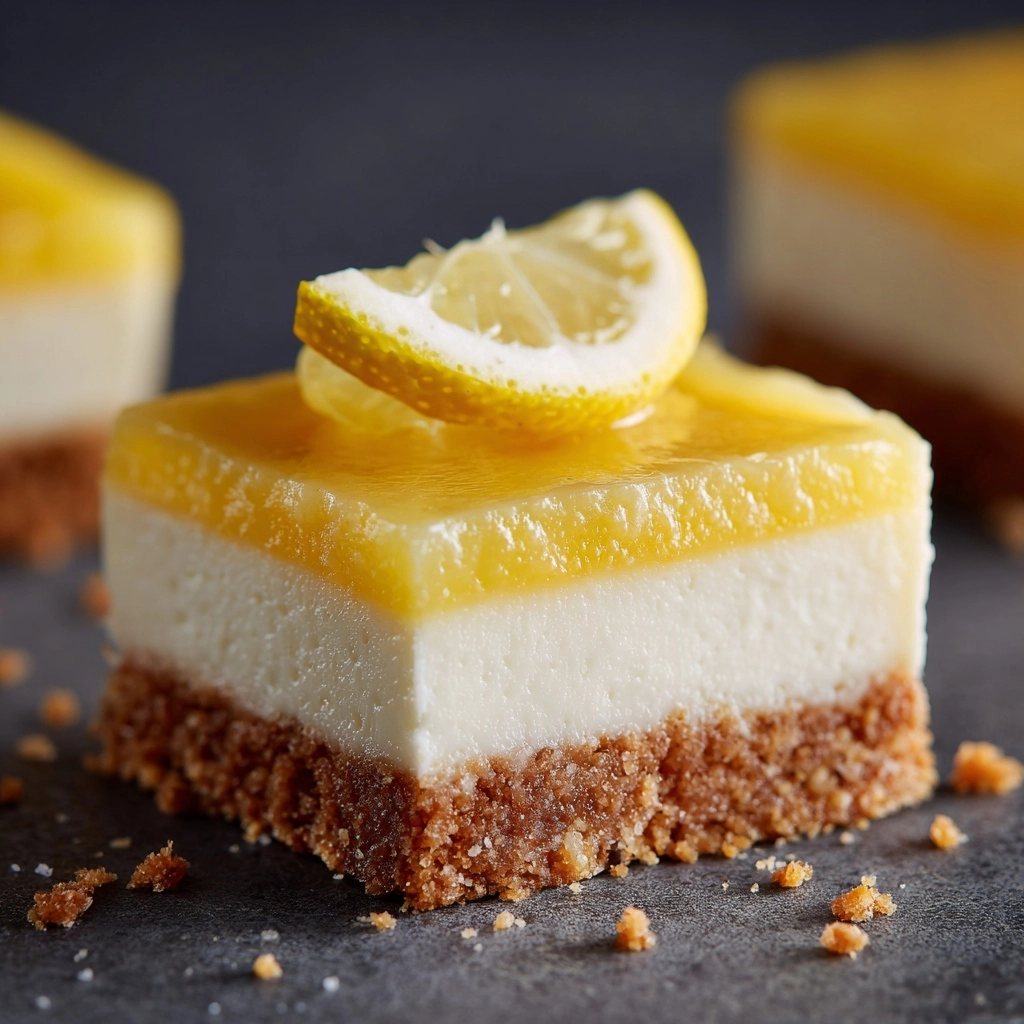
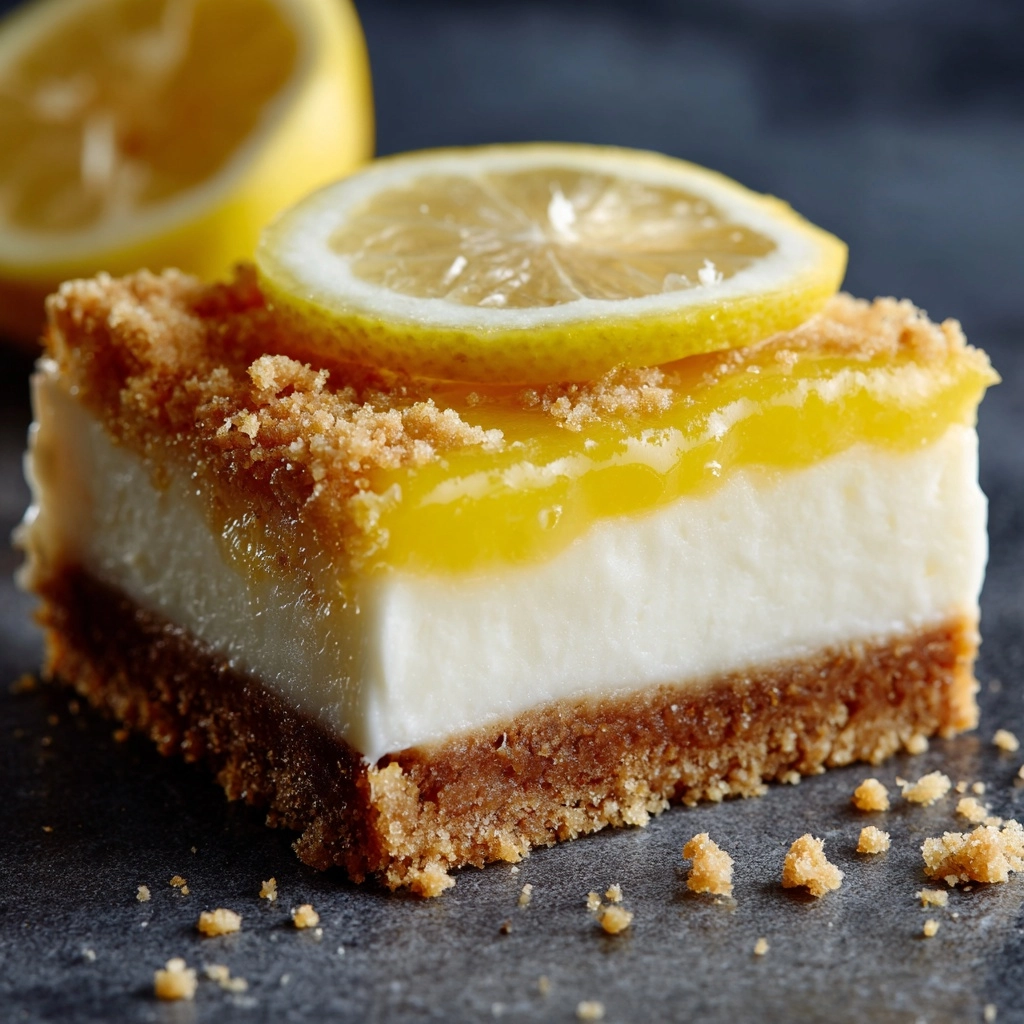
If you’re on the hunt for a dessert that perfectly marries tangy citrus brightness with a luxuriously creamy texture, I can’t recommend this Lemon Cream Cheese Bars Recipe enough. With a tender, buttery crust and a decadent cream cheese layer brightened by fresh lemon juice and zest, these bars are irresistibly delicious and sure to become your new favorite sweet treat. Every bite is like sunshine wrapped in velvet, making these bars fantastic for any occasion, from casual afternoon snacks to elegant dessert options.
Ingredients You’ll Need
These ingredients are delightfully simple but essential to achieving the perfect balance of taste, texture, and color for your Lemon Cream Cheese Bars Recipe. Each element has its role, whether it’s the crisp buttery crust or the smooth, tangy filling that steals the show.
- 1 cup all-purpose flour: Forms the sturdy yet tender base crust that holds everything together.
- 1/4 cup granulated sugar: Adds just a touch of sweetness to the crust without overpowering.
- 1/2 cup unsalted butter (cold and cut into cubes): Creates that perfect crumbly texture in the crust and adds richness.
- 8 ounces cream cheese (softened): The star ingredient of the filling, giving it the creamy texture and tangy flavor.
- 1/2 cup granulated sugar: Sweetens the cream cheese filling while balancing the lemon’s brightness.
- 1 large egg: Binds the filling together and ensures a smooth, custard-like finish.
- 2 tablespoons fresh lemon juice: Provides fresh, zesty citrus flavor that makes these bars so refreshing.
- 1 teaspoon lemon zest: Packs concentrated lemon aroma and flavor to elevate the filling.
- 1/2 teaspoon vanilla extract: Adds warmth and depth to the flavor profile, rounding out the tartness.
- Powdered sugar (for dusting, optional): Offers a pretty, delicate finish and an extra touch of sweetness when sprinkled on top.
How to Make Lemon Cream Cheese Bars Recipe
Step 1: Prepare the Crust
Start by preheating your oven to 350°F (175°C) and lining an 8×8-inch baking pan with parchment paper or lightly greasing it. In a medium bowl, mix the flour and 1/4 cup sugar together. Next, incorporate the cold butter cubes using a pastry cutter or fork until the mixture looks like coarse crumbs—this method ensures your crust will be perfectly flaky and buttery. Press this crumbly mixture firmly and evenly into the bottom of your pan. Bake it for 15 to 18 minutes, or until it turns a delicate golden color. This warm, fragrant crust sets the stage for that luscious lemon cream cheese filling.
Step 2: Make the Lemon Cream Cheese Filling
While the crust is baking, beat the softened cream cheese in a bowl until it’s completely smooth and creamy. Gradually add 1/2 cup sugar, then the egg, fresh lemon juice, lemon zest, and vanilla extract. Beat all these together until the mixture becomes luscious and well combined. The fresh lemon juice and zest brighten the filling beautifully, giving it that signature flavorful tang you’re after in a Lemon Cream Cheese Bars Recipe.
Step 3: Bake the Bars
Once your crust is slightly cooled but still warm, pour the creamy lemon mixture over it, smoothing the top so it’s nice and even. Bake again for 18 to 22 minutes until the filling is set—meaning it should have a gentle jiggle but not be liquidy. This final bake gives the bars their delightful custard-like texture that melts in your mouth.
Step 4: Cool and Chill
Allow the bars to cool completely at room temperature, then place them in the refrigerator for at least two hours. This chilling step is key to firming up the filling so you can cut perfect squares without any mess. Right before serving, dust with powdered sugar if you like a pretty, sweet finish that adds a little extra charm.
How to Serve Lemon Cream Cheese Bars Recipe

Garnishes
These bars are beautiful and flavorful enough on their own, but garnishes can take them to the next level. Try a light dusting of powdered sugar for a classic look or add thin lemon slices or curls on top for a burst of color. A sprig of fresh mint also pairs wonderfully, offering a refreshing aroma and contrasting green hue.
Side Dishes
Lemon Cream Cheese Bars pair exceptionally well with a scoop of vanilla ice cream or a dollop of lightly sweetened whipped cream to complement the tanginess. For a beverage, consider serving them alongside a cup of hot tea or iced herbal infusions like chamomile or mint, which highlight the citrus notes without overpowering.
Creative Ways to Present
For a crowd-pleaser, arrange the bars on a tiered dessert tray with other small treats like macarons or fresh berries. You can also serve individual bars on pretty plates garnished with edible flowers and a drizzle of berry coulis for a fancy touch. These bars can be wrapped up as charming homemade gifts when packed in decorative boxes or tied with pretty ribbons.
Make Ahead and Storage
Storing Leftovers
The Lemon Cream Cheese Bars Recipe keeps beautifully when stored in the refrigerator. Place them in an airtight container and enjoy within 4 to 5 days to maintain freshness and flavor. They stay moist and delicious, making them a perfect make-ahead dessert for busy weeks.
Freezing
If you want to keep these bars longer, they freeze wonderfully. Wrap each bar individually in plastic wrap, then place all wrapped bars in a freezer-safe container or bag. They’ll keep well for up to 2 months. When ready to enjoy, just thaw them overnight in the fridge, and you’re good to go!
Reheating
Because these are delicate cream cheese bars, reheating is not usually necessary and may change the texture. If you prefer them slightly warmer, leave them out at room temperature for about 30 minutes before serving to soften the filling gently without affecting their integrity.
FAQs
Can I use low-fat cream cheese for this Lemon Cream Cheese Bars Recipe?
You can, but full-fat cream cheese provides the best creamy texture and rich flavor. Low-fat versions might make the filling less smooth and a bit grainy.
Is it necessary to chill the bars before cutting?
Yes, chilling helps the filling firm up so that you can cut clean squares without the cream cheese layer falling apart or sticking to the knife.
Can I substitute lemon juice with lime juice?
Absolutely! Lime juice will give the bars a slightly different citrus note but keep the refreshing zing that makes this dessert so special.
What baking pan size should I use?
An 8×8-inch pan is ideal for this recipe, as it ensures the bars cook evenly and have the right thickness for satisfying bites.
Are powdered sugar and vanilla extract optional?
Powdered sugar is optional and primarily for garnish, but vanilla extract really helps round out the flavor, so it’s worth including in the filling.
Final Thoughts
Trust me when I say this Lemon Cream Cheese Bars Recipe is destined to become a beloved classic in your dessert repertoire. Its bright lemon flavor paired with the creamy filling and buttery crust offers pure bliss in every bite. Whether you’re serving it for family gatherings, special occasions, or simply indulging your sweet tooth, these bars never disappoint. Grab your ingredients and have fun baking something truly delightful—it’s a lovely way to share a little sunshine with the people you care about.
“`
Print
Lemon Cream Cheese Bars Recipe
- Prep Time: 15 minutes
- Cook Time: 35 minutes
- Total Time: 50 minutes plus cooling and chilling time
- Yield: 9 bars
- Category: Dessert
- Method: Baking
- Cuisine: American
- Diet: Vegetarian
Description
These Lemon Cream Cheese Bars blend a buttery, crumbly crust with a smooth, tangy lemon cream cheese filling for a perfect balance of sweet and citrusy flavors. Easy to prepare and bake, they make a delightful dessert or snack, ideal for summer or any occasion.
Ingredients
Crust
- 1 cup all-purpose flour
- 1/4 cup granulated sugar
- 1/2 cup unsalted butter (cold and cut into cubes)
Filling
- 8 ounces cream cheese (softened)
- 1/2 cup granulated sugar
- 1 large egg
- 2 tablespoons fresh lemon juice
- 1 teaspoon lemon zest
- 1/2 teaspoon vanilla extract
Optional Topping
- Powdered sugar (for dusting)
Instructions
- Preheat the oven: Set your oven to 350°F (175°C) and prepare an 8×8-inch baking pan by lining it with parchment paper or lightly greasing it to prevent sticking.
- Make the crust: In a medium bowl, combine the all-purpose flour and 1/4 cup sugar. Cut in the cold, cubed butter using a pastry cutter or fork until the mixture resembles coarse crumbs. Press this mixture evenly into the bottom of the prepared pan forming the crust layer.
- Bake the crust: Place the pan in the oven and bake for 15–18 minutes until the crust is lightly golden and set. This step ensures a firm base for your bars.
- Prepare the filling: While the crust bakes, beat the softened cream cheese in a separate bowl until smooth. Add 1/2 cup sugar, the egg, fresh lemon juice, lemon zest, and vanilla extract. Beat all together until the filling is creamy and well combined.
- Assemble the bars: Pour the cream cheese filling over the warm crust, smoothing the top evenly with a spatula for consistent texture.
- Bake again: Return the pan to the oven and bake for an additional 18–22 minutes or until the filling is set and does not jiggle when gently shaken.
- Cool and chill: Remove the pan from the oven and let the bars cool completely on a wire rack. After cooling, refrigerate them for at least 2 hours to allow the filling to firm up.
- Serve: Before serving, dust the bars with powdered sugar if desired. Cut into 9 bars and enjoy the luscious lemon cream cheese dessert.
Notes
- For enhanced lemon flavor, increase the lemon zest to 2 teaspoons.
- These bars can be stored in the refrigerator for up to 5 days.
- They can also be frozen for longer storage; thaw before serving.

