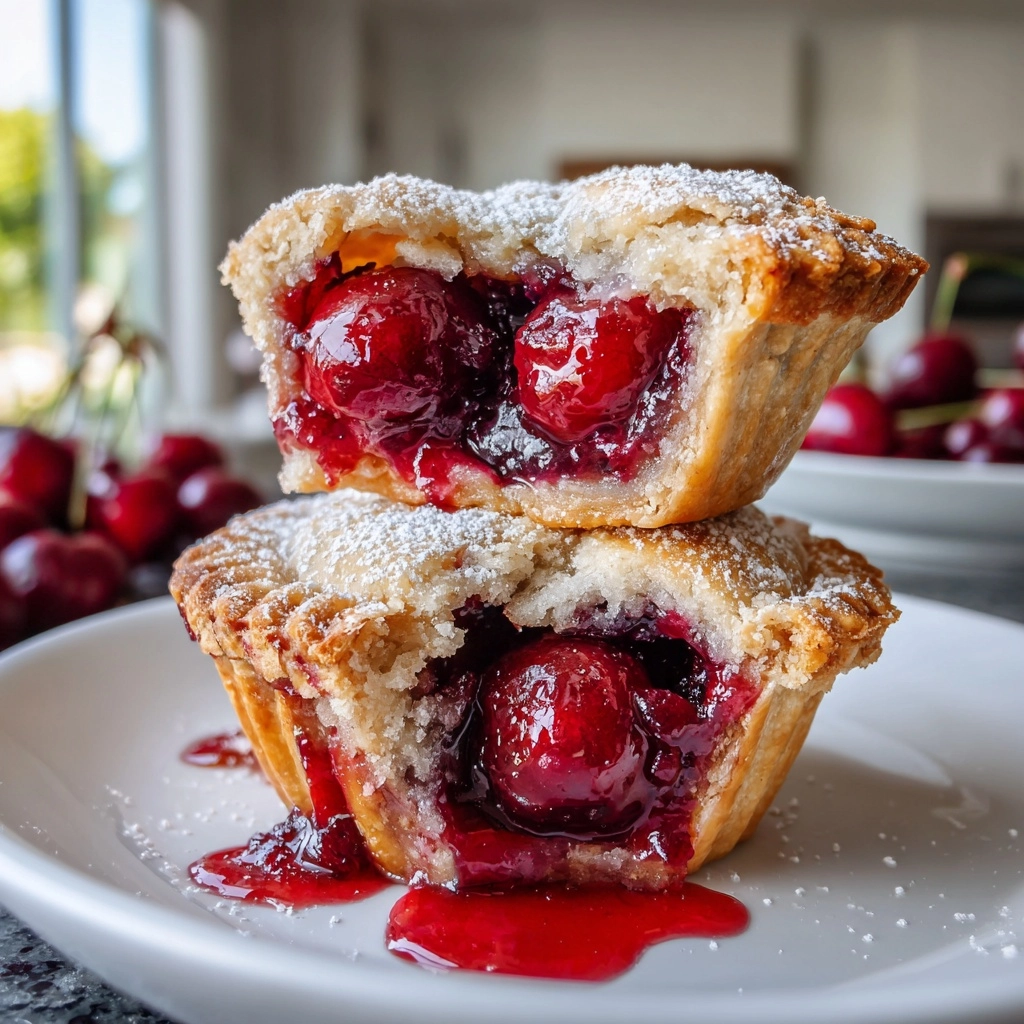
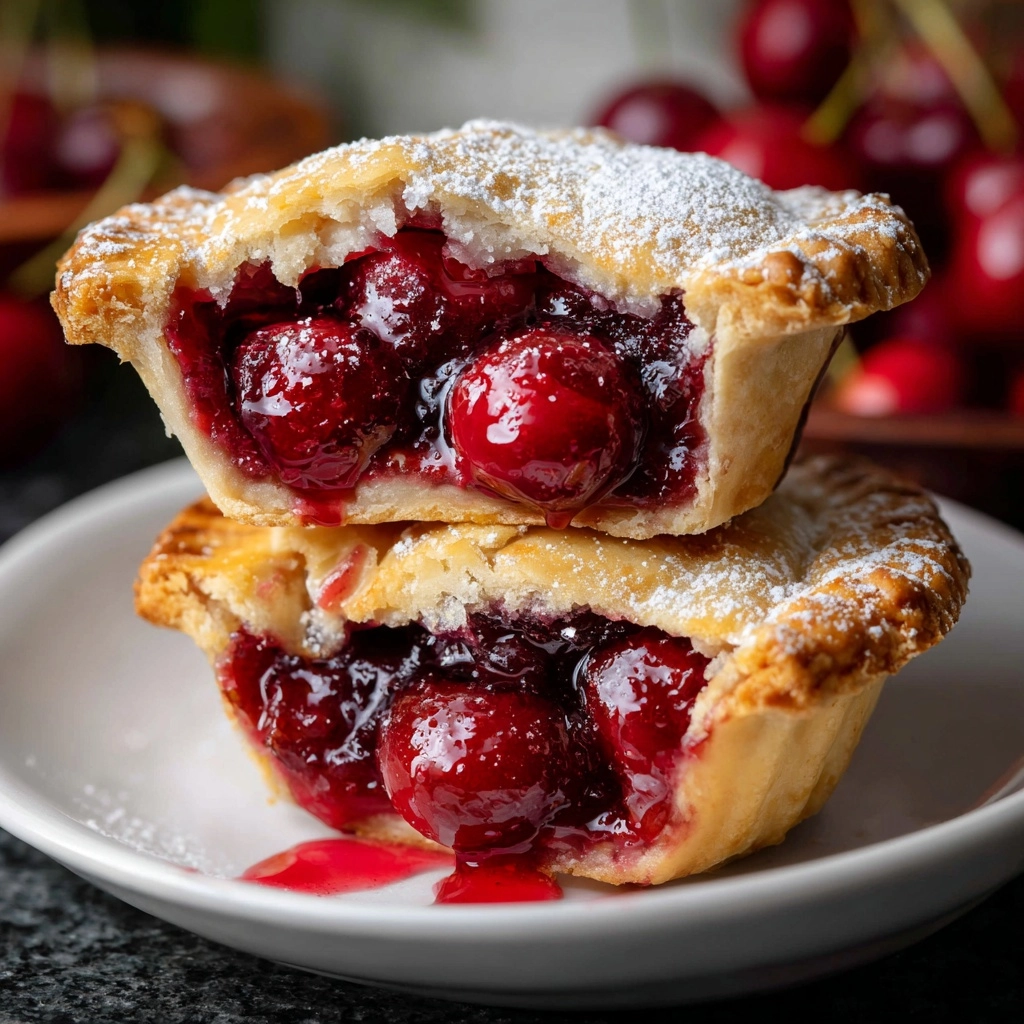
If you’ve ever dreamed of a perfectly sweet and flaky treat that fits right in the palm of your hand, the Mini Cherry Pies Recipe is here to make that dream come true. These delightful little pies sparkle with juicy cherry filling encased in a buttery crust, making them the ultimate crowd-pleaser for any occasion. Whether you’re whipping up a quick dessert for family or impressing guests with homemade charm, these mini cherry pies are as comforting as they are irresistible.
Ingredients You’ll Need
This Mini Cherry Pies Recipe keeps it simple with a handful of pantry staples that come together effortlessly to create that delightful balance of texture and taste. Each ingredient plays a key role, delivering the familiar flavors and that golden, flaky crust everyone loves.
- Cherry pie filling: The sweet and slightly tart star of the show, packed with juicy cherries that burst with flavor.
- Refrigerated pie crusts: Convenient and buttery, these crusts form the perfect flaky base and top for your mini pies.
- Egg: Beaten for egg wash, it gives the crust that beautiful golden sheen and helps the sugar stick.
- Granulated sugar: Sprinkled on top for a subtle crunch and a touch of sparkle.
- Flour for dusting: Keeps your workspace smooth and fuss-free when rolling out the dough.
How to Make Mini Cherry Pies Recipe
Step 1: Preheat and Prepare Your Dough
Start by preheating your oven to 375°F (190°C). Lightly flour your workspace to prevent sticking, then unroll the thawed pie crusts and cut out 3.5 to 4-inch rounds. You should aim for about a dozen circles that will become your mini pie shells and tops. This step sets the foundation for those perfectly shaped pies that will be a joy to eat.
Step 2: Form the Mini Pie Shells
Press half of your dough circles gently into the cups of a greased muffin tin. This forms the base of your mini pies and ensures a sturdy shell that will hold all that delicious cherry filling without any leaks. The muffin tin helps keep everything uniform and gives the pies a charming individual size.
Step 3: Fill with Cherry Filling
Spoon 1 to 2 tablespoons of cherry pie filling into each crust cup. Don’t be shy here—this is where all the bursting cherry goodness lives, so fill them up for maximum flavor in every bite. Be careful not to overfill to avoid spills during baking.
Step 4: Top and Seal the Pies
Now it’s time to cover each mini pie with the remaining dough rounds or get creative by cutting those tops into strips to create a classic lattice design. Gently press the edges to seal everything in. This step not only locks in the filling but also ensures that golden crust on top.
Step 5: Egg Wash and Sugar Sprinkle
Brush each pie top with your beaten egg wash to give it that irresistible glossy finish once baked. Then, sprinkle with a tablespoon of granulated sugar to add a little extra crunch and sparkle that invites you to dig in.
Step 6: Bake and Cool
Bake your pies for 18 to 22 minutes or until the crust is a gorgeous golden brown and the filling is bubbling joyfully beneath. Once out of the oven, let the pies cool in the pan for about 10 minutes before transferring them to a wire rack to cool completely—this helps them set just right.
How to Serve Mini Cherry Pies Recipe

Garnishes
These mini cherry pies shine when topped with a dollop of freshly whipped cream or a scoop of vanilla ice cream. A light dusting of powdered sugar or a sprinkle of cinnamon can also add a festive touch that elevates every bite.
Side Dishes
Serve these mini pies alongside a fresh green salad with a tangy vinaigrette or a scoop of creamy mascarpone for balance. They also pair wonderfully with a hot cup of coffee or a chilled glass of milk for a classic comfort combo.
Creative Ways to Present
Present your mini pies on a rustic wooden board or a colorful serving tray to showcase their charm. Add fresh cherries or mint leaves around them for a pop of color. You can even place them in decorative cupcake liners for a playful edible presentation that guests will love.
Make Ahead and Storage
Storing Leftovers
If you have leftovers (and you might!), store your mini cherry pies in an airtight container at room temperature for up to 3 days. This helps keep the crust tender but still slightly crisp, perfect for enjoying later without fuss.
Freezing
Want to save these sweet delights for later? Wrap each pie individually in plastic wrap and place them in a freezer-safe bag or container. They freeze beautifully for up to 2 months, making them a great make-ahead treat for busy days.
Reheating
To enjoy your frozen or refrigerated mini cherry pies again, warm them in a 350°F (175°C) oven for 10 to 15 minutes. This brings back the flaky crust and warm filling, making them taste freshly baked all over again.
FAQs
Can I use homemade pie crust instead of refrigerated?
Absolutely! Homemade dough will add an extra layer of flavor and can be tailored to your preferred thickness and texture. Just make sure it’s well-chilled for easy handling and cutting.
Is it possible to use fresh cherries in this Mini Cherry Pies Recipe?
Yes, but fresh cherries should be cooked slightly to create a thickened filling similar to canned pie filling. You’ll want to combine them with sugar and cornstarch, then simmer until thick before filling the pies.
How do I prevent the crust from getting soggy?
Ensuring your pie shells are well-pressed into the muffin tin and not overfilled helps prevent sogginess. Also, a quick egg wash and baking at the right temperature make for a crisp crust.
Can I make these pies gluten-free?
Yes! Substitute the regular pie crust with a gluten-free version available in stores or make your own. Just keep in mind the texture may vary slightly, but the delicious cherry filling will remain the star.
How long do mini cherry pies keep fresh?
Stored properly in an airtight container, these mini pies stay fresh for about 3 days at room temperature. Beyond that, freezing is your best bet to maintain freshness and flavor.
Final Thoughts
There’s something truly special about these bite-sized treasures, and I wholeheartedly encourage you to try this Mini Cherry Pies Recipe. It’s straightforward, fun, and incredibly rewarding. Whether you’re making them for a casual snack or a festive celebration, these mini pies bring a little joy in every flaky, fruity bite. Happy baking!
Print
Mini Cherry Pies Recipe
- Prep Time: 15 minutes
- Cook Time: 20 minutes
- Total Time: 35 minutes
- Yield: 12 mini pies
- Category: Dessert
- Method: Baking
- Cuisine: American
- Diet: Vegetarian
Description
These Mini Cherry Pies are a delightful handheld dessert, perfect for any occasion. Made with flaky refrigerated pie crusts and filled with sweet cherry pie filling, these bite-sized treats are easy to prepare and baked to golden perfection. A simple egg wash and sprinkle of sugar gives the crusts a beautiful shine and crunch. Ideal for serving at parties or enjoying as a quick sweet snack.
Ingredients
Pie Filling and Crust
- 1 (21-ounce) can cherry pie filling
- 1 box refrigerated pie crusts (2 crusts, thawed)
- Flour for dusting
Topping
- 1 egg (beaten for egg wash)
- 1 tablespoon granulated sugar (for sprinkling)
Instructions
- Preheat and Prepare Dough: Preheat the oven to 375°F (190°C). Lightly flour a clean surface and unroll the thawed pie crusts. Using a 3.5 to 4 inch round cutter, cut out approximately 12 dough circles for pie shells.
- Form Pie Shells: Gently press half of the dough circles into the cups of a greased muffin tin, shaping them to form mini pie shells.
- Fill Pies: Spoon 1 to 2 tablespoons of cherry pie filling into each prepared dough shell, distributing evenly.
- Top Pies: Cover each filled shell with the remaining dough circles or cut the dough into strips to create a lattice design. Press the edges gently to seal each mini pie.
- Apply Egg Wash and Sugar: Brush the tops with the beaten egg wash to enhance browning and shine, then sprinkle with granulated sugar for a sweet finish.
- Bake: Bake the mini pies in the preheated oven for 18 to 22 minutes, or until the crusts turn golden brown and the filling is bubbly.
- Cool: Remove from oven and let the pies cool in the muffin tin for 10 minutes before carefully transferring them to a wire rack to cool completely.
Notes
- These mini pies can be made ahead and stored in an airtight container for up to 3 days.
- For extra flavor, add a dash of almond extract to the cherry pie filling before assembling.
- Serve with whipped cream on top for a delicious finish.


