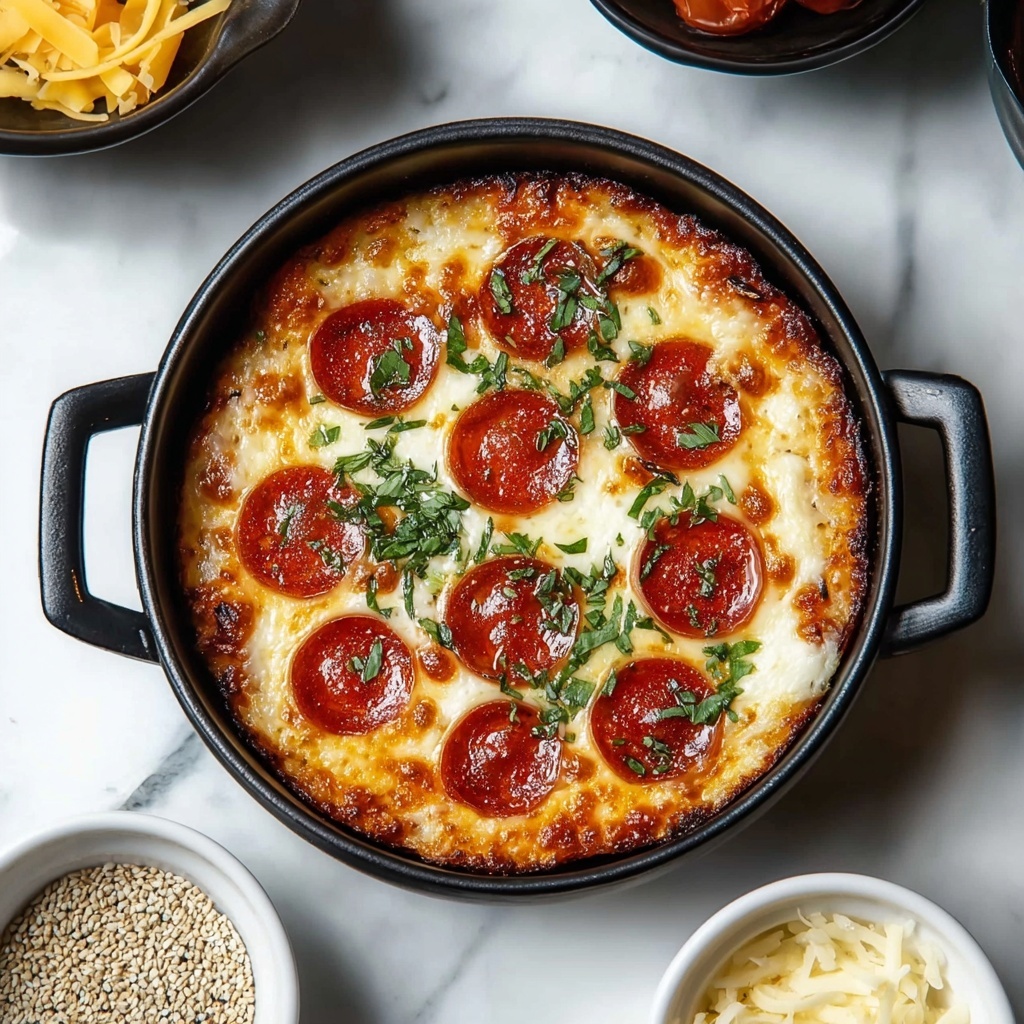
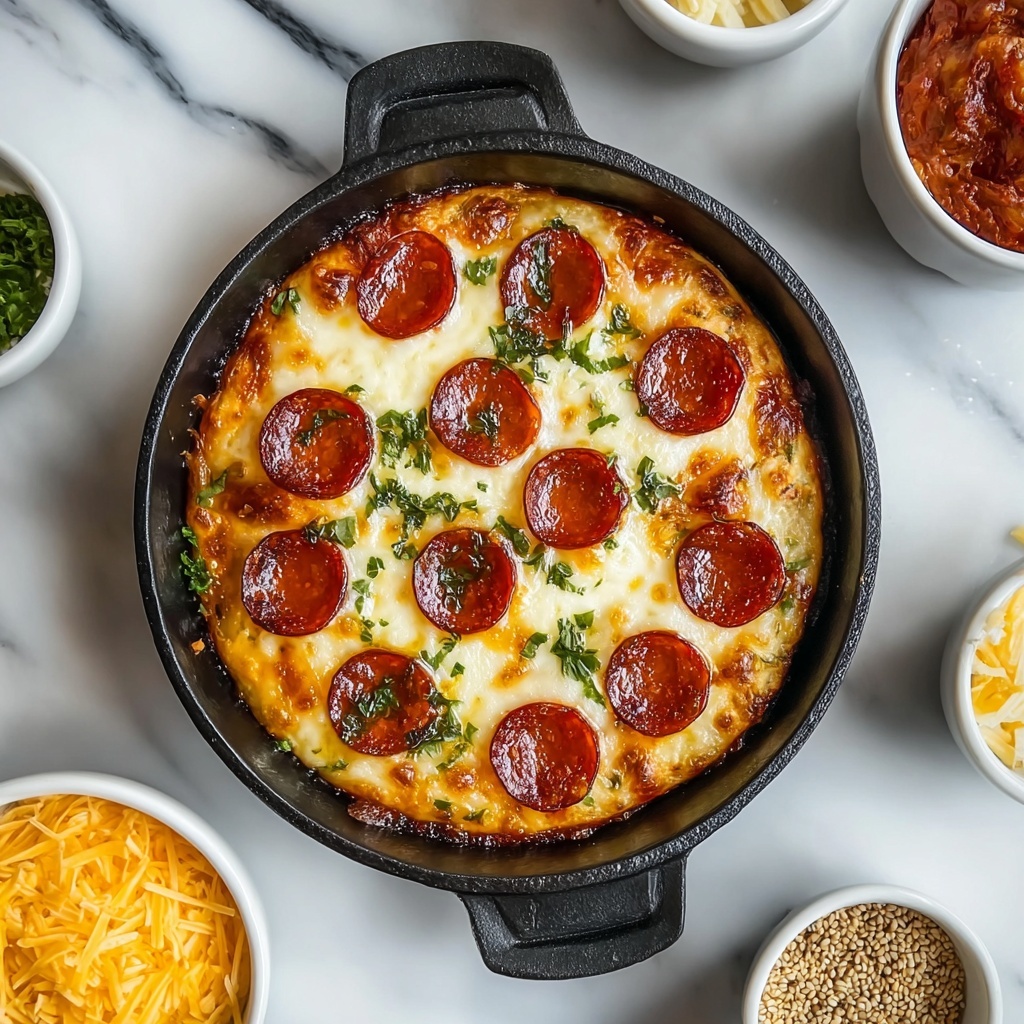
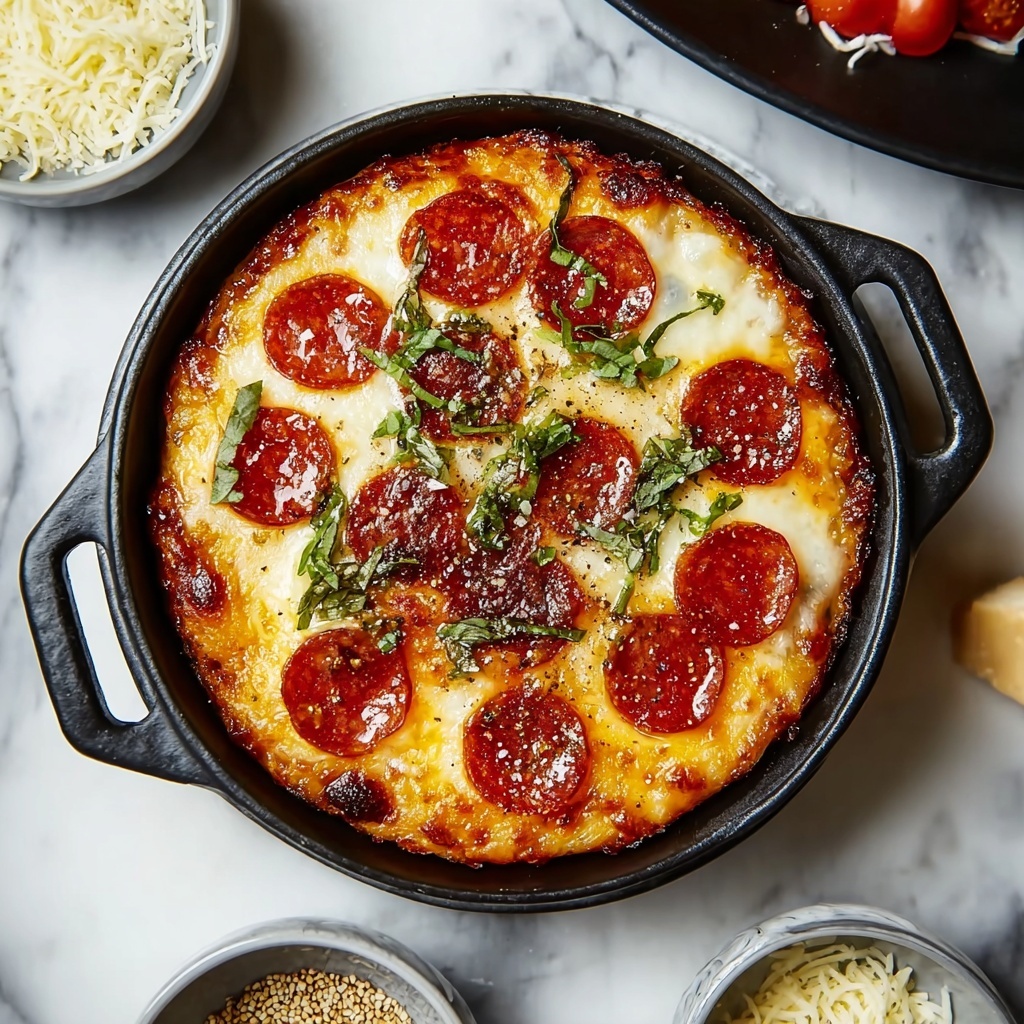
There is something truly magical about bite-sized foods that pack a full flavor punch, and the Mini Lunchbox Pizzas Recipe is a stellar example. These adorable little pizzas are easy to make, bursting with cheesy goodness, and customizable with your favorite toppings. Perfect for kids’ lunches, parties, or a quick snack, they marry the fun of pizza with the convenience of just the right portion size. From the soft, homemade crust to the vibrant blend of sauce, mozzarella, pepperoni, and fresh herbs, this recipe is a total winner that brings smiles to any table.
Ingredients You’ll Need
Simple and straightforward ingredients make this recipe accessible, but don’t let that fool you — each one plays a crucial role in creating the perfect mini pizza experience. They combine to deliver taste, texture, and color that make these bite-sized delights so irresistible.
- 1 cup all-purpose flour: The base for your dough, providing structure and chewiness.
- 1 teaspoon baking powder: Helps the dough puff up slightly, making each mini crust tender yet firm.
- 1/2 teaspoon salt: Balances the flavors and enhances the overall taste.
- 1/2 cup warm water: Hydrates the flour and activates the baking powder for the perfect dough consistency.
- 1 tablespoon olive oil: Adds richness to the dough and keeps it moist during baking.
- 1/4 cup pizza sauce: A vibrant, tangy topping that infuses classic pizza flavor.
- 1/2 cup shredded mozzarella cheese: Melts beautifully to create that irresistibly gooey, stretchy topping.
- 1/4 cup mini pepperoni slices: Adds a savory, slightly spicy element with a fun bite-sized twist.
- 1 tablespoon chopped fresh basil: Brings a refreshing herbal brightness that elevates the flavor profile.
- 1/4 teaspoon dried oregano: A classic Italian touch, giving depth and warmth to every bite.
How to Make Mini Lunchbox Pizzas Recipe
Step 1: Prepare your oven and baking sheet
Start by preheating your oven to 375°F (190°C) to ensure it’s hot and ready to give your mini pizzas that perfect golden crust. Line a baking sheet with parchment paper; this will prevent sticking and make cleanup a breeze.
Step 2: Mix dry ingredients
In a medium bowl, combine the all-purpose flour, baking powder, and salt. Stir them together to evenly distribute the baking powder, which is essential for the light texture of the dough.
Step 3: Add wet ingredients and form dough
Pour in the warm water and olive oil to the dry mix. Use a spoon or your hands to blend everything until the dough just begins to come together—it should feel soft but manageable.
Step 4: Knead and roll out the dough
Knead the dough for two to three minutes right in the bowl, aiming for a smooth and elastic texture. Then, transfer it to a lightly floured surface and roll it out to approximately 1/4-inch thick. This thickness is key for a crust that’s tender yet sturdy enough to hold toppings.
Step 5: Cut mini pizza shapes
Use a round cookie cutter, a small glass, or a knife to cut your dough into your favorite shapes—circles or squares both work wonderfully. This step is where your mini pizzas start to take their charming, bite-sized form.
Step 6: Add sauce and toppings
Place the dough rounds on your prepared baking sheet, leaving a little space between each one. Spoon a small amount of pizza sauce on top, spreading it carefully with the back of the spoon. Then sprinkle shredded mozzarella generously, followed by those cute mini pepperoni slices. Finish with fresh chopped basil and a dusting of dried oregano for that authentic flavor punch.
Step 7: Bake to perfection
Pop your tray into the oven and bake for 10 to 12 minutes. You’ll know they’re ready when the crust turns a warm golden color and the cheese melts into bubbly perfection. This quick baking time ensures the mini pizzas are piping hot and delicious.
Step 8: Cool and serve
Once baked, carefully remove the mini pizzas and let them cool for a minute or two—this makes them easier to handle and lets the cheese set slightly without losing its gooey appeal. Then, dig in and enjoy!
How to Serve Mini Lunchbox Pizzas Recipe
Garnishes
Enhance the look and flavor of your mini pizzas by adding a sprinkle of freshly grated Parmesan, a drizzle of extra virgin olive oil, or a few fresh basil leaves. These little touches make every bite even more indulgent and visually appealing.
Side Dishes
Pair these delightful mini pizzas with crisp vegetable sticks, a fresh garden salad, or a bowl of fruit salad for a balanced, colorful meal. The contrast between hot pizza and cool, crunchy sides is a match made in lunchbox heaven.
Creative Ways to Present
For a twist, serve mini pizzas on a wooden platter with small bowls of dipping sauces like ranch, garlic butter, or spicy marinara. You can also skewer them with toothpicks to create mini pizza pops, perfect for parties or fun lunches on the go.
Make Ahead and Storage
Storing Leftovers
Store any leftover mini pizzas in an airtight container in the refrigerator for up to 3 days. This keeps them fresh and ready for a quick snack or lunch the next day without losing their delightful flavor and texture.
Freezing
If you want to keep these mini pizzas longer, place them on a baking sheet and freeze until firm, then transfer to a freezer-safe container or bag. They can be frozen for up to 2 months, making them perfect for meal prep or emergency treats.
Reheating
To reheat, pop the mini pizzas in a preheated oven at 350°F (175°C) for about 5 to 7 minutes or until warmed through and the cheese is bubbly again. Avoid microwaving, as reheating in the oven preserves the crust’s crispness and cheesy goodness.
FAQs
Can I use a different type of cheese?
Absolutely! While mozzarella is classic for pizza, you can experiment with cheddar, Monterey Jack, or even a blend of cheeses to customize the flavor to your liking.
Is this recipe suitable for kids?
Definitely. The mini size is perfect for small hands, and you can easily adjust toppings to cater to picky eaters or add veggies for a nutritious twist.
Can I make the dough ahead of time?
Yes, you can prepare the dough in advance and keep it refrigerated for up to 24 hours. Let it come to room temperature before rolling out to make it easier to work with.
What if I don’t have mini pepperoni slices?
No worries! You can chop up regular-sized pepperoni or substitute with other toppings like diced ham, cooked sausage, or even vegetables.
How can I make this recipe gluten-free?
Try swapping the all-purpose flour for a gluten-free baking blend. Keep in mind the texture might vary slightly, so adjust water amounts as needed for the right dough consistency.
Final Thoughts
This Mini Lunchbox Pizzas Recipe is truly a little celebration in every bite. It’s quick to put together, uses simple ingredients, and delivers big on flavor and fun. Whether you’re packing lunch, throwing a party, or just craving something cozy and cheesy, these mini pizzas are a fantastic choice you’ll want to make again and again. Give this recipe a whirl—you might just discover your new favorite go-to snack!
Print
Mini Lunchbox Pizzas Recipe
- Prep Time: 0h 15m
- Cook Time: 0h 10m
- Total Time: 0h 25m
- Yield: 12 mini pizzas
- Category: Snack
- Method: Baking
- Cuisine: Italian-American
Description
These Mini Lunchbox Pizzas are perfect bite-sized treats ideal for kids’ lunches or quick snacks. Made with a simple homemade dough, topped with classic pizza sauce, mozzarella cheese, mini pepperoni slices, and fresh herbs, they bake to golden perfection in just 10 minutes. Easy to prepare and customizable, they’re a fun and delicious way to enjoy pizza in a mini format.
Ingredients
Dough
- 1 cup all-purpose flour
- 1 teaspoon baking powder
- 1/2 teaspoon salt
- 1/2 cup warm water
- 1 tablespoon olive oil
Toppings
- 1/4 cup pizza sauce
- 1/2 cup shredded mozzarella cheese
- 1/4 cup mini pepperoni slices
- 1 tablespoon chopped fresh basil
- 1/4 teaspoon dried oregano
Instructions
- Preheat the Oven: Preheat your oven to 375°F (190°C) and line a baking sheet with parchment paper to prevent sticking.
- Mix Dry Ingredients: In a medium-sized mixing bowl, combine the all-purpose flour, baking powder, and salt thoroughly.
- Combine Dry Ingredients: Stir the dry mixture well to ensure even distribution of baking powder and salt.
- Add Wet Ingredients: Pour in the warm water and olive oil to the dry ingredients.
- Form Dough: Mix the ingredients with a spoon or your hands until a dough starts to form.
- Knead Dough: Knead the dough in the bowl for 2 to 3 minutes until smooth and slightly elastic.
- Roll Out Dough: Transfer the dough to a lightly floured surface and roll into a rectangle or circle about 1/4-inch thick.
- Cut Dough Shapes: Cut the rolled dough into small circles or squares for mini pizzas.
- Arrange on Baking Sheet: Place dough pieces on the prepared baking sheet leaving space between each.
- Add Sauce: Spoon a small amount of pizza sauce onto each dough piece and spread evenly with the back of the spoon.
- Add Cheese: Generously sprinkle shredded mozzarella cheese over the sauce on each mini pizza.
- Add Pepperoni: Top each pizza with mini pepperoni slices evenly distributed over the cheese.
- Season: Sprinkle chopped fresh basil and dried oregano over each mini pizza for added flavor.
- Bake: Bake in the preheated oven for 10 to 12 minutes or until crust is golden and cheese is melted and bubbly.
- Cool: Remove the mini pizzas carefully from the oven and let cool for 1-2 minutes before serving.
- Serve: Serve the mini lunchbox pizzas warm and enjoy!
Notes
- For a gluten-free option, substitute all-purpose flour with a gluten-free blend.
- You can customize toppings with vegetables or different meats as desired.
- Use parchment paper or a silicone baking mat to prevent sticking and ease cleanup.
- Make sure the warm water is not too hot to avoid killing the baking powder’s effect.
- These mini pizzas are great for meal prep and can be refrigerated or frozen for later use.
