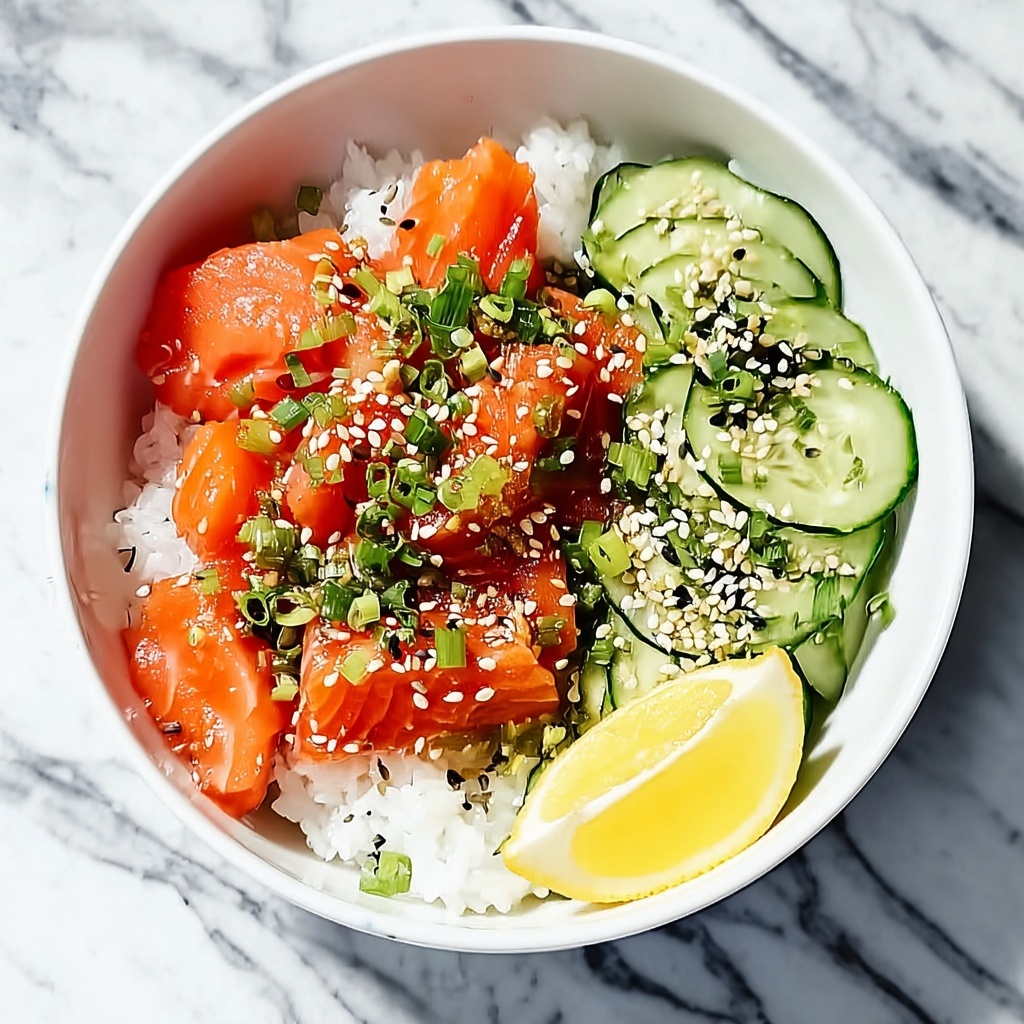
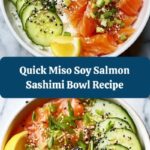
If you are craving something fresh, vibrant, and packed with umami goodness, the Quick Miso Soy Salmon Sashimi Bowl Recipe is your new best friend. This dish brings together the silky texture of sushi-grade salmon with the delightful combination of tangy miso, salty soy, and a hint of sweetness that makes every bite unforgettable. It’s refreshing yet comforting, perfect for a quick lunch or a light dinner that looks as beautiful as it tastes.
Ingredients You’ll Need
Getting this dish right is all about balancing simple, high-quality ingredients that each bring something unique to the bowl. From the rich salmon and bright cucumber to the aromatic sesame seeds and the deep umami of miso and soy, every item plays a crucial role in creating a bowl that bursts with flavor, texture, and color.
- 8 ounces Sushi-Grade Salmon: The star of the dish, providing buttery texture and fresh ocean flavors.
- 1 tablespoon Capers: Adds a briny punch that cuts through the richness of the salmon.
- 1/4 medium Red Onion: Offers a mild sharpness and vibrant color; green onions can be used for a gentler flavor.
- 1 medium Cucumber: Supplies a cool crunch that refreshes the palate.
- 1 tablespoon Sesame Seeds: Toast lightly for a nutty finish or swap for poppy seeds if you want a twist.
- 1 tablespoon Chives: Fresh herbs that add subtle onion notes and a pop of green.
- 2 tablespoons Olive Oil: Choose extra-virgin for a fruity depth that ties the dressing together.
- 1 teaspoon Sesame Oil: Optional but highly recommended for its fragrant, nutty aroma.
- 2 tablespoons Soy Sauce: The essential salty backbone; tamari works well if you need gluten-free.
- 2 tablespoons White Miso: Brings savory complexity and a slight sweetness to the bowl.
- 1 tablespoon Lemon Juice: Brightens the dish with citrusy freshness—lime juice works great too.
- 1 teaspoon Brown Sugar: Balances acidity and saltiness with a mild sweetness; honey is a good alternative.
- Flaky Salt: To taste; enhances every flavor carefully without overwhelming.
- Black Pepper: Freshly ground for a subtle spicy kick.
- 1 cup Sushi Rice (optional): For those wanting a more filling bowl base that soaks up all the flavors.
How to Make Quick Miso Soy Salmon Sashimi Bowl Recipe
Step 1: Prepare Your Salmon
Begin by slicing your sushi-grade salmon into delicate, bite-sized pieces. This ensures you get the perfect texture that melts in your mouth with every bite. Keeping the slices even helps with both presentation and palate balance.
Step 2: Make the Miso Soy Dressing
In a small bowl, whisk together the white miso, soy sauce, brown sugar, lemon juice, olive oil, and sesame oil if using. This dressing is the heart of your bowl, combining sweet, salty, and tangy notes in perfect harmony that will elevate your salmon and veggies.
Step 3: Slice and Prep Vegetables
Thinly slice the red onion and cucumber for a crisp texture contrast. Chop the chives finely to sprinkle on top later. These fresh ingredients add brightness and crunch that balance the richness of the salmon beautifully.
Step 4: Assemble the Bowl
If using sushi rice, cook it according to package instructions and let it cool slightly. In your serving bowl, place the rice (or simply use a bowl if skipping rice), then neatly arrange the sliced salmon, cucumber, and onion. Drizzle the miso soy dressing generously over the top to tie all components together.
Step 5: Garnish and Finish
Sprinkle the sesame seeds, capers, chives, flaky salt, and freshly ground black pepper over your bowl. These final touches are what make this bowl feel special and add enticing layers of flavor and texture.
How to Serve Quick Miso Soy Salmon Sashimi Bowl Recipe
Garnishes
Don’t underestimate the power of fresh garnishes. Additional sesame seeds, a few sprigs of fresh herbs like cilantro or microgreens, or even a small dollop of wasabi can bring a restaurant-quality finish that excites every sense.
Side Dishes
This quick miso soy salmon sashimi bowl pairs wonderfully with crunchy seaweed salad, pickled ginger, or a light miso soup. These sides complement the bowl’s flavors without overpowering them, creating a balanced and satisfying meal.
Creative Ways to Present
For a fun twist, try serving this bowl in vibrant ceramic dishes or glass bowls to showcase the bright colors. You can also place the salmon sashimi on a bed of mixed greens instead of rice for a refreshing, low-carb option that’s just as delicious.
Make Ahead and Storage
Storing Leftovers
If you have any leftover salmon sashimi bowl components, store the salmon separately in an airtight container in the fridge and consume within 24 hours. Keep the dressing and vegetables separate to maintain freshness and texture.
Freezing
Freezing is not recommended for this dish because the delicate texture of sashimi-grade salmon and fresh vegetables will degrade significantly upon thawing, compromising flavor and safety.
Reheating
This recipe is best enjoyed fresh and cold. If you’ve included sushi rice, you can gently warm the rice separately before assembling the bowl to avoid heating the salmon or fresh vegetables, which should remain chilled for the best experience.
FAQs
Can I use cooked salmon for this bowl?
While you can substitute cooked salmon, the essence of the Quick Miso Soy Salmon Sashimi Bowl Recipe relies on the fresh, raw texture and flavor of sushi-grade salmon. Cooking will change the experience but might still be tasty in a pinch.
Is white miso essential, or can I use red miso?
White miso has a milder, sweeter flavor perfect for this dish, but red miso can be used if you prefer a deeper, earthier taste. Just use it sparingly as it is saltier and stronger.
How do I choose sushi-grade salmon safely?
Always purchase salmon labeled as sushi-grade from a trusted fishmonger or grocery store. This ensures it has been frozen properly to kill parasites and is safe for raw consumption.
Can I add avocado or other veggies to this bowl?
Absolutely! Creamy avocado, radishes, or even shredded carrots add texture and nutrition, making the bowl your own. Just remember to keep balance with the miso soy flavors.
What can I use if I don’t have capers?
If capers aren’t available, green olives finely chopped or a few spritzes of lemon zest can mimic their tangy, briny flavor and provide a similar bright punch.
Final Thoughts
There’s something incredibly satisfying about enjoying a Quick Miso Soy Salmon Sashimi Bowl Recipe that’s fresh, flavorful, and fuss-free. Whether you’re treating yourself on a busy day or impressing friends with a simple yet elegant meal, this bowl delivers every time. Give it a try and watch how it quickly becomes a weeknight favorite you’ll want again and again.
Print
Quick Miso Soy Salmon Sashimi Bowl Recipe
- Prep Time: 15 minutes
- Cook Time: 0 minutes
- Total Time: 15 minutes
- Yield: 2 bowls
- Category: Main Dish
- Method: No-Cook
- Cuisine: Japanese
- Diet: Gluten Free
Description
This Quick Miso Soy Salmon Sashimi Bowl is a fresh and flavorful dish featuring sushi-grade salmon marinated in a savory miso soy dressing, served raw with crisp vegetables and optional sushi rice. Perfect for a light, elegant meal you’ll crave every week.
Ingredients
Salmon and Vegetables
- 8 ounces Sushi-Grade Salmon (Always ensure you use sushi-grade for safety in raw dishes.)
- 1 tablespoon Capers
- 1/4 medium Red Onion (For a milder taste, swap with green onions.)
- 1 medium Cucumber (Choose any firm variety for the best results.)
- 1 tablespoon Sesame Seeds (Poppy seeds can be used for a twist.)
- 1 tablespoon Chives (Fresh herbs like parsley can work instead.)
Marinade and Dressing
- 2 tablespoons Olive Oil (Opt for extra-virgin for the best flavor.)
- 1 teaspoon Sesame Oil (Optional, adds a nutty aroma.)
- 2 tablespoons Soy Sauce (Use tamari for gluten-free option.)
- 2 tablespoons White Miso (Red miso can be a great substitute.)
- 1 tablespoon Lemon Juice (Lime juice can also serve as an alternative.)
- 1 teaspoon Brown Sugar (Honey can be used for a warmer sweetness.)
- Flaky Salt to taste
- Black Pepper to taste
Optional
- 1 cup Sushi Rice (Optional base for a heartier meal.)
Instructions
- Prepare Sushi Rice (Optional): If using sushi rice, cook 1 cup of sushi rice according to package instructions. Allow it to cool slightly before serving.
- Slice the Salmon: Carefully slice the sushi-grade salmon into thin sashimi-style pieces ensuring freshness and safety for raw consumption.
- Prepare Vegetables: Thinly slice or finely chop the red onion and cucumber. Chop chives finely for garnish.
- Make the Marinade: In a bowl, whisk together olive oil, sesame oil, soy sauce, white miso, lemon juice, and brown sugar until smooth and well combined.
- Combine Ingredients: In a serving bowl, arrange the sliced salmon, cucumber, and red onion. Drizzle the miso soy dressing over the top and gently toss to coat the salmon and vegetables evenly.
- Season and Garnish: Sprinkle capers, sesame seeds, and chives on top. Add flaky salt and freshly ground black pepper to taste.
- Assemble the Bowl: If using, place the cooled sushi rice at the base of each serving bowl before adding the dressed salmon and vegetable mixture on top.
- Serve Immediately: Enjoy the dish fresh for best flavor and texture.
Notes
- Always use sushi-grade salmon to ensure safety when consuming raw fish.
- Red onion can be swapped for green onions for a milder flavor.
- White miso can be replaced with red miso for a deeper flavor profile.
- Soy sauce can be substituted with tamari to make the dish gluten-free.
- For a sweeter touch, honey can replace brown sugar in the marinade.
- The addition of sushi rice is optional and can make the dish more filling.
- Consume immediately after preparation for the best taste and freshness.

