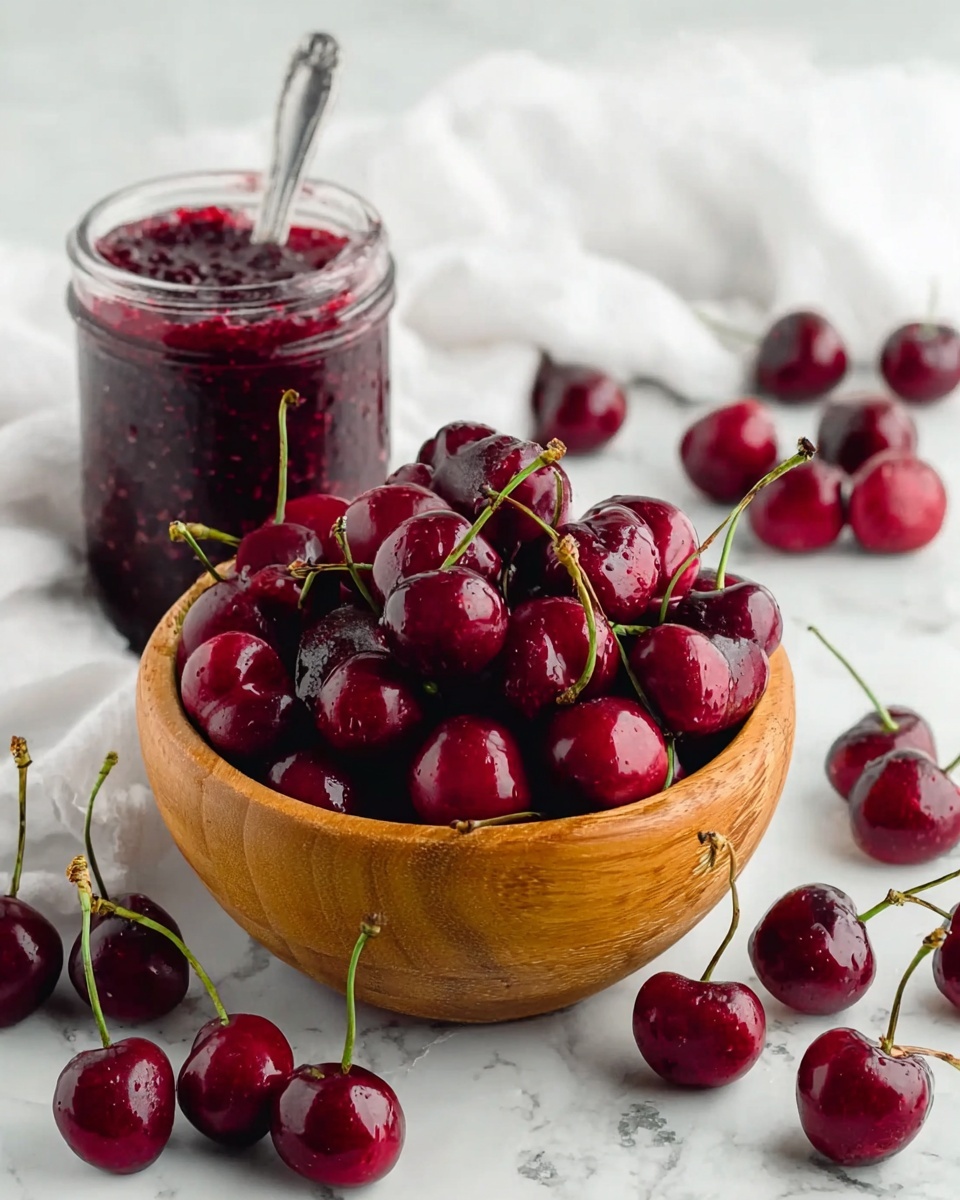
If you’ve ever wanted to capture the vibrant, sweet-tart flavor of fresh cherries in a small, manageable batch, look no further than this Small Batch Cherry Jam Recipe. It’s a charming way to turn just a few cups of cherries into a luscious, spreadable treat that’s perfect for toast, yogurt, or even as a surprise twist in your baking. This recipe is simple, quick, and delivers that homemade flavor that makes every bite feel special. Plus, making small amounts means you’re always enjoying the jam at peak freshness without worrying about it sitting unused for months.
Ingredients You’ll Need
Gathering the ingredients for this Small Batch Cherry Jam Recipe is refreshingly straightforward. Each component plays a key role: fresh cherries bring that gorgeous color and balance of sweet and tart, sugar naturally sweetens and helps preserve, while lemon juice brightens the flavors and assists in achieving the perfect jam consistency.
- Sweet cherries (2½ cups, halved and pitted): Fresh or frozen work wonderfully; make sure they’re ripe for the best natural sweetness and vibrant color.
- Granulated sugar (1 cup): Balances the tartness of the cherries and helps the jam set properly.
- Lemon juice (2 tablespoons): Adds bright acidity and enhances the jam’s shelf life by aiding the gelling process.
How to Make Small Batch Cherry Jam Recipe
Step 1: Combine the Ingredients
Start by placing your halved and pitted cherries, sugar, and fresh lemon juice into a medium-sized pot. At this stage, everything is simple and raw, but these ingredients are about to transform into a beautifully rich jam. Mixing them together ensures the sugar begins dissolving evenly into those succulent cherries.
Step 2: Gently Heat the Mixture
Set the pot over medium heat and stir occasionally. You’ll notice the sugar dissolve completely and the juice turning a deep, tempting dark red. For fresh cherries, this takes about five minutes; frozen cherries need a bit longer, roughly ten minutes. This step is crucial for building the jam’s base flavor.
Step 3: Bring to a Rolling Boil
Turn up the heat so the mixture comes to a rolling boil that you can’t stir down. Let it bubble vigorously for about 8 to 10 minutes, stirring now and then to prevent sticking. Keep an eye on the temperature—when it hits 220°F (105°C), the jam is sealing its perfect consistency. The cold plate test helps you know for sure: a dollop that holds in place means you’re on the right track.
Step 4: Blend the Cherries
Remove the pot from heat carefully. Use an immersion blender for just a few seconds at a time to break down the cherry pieces until they’re mostly smooth but still with some delightful texture. Tilting the pan helps keep the blender submerged and your jam lump-free without overworking it.
Step 5: Jar and Cool
Pour your hot cherry jam into clean jars, seal them tightly, and pop them in the fridge. The magic happens as the jam cools and thickens, so let it sit overnight if you can. Trust me, the spreadability and flavor develop beautifully, making every spoonful worth the wait.
How to Serve Small Batch Cherry Jam Recipe
Garnishes
A sprinkle of chopped fresh mint or a few whole cherries on top of a dollop adds a fresh, eye-catching pop when serving. A delicate swirl of creamy ricotta or yogurt can also complement the sweet-tart notes and elevate presentation.
Side Dishes
This jam shines paired with warm buttered toast, flaky croissants, or even savory cheeses like brie or sharp cheddar. It also works wonderfully alongside breakfast dishes such as pancakes, waffles, or oatmeal, making mornings feel extra special.
Creative Ways to Present
Think beyond the usual toast—try adding a spoonful to a vinaigrette for salads, swirl it into your smoothie bowl, or use it as a glaze for grilled meats or roasted vegetables. The concentrated cherry flavor brings a playful sweetness and bright color to many dishes.
Make Ahead and Storage
Storing Leftovers
If you have any jam left after a few days, keep it tightly sealed in the fridge. Thanks to its natural acidity and sugar content, it should stay fresh for up to three weeks, allowing you to savor those cherry bursts without rush.
Freezing
The Small Batch Cherry Jam Recipe also freezes well if you want to extend its life. Use airtight containers or freezer-safe jars, leaving enough space for expansion. Thaw in the fridge overnight, and your jam will retain its lovely texture and flavor.
Reheating
When you’re ready to use frozen jam, gently warm it over low heat to bring back its spreadable texture. Avoid high heat to maintain the vibrant flavors and prevent burning or thickening too much.
FAQs
Can I use frozen cherries for this recipe?
Absolutely! Frozen cherries work just as well as fresh ones and are a great option when cherries are out of season. Just remember they may take a little longer to reach the right stage in Step 2 due to released moisture.
Do I need to add pectin to the jam?
Nope! This Small Batch Cherry Jam Recipe relies on natural fruit pectin and the cooking process to thicken. The lemon juice also helps set the jam perfectly without extra additives.
How long will this jam keep in the fridge?
Stored in a sealed jar, the jam should stay fresh and delicious for up to three weeks. Always use a clean spoon to avoid contamination for the longest shelf life.
Can I make this recipe with other fruits?
Definitely! The method works well with berries like raspberries or strawberries, and stone fruits like peaches or plums—with slight adjustments for cooking time depending on fruit water content.
What is the best way to test if the jam is done?
The cold plate test is simple and reliable: drop a small spoonful of jam on a chilled plate; if it sets and doesn’t run after a minute, your jam is ready. If it’s still liquidy, cook a little longer and test again.
Final Thoughts
Making this Small Batch Cherry Jam Recipe is such a rewarding way to enjoy the fresh taste of cherries any time of year. The straightforward steps and simple ingredients let the fruit shine, and the small quantity means it’s perfect whether you’re new to jam-making or just want a sweet homemade treat without extra leftovers. Go ahead—give this recipe a try and watch your pantry transform into a little jar of cherry magic that brightens everything it touches!
Print
Small Batch Cherry Jam Recipe
- Prep Time: 10 minutes
- Cook Time: 25 minutes
- Total Time: 35 minutes
- Yield: About 1 3/4 cups (14.14 oz)
- Category: Condiments
- Method: Stovetop
- Cuisine: American
Description
This Small Batch Cherry Jam recipe is a quick and easy way to create a fresh, sweet cherry preserve using only three simple ingredients. Perfect for small households or those wanting to avoid waste, this jam cooks on the stovetop and is finished with a gentle blend to achieve a smooth texture with some fruit chunks. The jam thickens as it cools and delivers a vibrant cherry flavor ideal for spreading on toast, topping desserts, or mixing into yogurt.
Ingredients
Jam Ingredients
- 2½ cups (400 g) halved and pitted sweet cherries, fresh or frozen
- 1 cup (200 g) granulated sugar
- 2 Tablespoons (30 ml) lemon juice, from about one lemon
Instructions
- Combine Ingredients: In a medium pot, add the prepared cherries, sugar, and lemon juice to prepare the base for your jam.
- Dissolve Sugar: Place the pot over medium heat and stir occasionally until the sugar completely dissolves and the syrup turns a dark red color. This takes about 5 minutes for fresh cherries and about 10 minutes for frozen cherries.
- Boil to Thicken: Increase the heat to bring the mixture to a rolling boil that cannot be stirred down. Let it boil for 8 to 10 minutes, stirring as needed, until the jam thickens and reaches 220°F (105°C). Test doneness by placing a drop on a cold plate—once it stays in place instead of running, the jam is ready.
- Blend the Jam: Remove the pot from heat. Use an immersion blender in short bursts to break up the cherry pieces, blending just enough so no large chunks remain. Tilt the pot as needed to keep the blender immersed.
- Store the Jam: Pour the hot cherry jam into clean jars, seal tightly, and refrigerate. Let the jam set and thicken overnight before using for best texture and flavor.
Notes
- You can use fresh or frozen sweet cherries; frozen cherries will require slightly longer cooking time.
- Use an instant-read thermometer to ensure the jam reaches the ideal temperature of 220°F for proper set.
- The jam will thicken more as it cools, so avoid overcooking.
- Store refrigerated and use within 2-3 weeks, or freeze for longer storage.
- For a chunkier jam, blend for less time or mash with a spoon instead.
