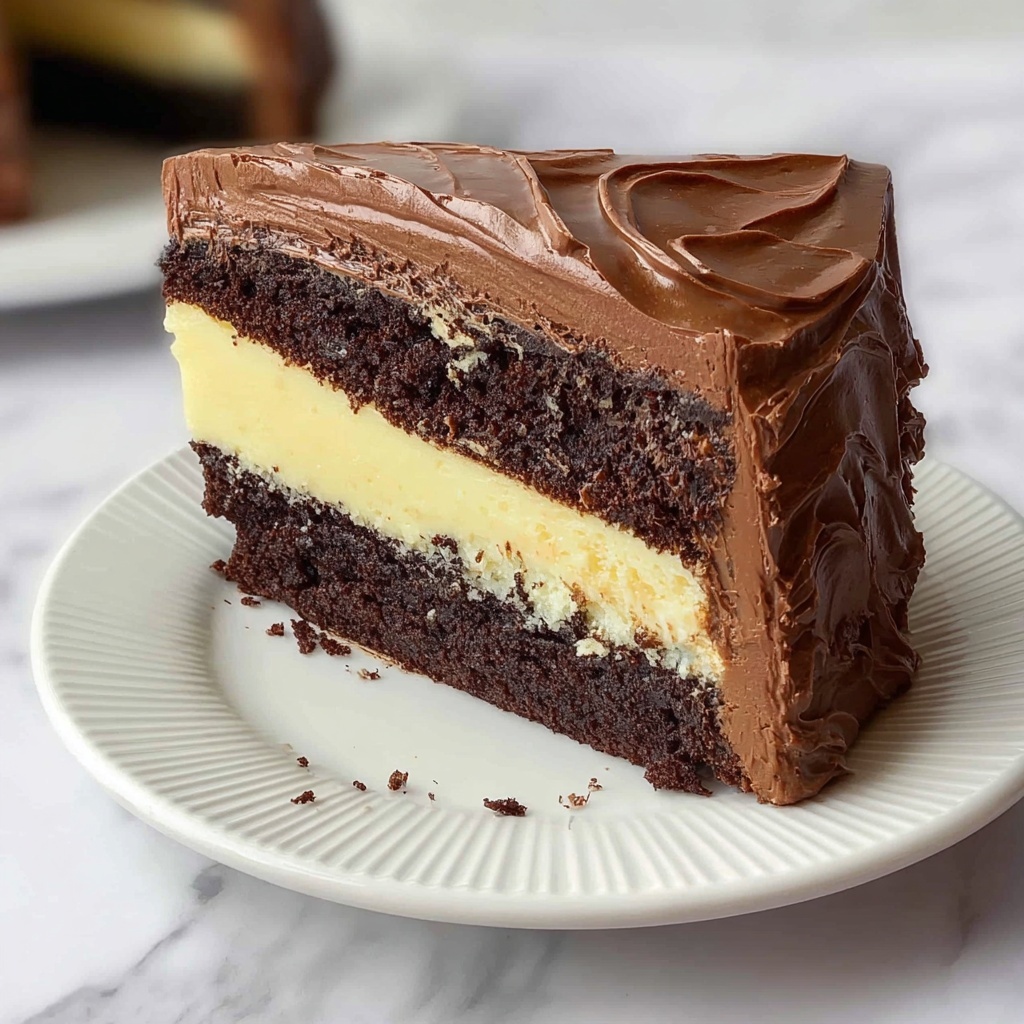
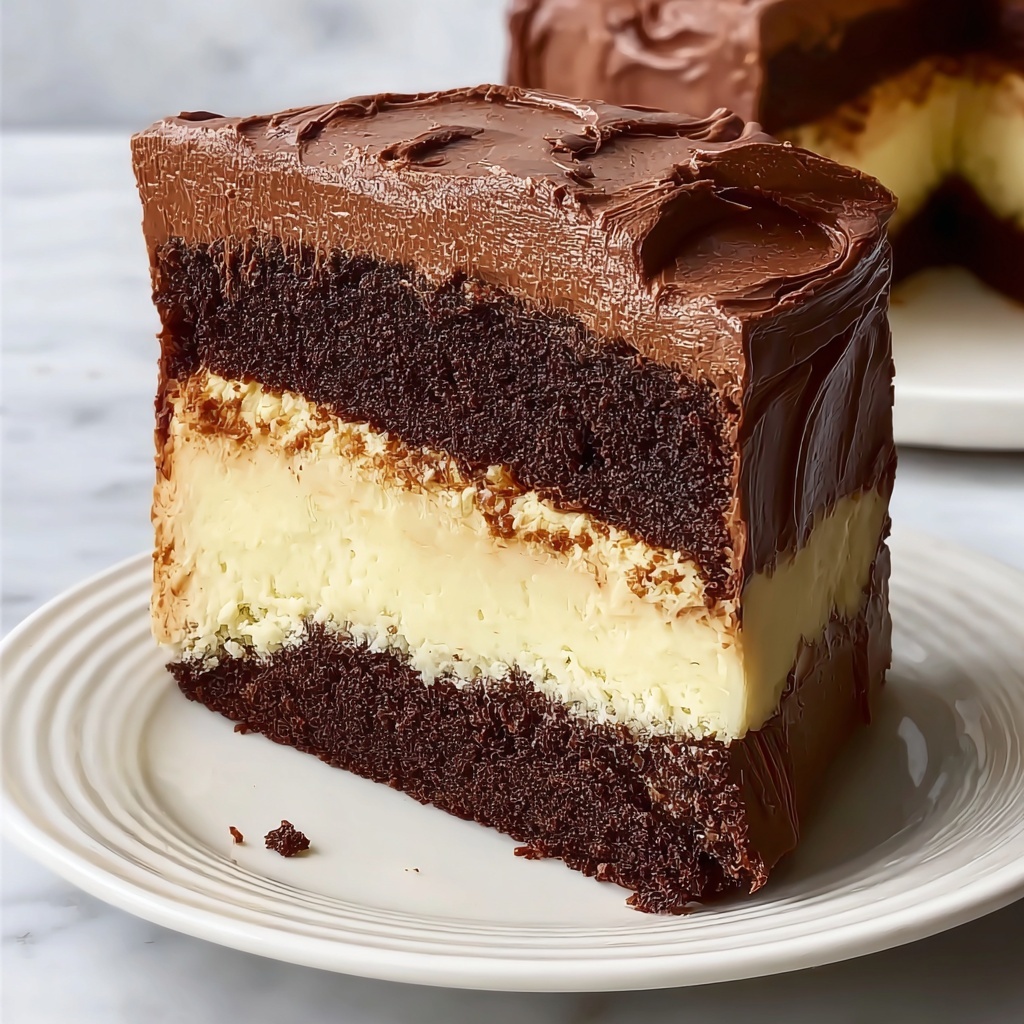
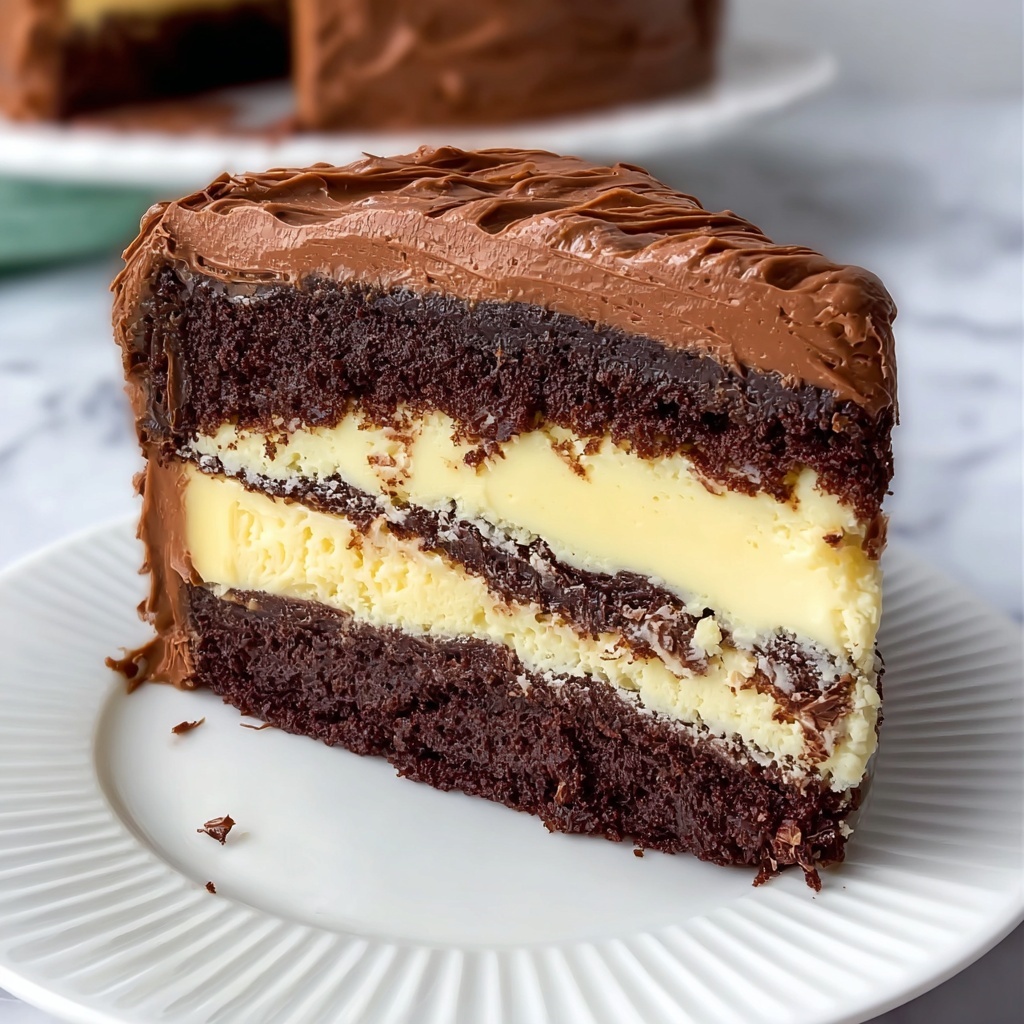
There is simply nothing quite like indulging in The Most Amazing Classic Chocolate Cake Recipe when you want a perfect balance of rich cocoa flavor and moist, tender crumb. This cake has that dreamy softness paired with a luscious cream filling and an indulgent chocolate frosting that will have you smiling from the very first bite. Whether you’re celebrating a special occasion or simply craving a timeless dessert, this recipe brings warmth, comfort, and a whole lot of deliciousness to your table.
Ingredients You’ll Need
Don’t let the ingredient list scare you—each element is straightforward but essential, creating the perfect blend of texture, flavor, and richness that makes this cake extraordinary.
- All-purpose flour: Provides the structure that holds your cake together with a tender crumb.
- Baking powder and baking soda: They give the cake its delightful rise and lightness.
- Salt: Balances the sweetness and brings out the chocolate’s depth.
- Unsweetened cocoa powder: The star ingredient that packs that unforgettable chocolate punch.
- Granulated sugar: Sweetens just enough without overpowering the chocolate.
- Eggs: Add richness and help bind everything perfectly.
- Whole milk: Keeps the cake moist and tender.
- Vegetable oil: Makes the crumb incredibly soft and moist.
- Vanilla extract: Enhances every bite with its warm, floral notes.
- Boiling water: Activates the cocoa for that deep chocolate flavor and thins the batter for a perfect texture.
- Heavy whipping cream: For the fluffy, smooth cream filling that complements the cake layers beautifully.
- Powdered sugar: Sweetens and balances the filling and frosting with a silky texture.
- Unsalted butter: Essential in the frosting for richness and creaminess.
- Milk: Adjusts the frosting’s consistency to make it easy to spread.
How to Make The Most Amazing Classic Chocolate Cake Recipe
Step 1: Prepare Your Cake Pans and Oven
Start by preheating your oven to 350°F (175°C). Grease and flour two 9-inch round cake pans. Properly prepping your pans makes sure nothing sticks, so your cake layers come out perfect and ready to stack without any tears.
Step 2: Combine Dry Ingredients
In a large bowl, sift together the flour, baking powder, baking soda, salt, cocoa powder, and sugar. Sifting here is key because it aerates the mixture and ensures no lumps sneak into the batter, keeping your cake light and evenly textured.
Step 3: Add Wet Ingredients and Mix
Next, add the eggs, whole milk, vegetable oil, and vanilla extract to the dry mix. Beat everything on medium speed until you have a smooth, velvety batter. The creamy texture at this stage is the foundation of The Most Amazing Classic Chocolate Cake Recipe’s moist crumb.
Step 4: Incorporate Boiling Water
Slowly pour the boiling water into your batter. This might feel strange as the batter thins out significantly, but that’s exactly what you want! The hot water helps fully bloom the cocoa powder’s flavor, giving the cake its signature rich taste.
Step 5: Bake Your Cake Layers
Divide the thin batter evenly between the two prepared pans. Bake for 30 to 35 minutes, or until a toothpick inserted into the center comes out clean. Patience here pays off; a fully cooked cake stays moist yet firm enough to hold the cream filling and frosting beautifully.
Step 6: Cool Completely
Let your cakes cool in the pans for 10 minutes before carefully transferring them to a wire rack to cool all the way down. Completely cool layers ensure your cream filling and frosting don’t melt or slide off, preserving that gorgeous layered look and texture.
Step 7: Whip the Cream Filling
In a chilled bowl, whip heavy cream, powdered sugar, and vanilla extract until stiff peaks form. This fluffy cream filling provides a light, airy contrast to the rich cake and chocolate frosting, making every bite perfectly balanced and exciting.
Step 8: Make the Chocolate Frosting
Beat softened unsalted butter with cocoa powder, powdered sugar, vanilla, and two tablespoons of milk. Add more milk if needed until you get a creamy, spreadable consistency. This smooth frosting is the final touch that wraps the cake in indulgent chocolate luxury.
Step 9: Assemble Your Cake
Place one cake layer on your serving plate and spread the luscious cream filling evenly on top. Carefully set the second layer over the cream and gently press down to secure. Then coat the entire cake with the chocolate frosting, using as much as you like for that irresistible, glossy finish.
Step 10: Decorate and Enjoy
If you want, add some chocolate shavings, sprinkles, or fresh berries as a whimsical garnish. Now, step back and admire your creation—the ultimate reward for anyone craving a show-stopping chocolate dessert.
How to Serve The Most Amazing Classic Chocolate Cake Recipe
Garnishes
A dusting of cocoa powder, a scattering of chocolate curls, or even a few fresh raspberries can elevate your cake’s look and flavor. These simple touches add elegance and a hint of fruity brightness, balancing the cake’s richness beautifully.
Side Dishes
Pair your cake with a scoop of vanilla ice cream, a dollop of whipped cream, or a side of fresh berries. These accompaniments add extra texture and freshness, making each forkful an even more delightful experience.
Creative Ways to Present
Try serving this cake in individual slices with a drizzle of warm chocolate or caramel sauce right before serving. Or present it as a layered mini cake for parties—everyone will be impressed by the personal touch and decadence.
Make Ahead and Storage
Storing Leftovers
Wrap leftovers tightly in plastic wrap or store them in an airtight container in the fridge. This keeps the cake moist and the frosting creamy for up to 3 days, so you can enjoy every last crumb without losing any of the magic.
Freezing
You can freeze the cake, either assembled or in layers. If freezing assembled, wrap well and freeze for up to one month. For layers, wrap each individually. Thaw in the fridge overnight and then frost or serve as desired.
Reheating
If you want the cake slightly warm, let it sit at room temperature or warm it gently in the microwave for 10-15 seconds—just enough to soften the frosting without melting it completely, keeping the best of the cake’s texture and flavor.
FAQs
Can I use a different type of flour?
While all-purpose flour is best for this recipe, you can experiment with cake flour for an even lighter texture, but the results may vary slightly.
What if I don’t have cocoa powder?
Cocoa powder is essential for that deep chocolate flavor. You can’t really substitute it directly, but you might try melted bittersweet chocolate in the recipe, adjusting other liquids accordingly.
How do I know when the cake is done?
Insert a toothpick into the center. If it comes out clean or with just a few moist crumbs (not wet batter), your cake is perfectly baked.
Can I make this cake gluten-free?
Yes! Use a gluten-free all-purpose blend that includes xanthan gum and bake as directed. Texture may differ slightly, but the flavor will remain heavenly.
Is the cream filling necessary?
The cream filling adds a delightful lightness that balances the rich cake and frosting, but you can skip it if you prefer a denser chocolate experience.
Final Thoughts
Trust me, once you try The Most Amazing Classic Chocolate Cake Recipe, it will become your go-to for every celebration or cozy night in. This cake combines simplicity with indulgence in such a heartfelt way that sharing it feels like sharing pure joy. So gather your ingredients, roll up your sleeves, and get ready to create a chocolate masterpiece that will keep everyone coming back for more.
Print
The Most Amazing Classic Chocolate Cake Recipe
- Prep Time: 20 minutes
- Cook Time: 35 minutes
- Total Time: 1 hour 30 minutes
- Yield: 12 servings
- Category: Dessert
- Method: Baking
- Cuisine: American
Description
This classic chocolate cake recipe features a moist and tender chocolate sponge layered with a smooth whipped cream filling and enveloped in a rich, creamy chocolate frosting. Perfect for celebrations or any chocolate lover’s craving, this recipe balances deep cocoa flavors with a light, fluffy texture for an unforgettable dessert experience.
Ingredients
For the Cake:
- 1 3/4 cups all-purpose flour
- 1 1/2 teaspoons baking powder
- 1/2 teaspoon baking soda
- 1/2 teaspoon salt
- 1/2 cup unsweetened cocoa powder
- 1 cup granulated sugar
- 2 large eggs
- 1 cup whole milk
- 1/2 cup vegetable oil
- 1 teaspoon vanilla extract
- 1 cup boiling water
For the Cream Filling:
- 1/2 cup heavy whipping cream
- 1/4 cup powdered sugar
- 1/2 teaspoon vanilla extract
For the Chocolate Frosting:
- 1 cup unsalted butter, softened
- 1/2 cup unsweetened cocoa powder
- 3–4 cups powdered sugar
- 1/2 teaspoon vanilla extract
- 2–4 tablespoons milk
Instructions
- Prepare Cake Pans: Preheat your oven to 350°F (175°C). Grease and flour two 9-inch round cake pans thoroughly to ensure the cakes do not stick.
- Mix Dry Ingredients: In a large bowl, sift together the all-purpose flour, baking powder, baking soda, salt, unsweetened cocoa powder, and granulated sugar. This step ensures an even distribution of the leavening agents and cocoa for a uniform cake texture.
- Add Wet Ingredients: To the dry mixture, add the eggs, whole milk, vegetable oil, and vanilla extract. Beat on medium speed until the batter is smooth and homogenous.
- Incorporate Boiling Water: Carefully and slowly pour in the boiling water while mixing. The batter will be quite thin, which results in a moist and tender crumb after baking.
- Bake the Cake Layers: Divide the batter evenly between the two prepared pans. Bake in the preheated oven for 30 to 35 minutes, or until a toothpick inserted into the center comes out clean.
- Cool the Cakes: Allow the cakes to cool in their pans for 10 minutes, then invert them onto a wire rack to cool completely. Cooling completely is essential before filling and frosting.
- Prepare Cream Filling: In a separate mixing bowl, whip the heavy cream with powdered sugar and vanilla extract until stiff peaks form. This whipped cream layer adds a light, creamy contrast to the rich cake.
- Make Chocolate Frosting: Beat the softened unsalted butter with unsweetened cocoa powder, powdered sugar, vanilla extract, and two tablespoons of milk. Add more milk as needed until the frosting reaches a spreadable consistency suitable for covering the cake.
- Assemble Cake: Place one cake layer on a serving plate and spread the whipped cream filling evenly over the top.
- Layer and Press: Place the second cake layer on top of the cream-filled base and gently press down to secure.
- Frost the Cake: Use the chocolate frosting to cover the top and sides of the cake completely. Decorate with additional frosting or chocolate shavings if desired for a beautiful finish.
Notes
- Ensure cakes are completely cooled before frosting to prevent melting and sliding of the frosting and filling.
- Use room temperature ingredients for better blending and a smoother batter.
- The boiling water in the batter enhances the cocoa flavor and contributes to a moist texture.
- The whipped cream filling should be used immediately or chilled briefly before assembling to maintain stability.
- Adjust powdered sugar in the frosting to your preferred sweetness and consistency.
- Store the assembled cake in the refrigerator if not serving immediately to keep the cream filling fresh.


